
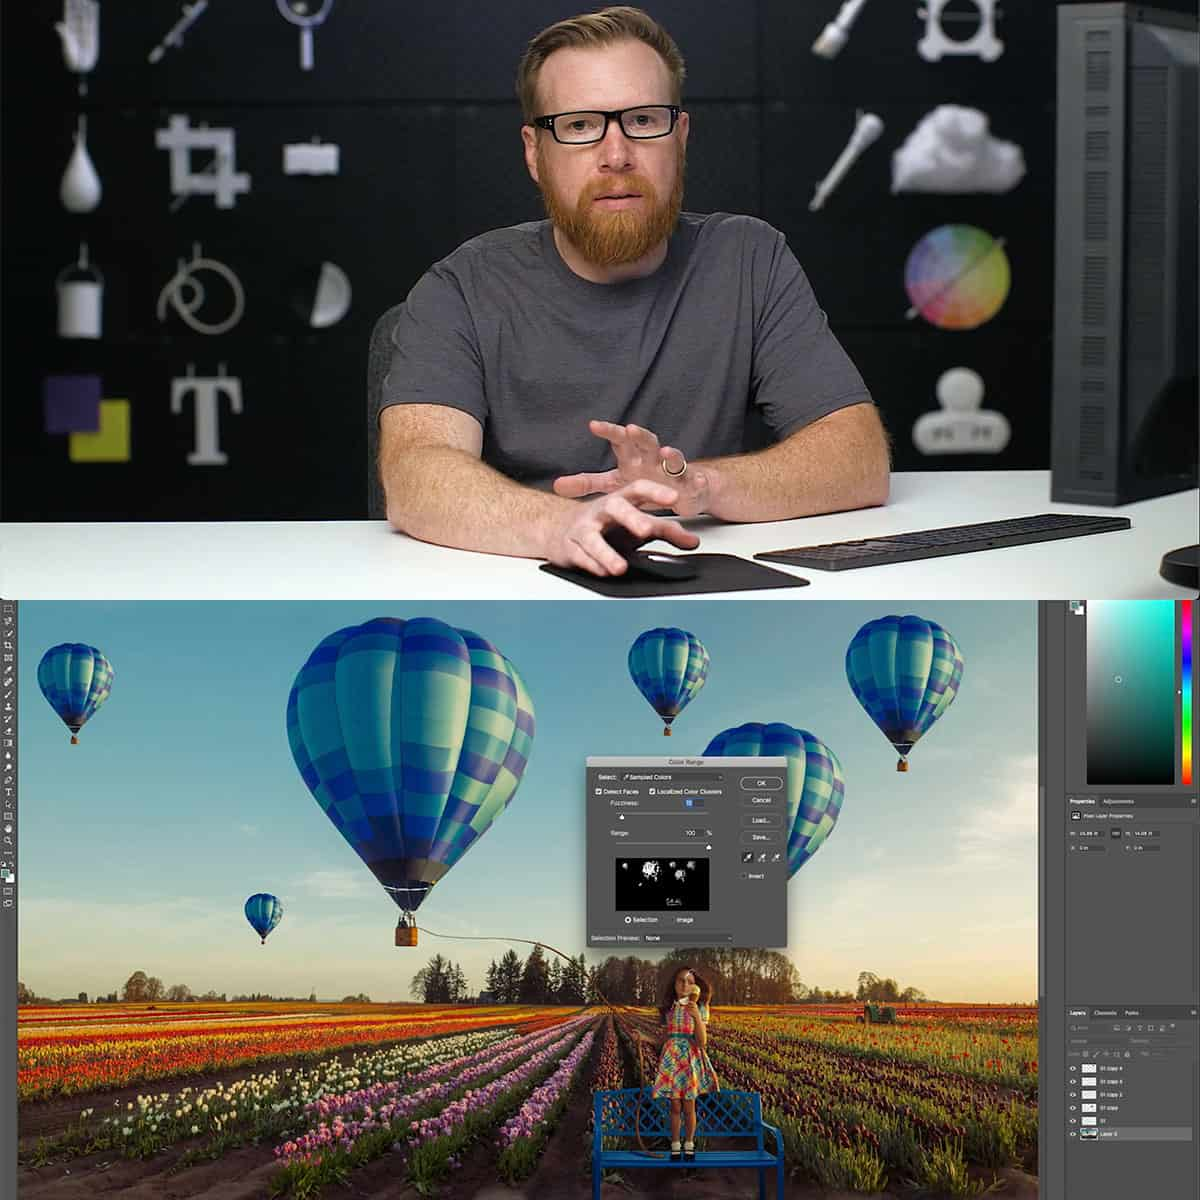
The Magic of Masking: Unleashing Photoshop's Hidden Power for Image Editing Mastery
In the realm of digital image editing, Photoshop reigns supreme with its myriad of tools that turn simple photos into works of art. Among these tools, masking is a powerful feature that allows us to manipulate and enhance our images with precision and creativity. By understanding and utilizing masks, we can selectively edit parts of an image without altering the rest. This technique is crucial for both subtle corrections and bold artistic statements, enabling us to merge layers, blend images, and apply adjustments with control that was once thought impossible.
Layers form the foundation of Photoshop, and masks provide the means to unlock their full potential. Think of masks as the digital equivalent of stencil art; they protect certain areas of an image while allowing changes to be made to other parts. Whether you're a seasoned professional or a passionate hobbyist, mastering masking can elevate your photo editing to new heights. Through layers and masks, compositing images and crafting visual narratives become an art form, allowing us to share our visions exactly as we've imagined them.
Key Takeaways
- Masking in Photoshop empowers selective editing and precision in photo manipulation.
- Mastery of layers and masks is essential for sophisticated image compositing.
- Efficient use of masking tools enhances the photo editing workflow.
Understanding Layers and Masks
In Photoshop, we encounter the fundamental building blocks that give us immense control over our artistic process: layers and layer masks. These tools are vital for compositing, editing, and fine-tuning our images.
Layer Basics
Layers in Photoshop are akin to transparent sheets stacked upon one another, each holding different parts of a composition. You can imagine layers as the individual elements that make up a completed image. We manipulate layers to adjust our images, adding text, shapes, and effects. Each layer retains its properties, allowing for non-destructive editing—a change on one layer doesn't affect the others.
- Visibility: Toggling the eye icon beside a layer will show or hide it.
- Order: We can drag layers to rearrange their order, which affects how they composite.
Opacity on a layer dictates how transparent it is. At 100%, a layer is fully opaque; at 0%, it’s completely transparent.
Color Coding: To stay organized, we can assign colors to layer tabs, allowing us to quickly identify different types of layers.
The Power of Masking
Layer masks are the true workhorses of compositional control. They define the visibility of the layer they are attached to; black conceals and white reveals. By painting on the mask with black, we hide aspects of the layer, while white brings them back into view.
- Flexibility: Masks allow for reversible changes, unlike erasing which is permanent.
- Gradients: Applying gradients to masks can create smooth transitions between visible and hidden areas.
By adjusting the mask's opacity, we manage the degree of transparency applied to the masked areas, providing us with a slider between revelation and concealment.
Tip: Use a soft brush for a gradual mask edge, creating subtle transitions instead of harsh lines.
Utilizing layer masks and understanding their relationship with layers propels our Photoshop skills to levels where our only limit is our imagination.
Selecting and Masking
In our pursuit of image manipulation mastery, we recognize the foundational role of precisely isolating elements. Through meticulous selection and masking, we can non-destructively alter only the desired areas of an image.
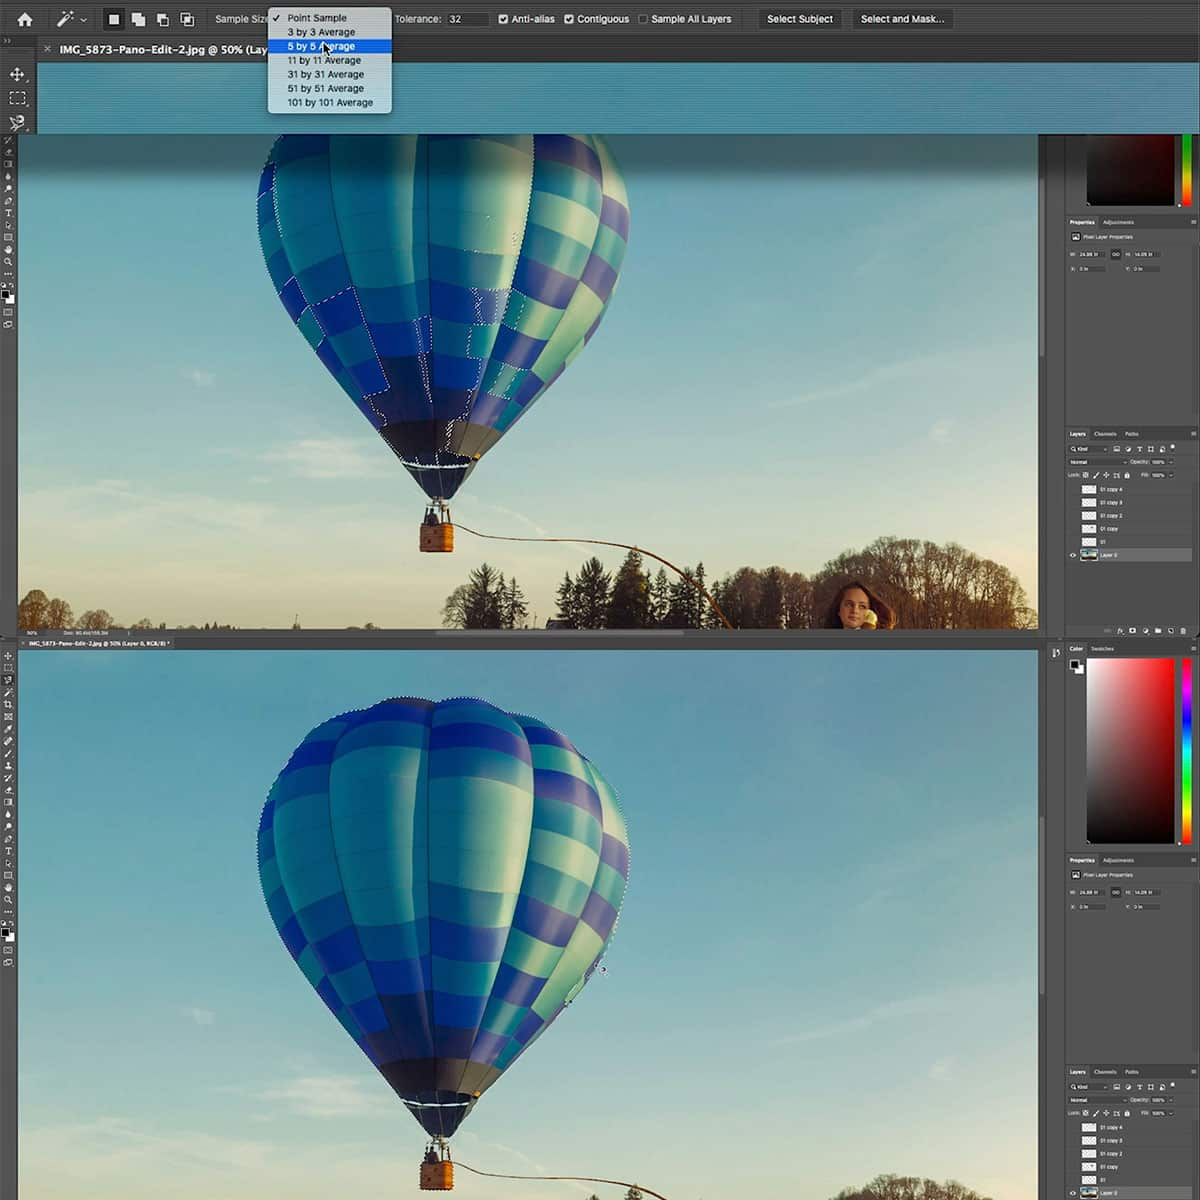
Selection Tools Overview
Our toolkit for tackling selections in Photoshop includes various instruments, each with strengths tailored to different tasks. We begin with the Quick Selection Tool, agile in snapping up areas of similar color and texture with just a few swipes. It's especially effective for broad strokes. Yet, for more intricate scenarios where the Quick Selection Tool falters, we turn to the Lasso Tool, granting us the freedom to manually delineate irregular shapes and contours with freehand precision.
- Quick Selection Tool: Fast and user-friendly; it works well for distinct and well-defined objects.
- Lasso Tool: Allows for manual control; it's best for custom selection shapes.
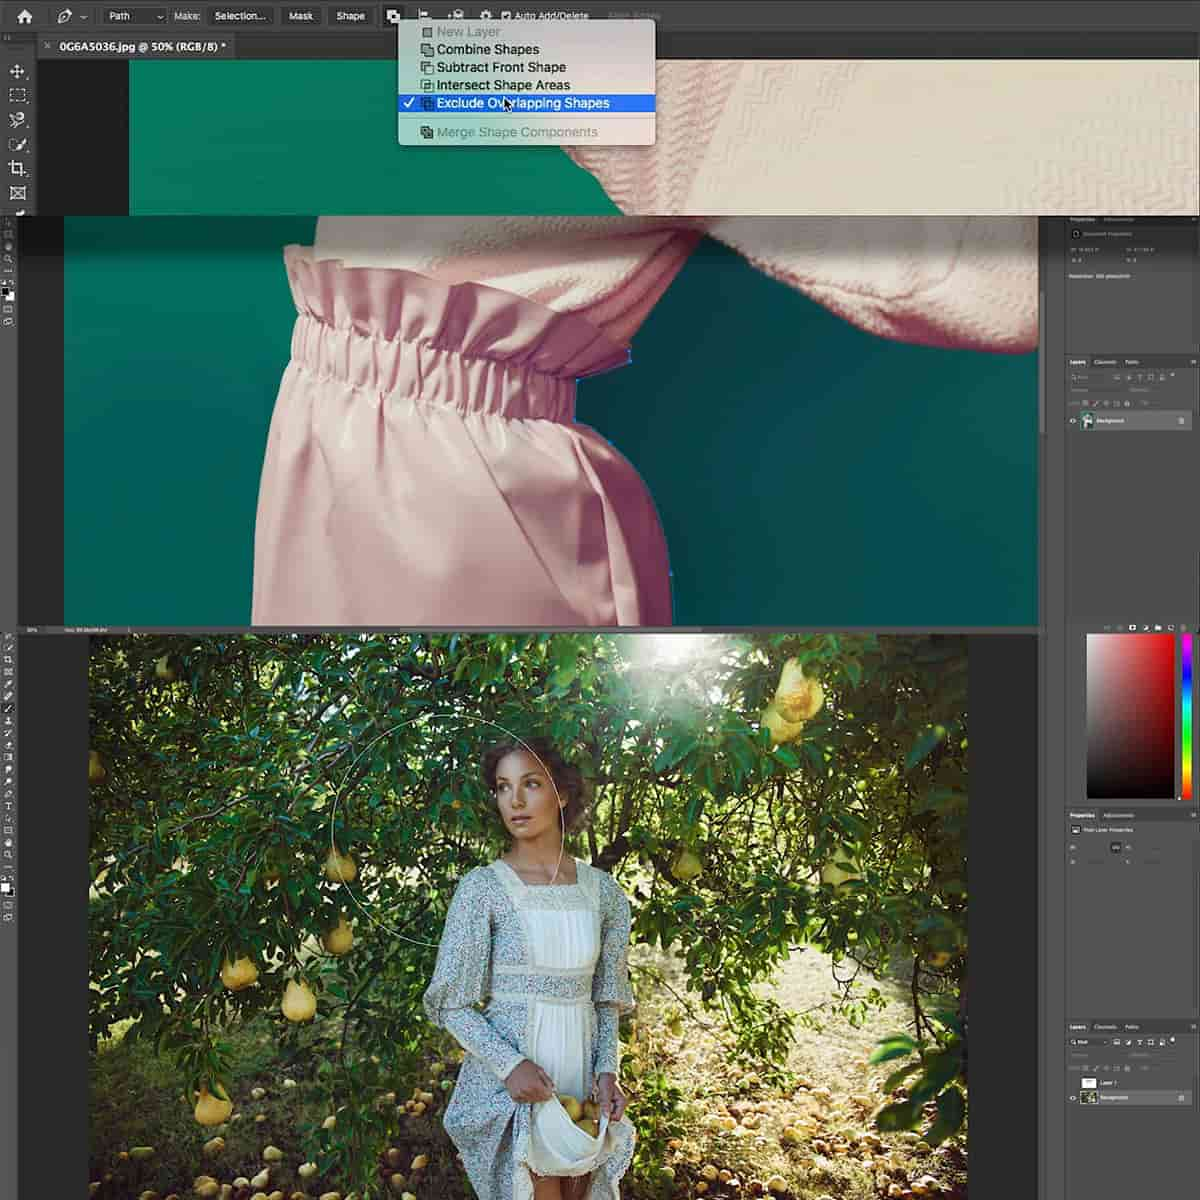
For the ultimate control in path creation and selection, the Pen Tool stands unrivaled. It provides unparalleled precision, useful for complex selections involving curves and sharp angles.
- Pen Tool: Perfect for vector paths and precise anchor placement; it offers maximum accuracy.
Advanced Selection Techniques
Moving beyond the basics, we delve into advanced techniques to uplift our selections. The Color Range function assists us in selecting specific color spectrums within the image, a powerful ally when isolating elements based on color is essential.
- Color Range: Selects areas based on color similarity; ideal for uniform backgrounds or distinct color features.
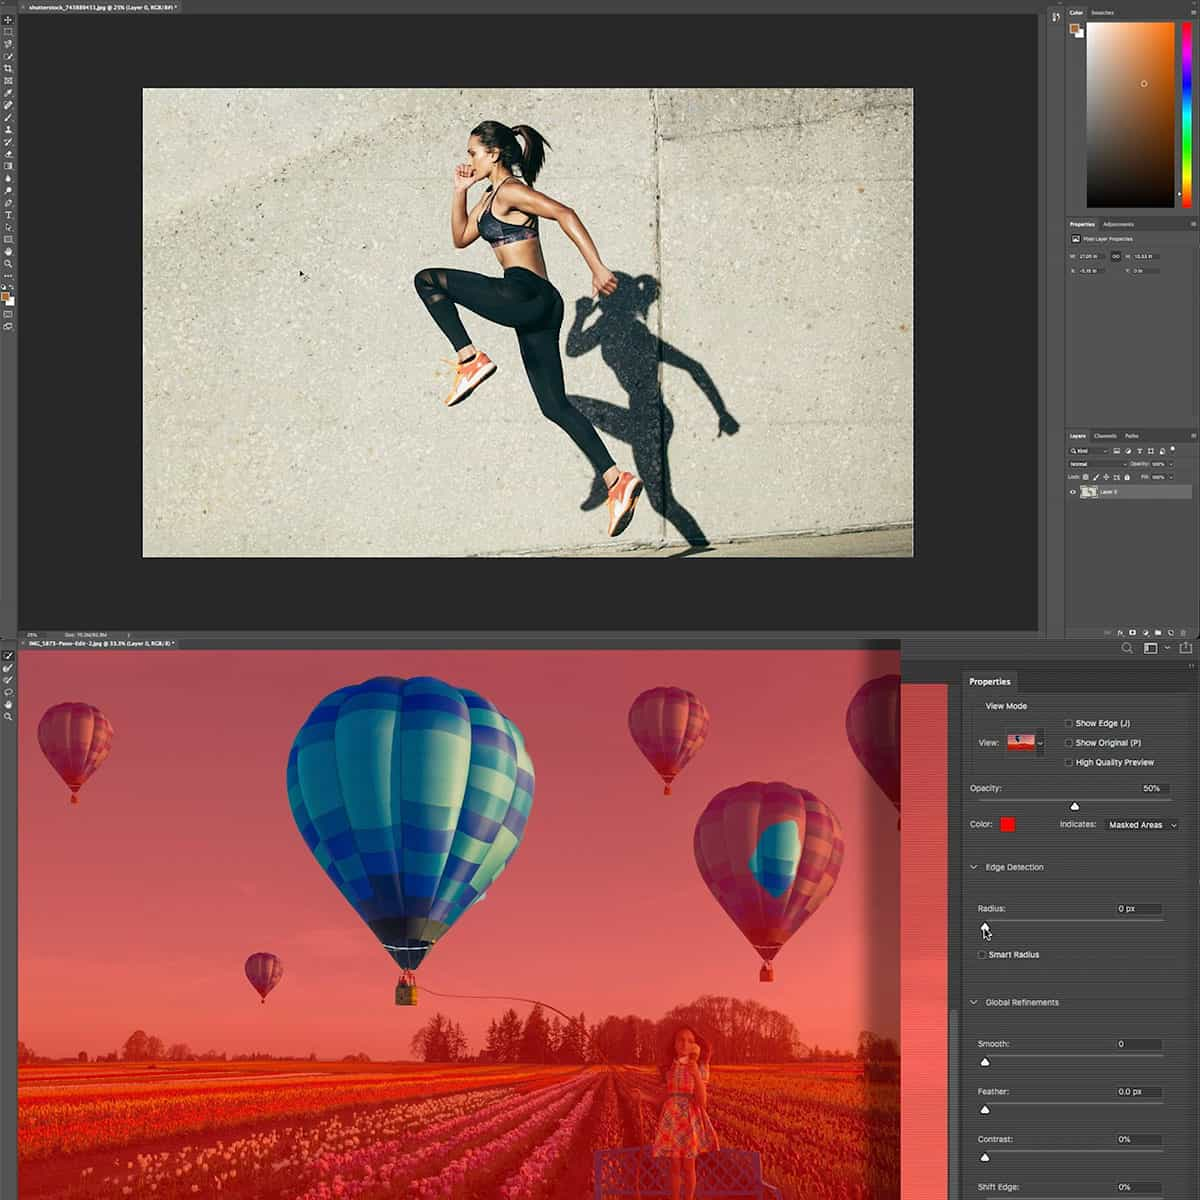
To refine our selections, the Refine Edge tool allows us to smooth edges, feather, and even capture fine details like hair with ease.
- Refine Edge: Adjusts edge detection for a cleaner transition between subject and background; indispensable for tough edges and detailed work.
Combining these tools and techniques, we craft precise and clean selections, laying down a robust foundation for complex masking and compositing. Through efforts in selection and masking, we manipulate reality one pixel at a time, with our creativity as the only true limit.
Working with Layer Masks
In our exploration of Photoshop's capabilities, we recognize that layer masks are essential for non-destructive editing. By harnessing this feature, we gain control over the visibility of different parts of a layer with precision.
Creating and Applying Layer Masks
We initiate our work by adding a layer mask to our chosen layer or group. To reveal elements, simply select the layer and click the Add Layer Mask button in the Layers panel. For more nuanced adjustments, remember that white areas on the mask expose parts of the layer, whereas black conceals them. An important strategy involves using the Brush Tool with black or white to refine the mask, thus impacting layer visibility meticulously.
-
To Add a Layer Mask:
- Select your desired layer.
- Click the Add Layer Mask button at the bottom of the Layers panel.
- Use white to reveal and black to conceal.
-
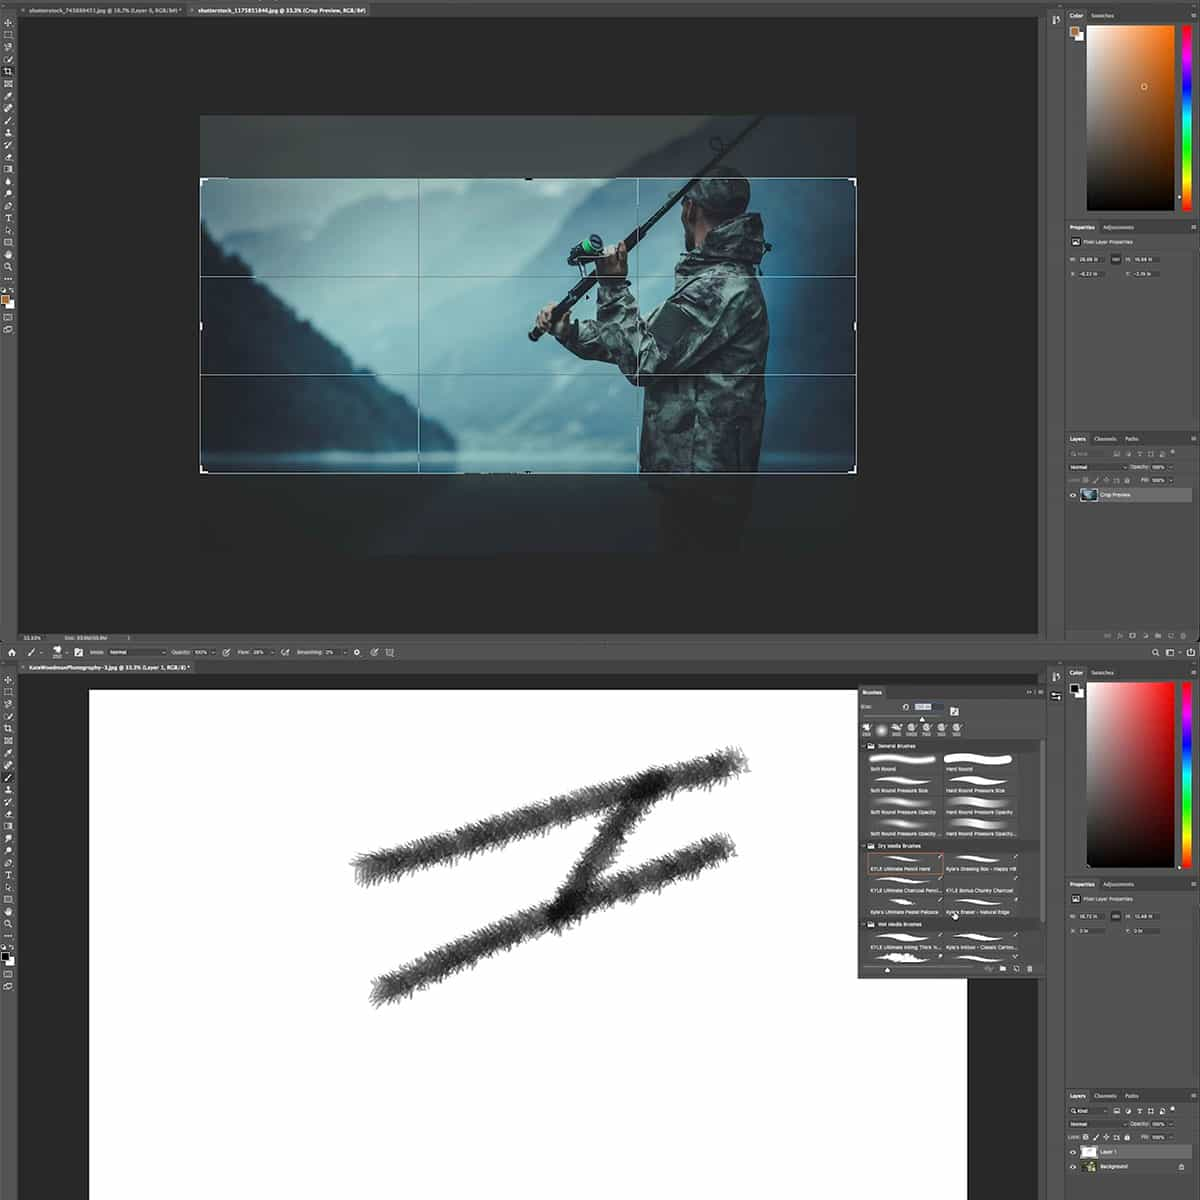
To Paint on a Mask:
- Select the Brush Tool from the toolbar.
- Set your foreground color to black or white depending on your need.
- Paint over the layer to hide or reveal content.
Adjusting Layer Masks
Adjusting layer masks is where finesse comes into play. We use grayscale values to control the transparency of different areas—gray will partially hide or reveal details depending on its shade. To enhance adjustment, we often switch to a black brush for concealment or a white brush for exposure. This dynamic allows for seamless blending and transitioning between hidden and visible elements within our image.
-
To Adjust Transparency:
- Choose a shade of gray as your foreground color.
- Paint over the mask to fine-tune visibility.
Through careful application and adjustment of layer masks, we enable our artwork to reach its full potential without permanent alterations to the original layers. Remember to zoom in for precise edits and save your work regularly.
Compositing with Masks
In Photoshop, the true power lies in our ability to seamlessly combine images with precision and control. Masks are our tools of choice for crafting composites that are limited only by our imagination.
Combining Images Using Masks
Using layer masks allows us to blend multiple images together without permanently altering the original layers. By painting on the mask with black or white, we hide or reveal parts of the layer beneath. This non-destructive approach gives us the flexibility to experiment and refine our composition without any loss of detail or quality.
- Black on a mask: Conceals the layer.
- White on a mask: Reveals the layer.
- Gray on a mask: Partially hides the layer depending on the gray shade.
When we combine images using masks, we can also adjust the opacity for subtle blending, ensuring a natural integration of disparate elements into a cohesive whole.
Mastering Composite Techniques
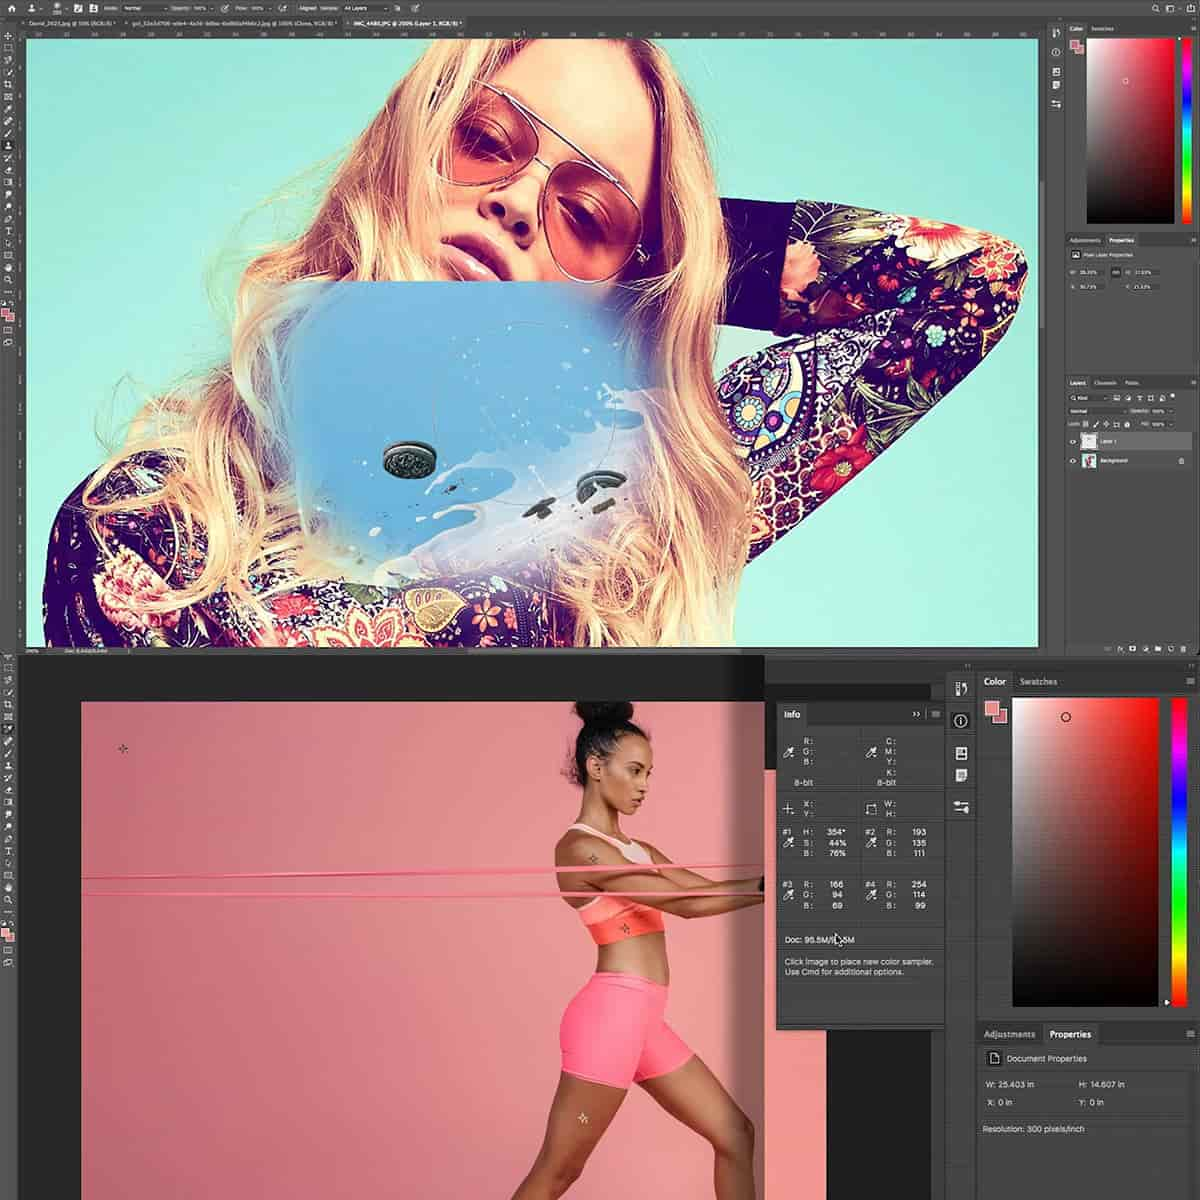
Our mastery of composite techniques hinges on understanding how different tools and features interact. Blending modes, for instance, are essential for merging layers in ways that go beyond simple transparency. They determine how the pixels of one layer blend with another, significantly affecting the mood and tonality of our composite images.
- Normal Mode: Keeps the top layer opaque, covering the layer beneath.
- Multiply Mode: Darkens the bottom layer based on the top layer's colors.
- Screen Mode: Lightens the bottom layer, the opposite of Multiply.
Layer masks, when combined with blending modes, can yield a rich tapestry of visuals that would be impossible by other means. As we refine our masking capabilities, we unlock the full potential of compositing in Photoshop, transforming our work into sophisticated visuals that tell compelling stories.
Utilizing Clipping Masks
Before we explore the depths of clipping masks, it's essential to understand their role in enhancing layer management and editing workflows in Photoshop, offering us tremendous flexibility in compositing images.
Basics of Clipping Masks
The concept of clipping masks revolves around the use of one layer to define the visibility of another. Here are the steps to create a clipping mask in Photoshop:
- Place Your Layers: Ensure your base layer (the one defining the mask) is directly below the layer you want to mask.
- Create the Mask: Move the layer you want to mask directly above the base layer, right-click on it and choose "Create Clipping Mask".
When a clipping mask is in place, the non-transparent areas of the base layer reveal the layers above, while the rest remains hidden. This method gives us precision in our editing process, maintaining the original integrity of the images we work with.
By learning how to create and manipulate clipping masks, as outlined in a complete guide to using clipping masks in Photoshop, we gain a non-destructive editing technique that can be adjusted or removed at any time.
Creative Uses for Clipping Masks
Clipping masks extend beyond basic layer visibility—they inspire creativity in our projects.
- Texturing Text: By clipping an image to text, we can fill the letters with any texture or pattern, maintaining editable text.
- Combining Images: Create a collage by clipping various images into shapes or frames for a clean, cohesive design.
The adaptability of clipping masks empowers us to combine, blend, and juxtapose different visual elements in a single composition. For a deeper understanding, the tutorial on revealing layers with clipping masks in Photoshop illustrates the potential of layer interaction and visual storytelling.
Efficient Masking Tools and Techniques
In our pursuit of mastery over Photoshop's capabilities, understanding and utilizing efficient masking tools and techniques is crucial. We exploit these features to manipulate and fine-tune images with precision, blending and compositing with ease.
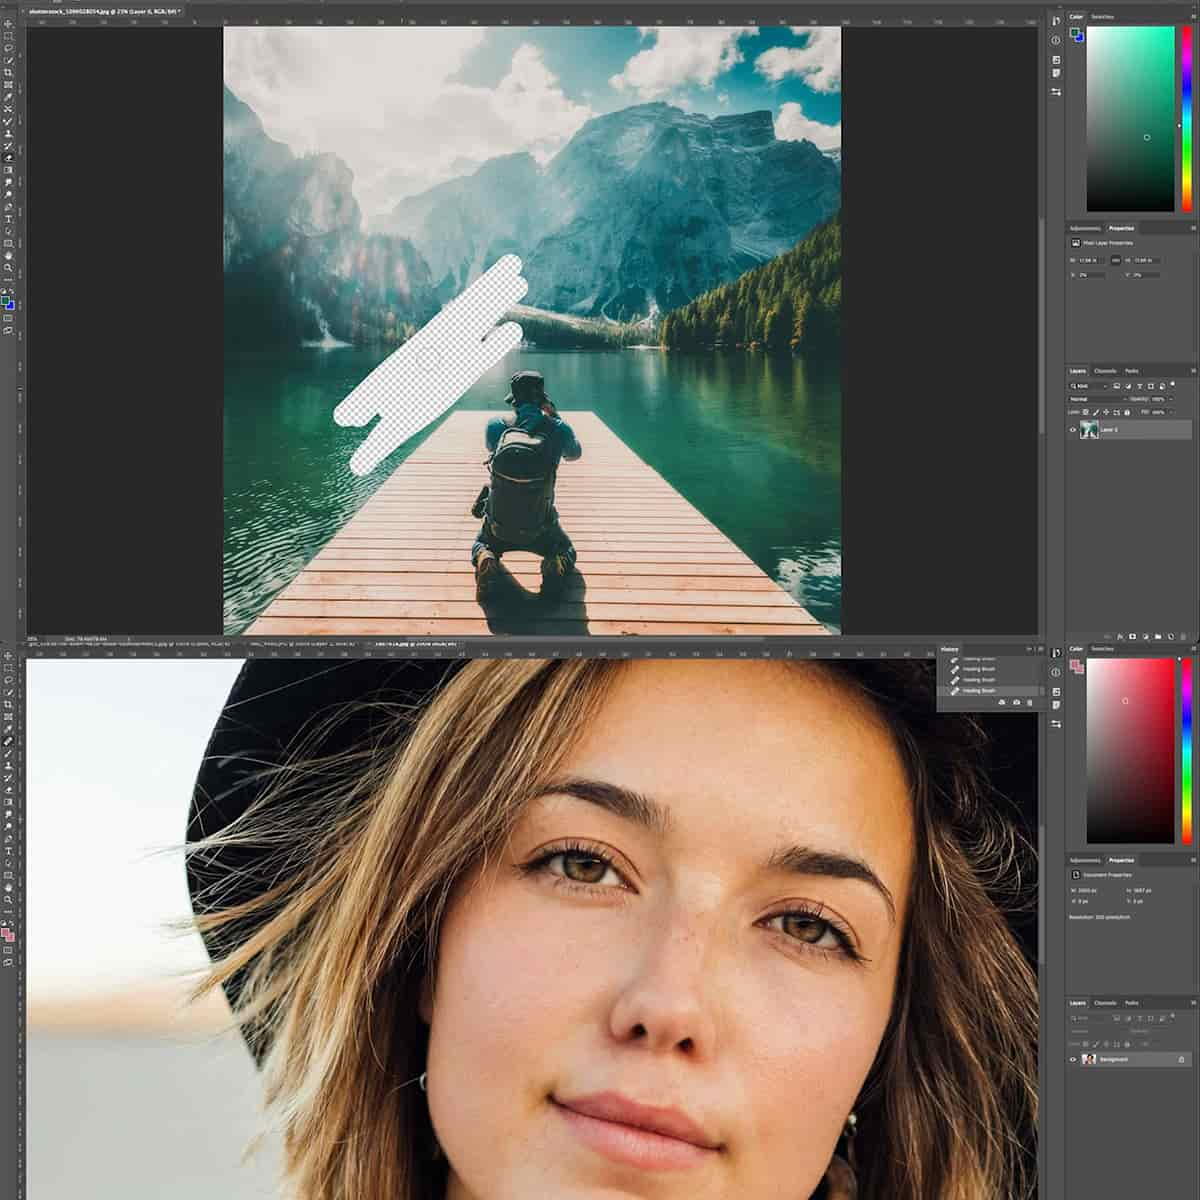
Quick Mask Mode
Photoshop's Quick Mask Mode is an intuitive way to create and edit selections. By simply pressing Q on your keyboard, you can toggle this feature on and off. We paint over the desired area with a brush tool to add to the selection, and the painted area appears as a colored overlay. This is particularly helpful for visualizing and modifying selections on the fly.
Using Channels for Masking
Our ability to use Channels for masking unlocks a higher tier of editing control in Photoshop CC. Channels represent the different color components of an image, and we can use them to create intricate masks based on color and luminance values. This technique allows for more nuanced selections, especially useful when dealing with complex subjects like hair or fur. To utilize channels, we:
- Open the Channels panel.
- Identify the channel with the greatest contrast to our subject.
- Duplicate that channel.
- Use levels or curves to increase the contrast further.
- Command-click (Mac) or Ctrl-click (Windows) on the channel thumbnail to load it as a selection.
Leveraging Paths for Precision
For those instances where we seek the utmost accuracy, Paths offer us precision masking capabilities. By employing the Pen tool, we create paths that can be converted into very precise vector masks or selections. This method is indispensable for creating clean, sharp edges around objects. Leveraging Paths is best suited for graphic shapes or products with solid edges, allowing us to achieve a level of detail that is challenging to replicate with other selection tools.
The Role of Masking in Photo Editing
Masking in photo editing is an indispensable tool for us as professional photographers; it offers the ability to hide layers or reveal them selectively, which is essential in achieving the level of detail and precision that high-end editing work demands.
Masking in Professional Workflows
In our professional workflows, masking is more than just an option—it's a necessity. When we edit images, layers are akin to the various brush strokes in a painting, each one applying a specific change or effect to the composition. In more complex edits, where the focus must be precise, and the elements require fine-tuning, the use of masks allows us to isolate adjustments to specific parts of an image without affecting the rest. This level of control is paramount when working with clients who demand perfection.
Integration with Lightroom and Other Tools
As we expand our editing toolkit, the integration of masking with tools like Adobe Lightroom becomes evident. Lightroom provides a streamlined workflow for basic adjustments and when paired with Photoshop, enables a seamless transition from broad edits to refined alterations. This synergy allows us to apply Lightroom's broad adjustments, and then dive into detailed editing in Photoshop where masking unravels its full potential, particularly when dealing with composite images or making selective color adjustments.
Advanced Masking Techniques and Tips
In exploring Photoshop's advanced masking, we uncover its potential to elevate our workflow. When applied with precision, various tools and techniques can significantly enhance the editing process.
Creative Masking Tips and Tricks
1. Utilize Smart Objects: By converting layers to Smart Objects, our masking operations become non-destructive. This allows us to apply, modify, and even remove a mask without altering the original layer within the Smart Object.
- Refine Edge Masking: For intricate selections like hair or fur, we use Refine Edge for a sophisticated, clean mask edge. Learn from a Refine Edge masking guide and see this tool's effectiveness.
2. Explore Blending Modes: Investigate blending modes alongside masking for dynamic effects. For instance, using the 'Multiply' mode can naturally integrate subjects within new backgrounds.
- Painting on Masks: Equip the Brush Tool (B) and selectively mask using black or white to hide or reveal layers. Adjust opacity and hardness for a subtle blend. A closer look at this technique can be found in tutorials like Photoshop Masking: Perfect Techniques to Hide Layers.
3. Keyboard Shortcuts: Familiarize ourselves with keyboard shortcuts to speed up the masking process. For instance, pressing 'X' quickly toggles the mask's paint color between black and white.
Adjustment Layers and Masking
1. Control Tonal Adjustments: With adjustment layers, we precisely dictate an image’s tonal range.
- Levels Adjustment: Applying a Levels adjustment layer impacts an image's luminosity. The included mask permits pinpointed adjustments rather than global changes. It’s a tool vital for correcting exposure selectively.
2. Coupling with Masking Capabilities: Our masking prowess is further amplified by the adjustment layer's built-in mask, establishing a refined level of control.
- Gradient Masks: Combining gradient masks with adjustment layers permits smooth transitions in adjustments, essential in creating believable lighting and depth.
Frequently Asked Questions
In this section, we're going to address some of the most common questions about masking in Photoshop to help you better understand its powerful capabilities.
How does using masks enhance image manipulation in Photoshop?
By using masks, we can manipulate images in a flexible and non-destructive manner. It allows us to hide and reveal parts of a layer without altering the original image, accommodating a high degree of creativity and adjustment at any point in the editing process.
Can you explain the role of layer masks in compositing multiple images?
Layer masks play a pivotal role in compositing multiple images by letting us blend layers together seamlessly. We can control the transparency of different areas across layers, which results in a cohesive and realistic composite.
What are the differences between layer masks and clipping masks?
The key difference between layer masks and clipping masks in Photoshop is that layer masks allow us to hide specific parts of a single layer, whereas clipping masks use one layer to determine the visibility or shape of another.
How can one utilize mask properties to blend objects seamlessly?
Utilizing mask properties, such as feathering and opacity, enables us to blend objects smoothly into a scene. Gradually adjusting these properties allows us to create transitions that look natural and are visually appealing.
In what ways can masking improve non-destructive editing workflows?
Masking elevates non-destructive editing workflows by ensuring that the original pixel data is intact. We avoid permanent changes, giving us the flexibility to revise our edits at any time without starting over from scratch.
What techniques are available to refine edges in a Photoshop mask?
To refine edges in a Photoshop mask, we often use the "Refine Edge" tool which smoothens and feathers the edges. This works wonders for complex selections like hair or fur, resulting in a more polished look.


