Enhancing Wildlife Photography in Photoshop: Techniques for Vivid Images
Capturing wildlife through the lens is an exhilarating experience, but sometimes the raw photographs need a touch of post-processing to truly bring them to life. With wildlife photography, it's not just the subject that's important, but also how it's presented. Photoshop offers an array of tools that allow us to enhance the natural beauty of our wildlife captures without altering the essence of the moment. Correcting white balance, adjusting exposure, and fine-tuning contrast can transform a good photo into a great one. By doing so, we ensure the scene's integrity while elevating its visual impact.
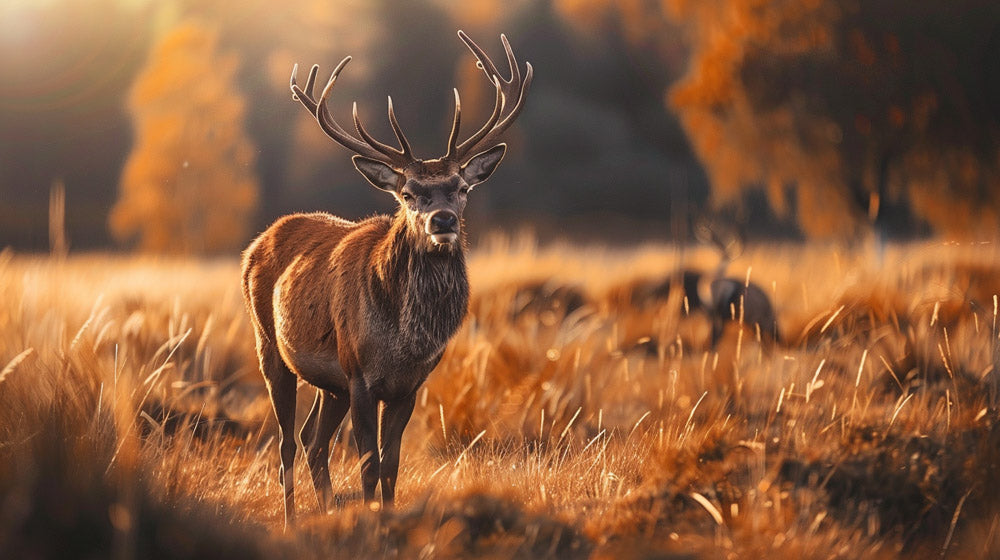
At the heart of our editing process is a desire to reflect the true colors and moods of nature. Photoshop enables us to draw attention to the subject, guiding the viewer’s eye and making each photograph as compelling as the wildlife featured within it. We can use techniques to sharpen details, such as enhancing the eyes of an animal to create a sense of connection, or subtly blur the background to reduce distractions and emphasize the main focus. With a brush of creativity, we can refine our images to express the vibrant tapestry of the wild.
Key Takeaways
- Photoshop enhances wildlife photos by correcting elements like white balance and exposure.
- Detail sharpening and background blurring focus attention on the wildlife subject.
- Photoshop's editing tools offer creative ways to improve the overall visual appeal of wildlife images.
Understanding the Basics
https://www.youtube.com/watch?v=OD4aifVV4us&embed=true
Before we dive into the intricacies of Photoshop, we must have a solid grasp of the basics. This will ensure that our workflow is efficient and our use of tools is effective in enhancing our wildlife photography.
Photoshop Overview
Adobe Photoshop offers a vast array of utilities and tools designed to fine-tune every pixel of our photography. As wildlife photographers, we're presented with a digital darkroom where we can control aspects ranging from color balance to sharp detail. Within Photoshop, we must familiarize ourselves with core components such as layers, masks, and adjustment tools. These features are critical in our post-processing workflow, allowing us to make non-destructive edits that can significantly enhance our photos.
- Layers: Use layers to make individual adjustments without altering the original image.
- Masks: Masks help us to isolate and edit specific parts of the photo.
- Adjustment Tools: Brightness, contrast, saturation, and more can be fine-tuned using these tools.
Wildlife Photography Fundamentals
Understanding wildlife photography fundamentals is essential for us as photographers to capture compelling and authentic images. The moments we encounter in the wild are fleeting, and a strong foundation allows us to make the most of these opportunities. Key techniques in wildlife photography include:
- Focus: Keeping the subject sharp is paramount. Utilize Photoshop's sharpening tools to enhance focus without overdoing it.
- Exposure: Sometimes the lighting conditions aren't on our side. Use Photoshop's range of exposure adjustment tools to bring out the details.
- Composition: We can refine the framing of our shots using the crop tool, ensuring the subject is the focal point.
By mastering the basics of both Photoshop and wildlife photography, we set ourselves up for success in producing captivating and vivid portrayals of the natural world.
Preparation and Initial Steps
https://www.youtube.com/watch?v=YxOYHYDPKVo&embed=true
To ensure we get the most out of our wildlife photographs in Photoshop, it's imperative that we start with a solid foundation. This includes properly importing our images and establishing an organized workflow that streamlines the editing process.
Importing Images
When we begin the editing journey, our first step is always to import our images. We typically do this through Adobe Lightroom or directly into Photoshop’s Camera Raw plugin. The goal is to handle raw files whenever possible to maintain the highest quality of data from our shots. Here's our quick checklist for importing:
- Ensure our camera's date, time, and file-naming settings are correct before shooting.
- Connect our camera or insert the memory card into our computer.
- Open our preferred software (Lightroom or Photoshop) and navigate to the import section.
- Select the raw files we want to download and begin the import process.
Organizing Workflow
Once our images are imported, organizing them is crucial for an efficient workflow. We use Photo Mechanic for quick sort and select or Lightroom's Library module to categorize our shots. Here's what we prioritize in our workflow organization:
- Review: Quickly discard any images that are out-of-focus, poorly exposed, or uninteresting.
- Rating: Assign ratings or labels to the best images to identify them for further editing.
- Metadata: Add relevant details such as keywords, subject, location, and copyright information.
- Backup: Always back up the selected images, ideally both online and on an external drive.
By keeping these steps in mind, we set ourselves up for a successful and smooth editing process in Photoshop.
Essential Editing Techniques
https://www.youtube.com/watch?v=LV8s0Dmzblo&embed=true
As we dive into enhancing our wildlife photography, it’s crucial to master several key Photoshop techniques. Properly applied, these edits can transform a good photo into a great one, accentuating the subject and the story it tells.
Cropping and Composition
Cropping is our first tool for improving composition. We strategically remove unwanted elements, bringing attention to the subject, and adhering to the rule of thirds for a balanced image. It's vital to maintain the image's original aspect ratio to keep a natural look. We also consider the background, ensuring it complements but doesn't overshadow our subject.
Basic Adjustments
Under basic adjustments, we tweak the exposure to correct any lighting issues and adjust the contrast to make the subject stand out. We refine saturation to make the image more vivid or subdued, depending on the desired mood. By manipulating the curves, we gain precise control over the tonal range, darkening or lightening specific parts of the photo. Applying a subtle vignette can further focus the viewer's eye.
Working with Layers and Masks
Using layers and masks allows us to make non-destructive edits. We often convert layers to Smart Objects which lets us alter transformations and filters at any time. Sharpness is added selectively using a layer mask, enhancing only the subject and not the background. A separate adjustment layer for color and exposure ensures that we can tweak these elements independently of one another.
Color and Light Enhancement
https://www.youtube.com/watch?v=GL-GmQaZHbs&embed=true
In wildlife photography, the impact of your images can be significantly enhanced by mastering color and light adjustments. We'll explore how to balance whites for accuracy, enrich hues for vibrancy, and apply dodge and burn techniques to sculpt the light effectively.
Adjusting White Balance
White balance is crucial for replicating the true colors of the scene. By adjusting the white balance, we correct the color temperature to ensure that whites appear pure, which subsequently helps all other colors to look more natural. Tools like the eyedropper in Photoshop enable us to pick an area of the image that should be white, effectively neutralizing color casts.
Example:
- Incorrect white balance can make a sunrise look cold and uninviting, but by shifting the temperature slider towards warm tones, we reclaim the golden hues that are characteristic of that time of day.
Enhancing Colors
To make the colors in our wildlife photographs stand out, we adjust the hue, saturation, and luminance sliders in Photoshop. A slight increase in saturation can make a bird's plumage more vivid without oversaturating the image.
Table of Basic Color Enhancements:
| Color Property | Typical Adjustment | Effect |
|---|---|---|
| Hue | Minimal | Keeps the colors true to life |
| Saturation | Moderate Increase | Enhances color intensity |
| Luminance | Adjust as needed | Alters brightness of specific colors |
Remember, the key is subtlety; we aim to enhance, not overwhelm.
Dodge and Burn Techniques
Dodge and burn are techniques we use to selectively lighten (dodge) or darken (burn) areas of the photo. This can add dimension and draw attention to the subject.
- Dodging: Useful for lifting details from shadows without affecting the rest of the image too much.
- Burning: Helps to deepen the blacks or highlights to add contrast and focus.
We often use a soft brush with low exposure for a buildable effect, which allows for more precise control over the light and dark areas. These methods are particularly helpful for emphasizing textures and features in wildlife shots.
Detail and Sharpness Optimization
https://www.youtube.com/watch?v=y8ca2eNR7yI&embed=true
In this section, we'll focus on the crucial elements of enhancing the fine details in our wildlife photos, ensuring they are sharp and clear. Let's take a closer look at how both noise reduction and targeted sharpness can enhance the resolution and detail of our images.
Noise Reduction
When we capture wildlife in low light or high ISO settings, noise is often an unwanted guest in our photographs. To reduce noise without compromising detail, we apply a delicate balance in Photoshop's Noise Reduction tool. Detail sliders allow us to preserve essential features while diminishing graininess. When using this feature, it's important to zoom in to at least 100% to accurately assess and apply noise reduction.
Focus on Sharpness
To elevate the perceived sharpness of our wildlife photographs, we meticulously apply sharpening techniques. Photoshop offers several approaches, such as the Smart Sharpen or Unsharp Mask filters. The crux of sharpening lies in not overdoing it; too much can introduce unwanted artifacts. By selectively sharpening with the Brush Tool, we can direct the viewer's attention to specific areas, like the eyes of an animal. Remember, the goal is to reflect the resolution and crispness that mirrors what we observed in the field.
For the best results, sharpening should be one of the final steps in our workflow, ensuring that important details stand out and the overall image benefits from enhanced clarity.
Advanced Retouching Strategies
https://www.youtube.com/watch?v=MZEt_B-JBAc&embed=true
In elevating wildlife photography to a professional level, advanced retouching strategies play a crucial role. We focus on refining images by removing unwanted distractions and making selective adjustments to enhance the subject and its environment.
Removing Distractions
When we examine our photos, we identify and eliminate distracting elements that detract from the main subject. Using the Spot Healing Brush, we can seamlessly remove minor blemishes or unwanted spots. For larger or more complex distractions, the Clone Tool proves invaluable, allowing us to sample adjacent areas and replicate the desired texture and color over the distraction. It's essential to maintain the natural feel of the scene, ensuring that our edits are subtle yet effective.
Steps to Remove Distractions:
- Zoom in on the distraction.
- Choose the Spot Healing Brush for small blemishes, or the Clone Tool for larger elements.
- Carefully brush over the distraction or clone from a nearby area.
- Review the edit at full resolution to ensure a natural look.
Selective Adjustments
To draw attention to the main subject of our wildlife photographs, we apply selective adjustments. With tools like the Gradient Tool, we can create a smooth transition in areas such as the sky, creating a vignette effect that naturally leads the viewer's eye to the focal point. We also address the image's noise levels, particularly when shooting in low light, utilizing noise reduction techniques to preserve detail without compromising the overall sharpness.
Key Selective Adjustments:
- Brightness and Contrast: Highlight the subject while maintaining balance in the scene.
- Saturation and Vibrance: Enhance colors where needed without oversaturating.
- Noise Reduction: Apply selectively, being careful not to soften key details.
By applying these advanced retouching strategies, we ensure our wildlife images are both impactful and a truthful representation of the moment captured.
Utilizing Presets and Plugins
In wildlife photography, our post-processing workflow can be greatly enhanced by leveraging the power of presets and plugins. These tools can not only save time but also introduce a new level of creativity to our images.
Time-Saving Presets
Presets are pre-configured adjustments made to software settings that allow us to apply the same edits across different images with a single click. By using presets, we effectively create shortcuts that streamline our editing process. For instance, when editing wildlife photos, we can apply a preset that adjusts the contrast, sharpness, and saturation to suit the natural elements in the image. This maintains consistency and can significantly reduce the time we spend adjusting sliders for each photo.
-
Advantages of Presets:
- Consistency: Unified look across all images
- Efficiency: Reduces repetitive adjustments
- Speed: Quick application on multiple photos
Creative Effects with Plugins
On the other hand, plugins serve as extensions to our primary editing software, providing additional features and more specialized editing capabilities. These can range from noise reduction to advanced sharpening tools that are specifically designed for enhancing details in wildlife photographs. With the right plugins, we can transform a good photo into a great one by adding creative effects that would be time-consuming or impossible to achieve with standard tools.
-
Examples of Plugin Usage:
- Detail Enhancement: To emphasize fur or feathers
- Selective Adjustments: To draw attention to the subject
By integrating these time-saving and creative tools into our workflow, we ensure that our focus remains on capturing the beauty of wildlife, while post-processing becomes a faster, more enjoyable task.
Exporting and Sharing Your Work
When we've put significant effort into our wildlife photography, ensuring the best possible presentation of our work is paramount. Whether we're printing our photos for a gallery or sharing them online, it's crucial to optimize image quality and employ smart strategies for online sharing.
Optimizing Image Quality for Output
For printing or displaying images digitally, we begin by considering our resolution. Our images must meet specific requirements for print size without sacrificing quality, typically 300 dpi (dots per inch). Before exporting from Photoshop, we make it a habit to double-check the resolution, ensuring our wildlife shots maintain their detail and clarity upon enlargement.
When preparing images for online sharing, our file size needs to be balanced with visual quality. We aim for files large enough to present our work without pixelation but compressed enough to facilitate quick loading times. Utilizing Photoshop's 'Save for Web' feature allows us to adjust the balance between image quality and file size by selectively reducing dimensions and setting appropriate compression levels.
Online Sharing Strategies
Our approach to sharing wildlife photography online hinges on understanding the platform we are using.
-
Social Media: Sites like Instagram prioritize speed and mobile-friendliness. For these platforms, we keep our images in the sRGB color space and aim for a resolution that aligns with typical screen sizes. For instance, an image width of 1080 pixels is optimal for Instagram.
-
YouTube Channel: If we're sharing our work on YouTube, even if it's through a photo slideshow, we ensure our exports are at full HD (1920 x 1080 pixels) or even 4K resolution (3840 x 2160 pixels) to provide viewers the best visual experience.
We also consider the metadata and watermarking to protect our work and provide viewers with necessary information about the photograph. Careful tagging and description-writing can improve our work's visibility and findability on the web, allowing more people to appreciate and share our wildlife captures.
Sharing our photography is not just about exposure; it's about making smart decisions that reflect the value we place on our own work.
Frequently Asked Questions
When enhancing wildlife photography, our use of Photoshop techniques can significantly improve the raw captures' visual impact. To assist photographers, we've compiled answers to some of the most frequently asked questions about editing wildlife photos in Photoshop.
What techniques are used for editing wildlife photos in Photoshop?
In Photoshop, we utilize a range of techniques such as layer adjustment for brightness and contrast, selective color correction, sharpening using high-pass filters, and noise reduction to enhance the details and natural appearance of wildlife photos. It is important to maintain the authenticity of the photograph while improving its aesthetic appeal.
How can I enhance the colors of animals in Photoshop without making them look unnatural?
To enhance colors naturally, we recommend using Vibrance and Saturation sliders judiciously. The Vibrance adjustment is particularly useful because it increases the intensity of more muted colors without affecting already vibrant tones, which helps avoid giving animals an unnatural appearance.
Do wildlife photographers commonly retouch their images in Photoshop, and if so, to what extent?
Many wildlife photographers retouch their images in Photoshop to some extent, often focusing on minor corrections such as exposure adjustments, sharpening, and cleaning up distractions in the background. However, ethical practices dictate that the retouching should not deceive the viewer or misrepresent the subject.
What is the best way to maintain the sharpness of wildlife photos when editing?
The best way to maintain sharpness is to subtly apply the Smart Sharpen or Unsharp Mask filters in Photoshop. It's crucial to avoid over-sharpening to prevent the introduction of digital noise or halos, which can be detrimental to the image quality.
How does one balance exposure and contrast in Photoshop for well-lit wildlife photography?
We achieve balance in exposure and contrast by utilizing tools such as Levels and Curves in Photoshop. By carefully manipulating the histogram, we can brighten underexposed areas or recover details in overexposed parts without losing the overall contrast that gives the photo depth.
Can you suggest effective methods for removing unwanted elements from a wildlife photograph in Photoshop?
To remove distractions from wildlife photos, we can use the Clone Stamp tool for small corrections or the Content-Aware Fill function to intelligently replace larger areas. These methods should be used with care to preserve the natural setting of the wildlife subject.


