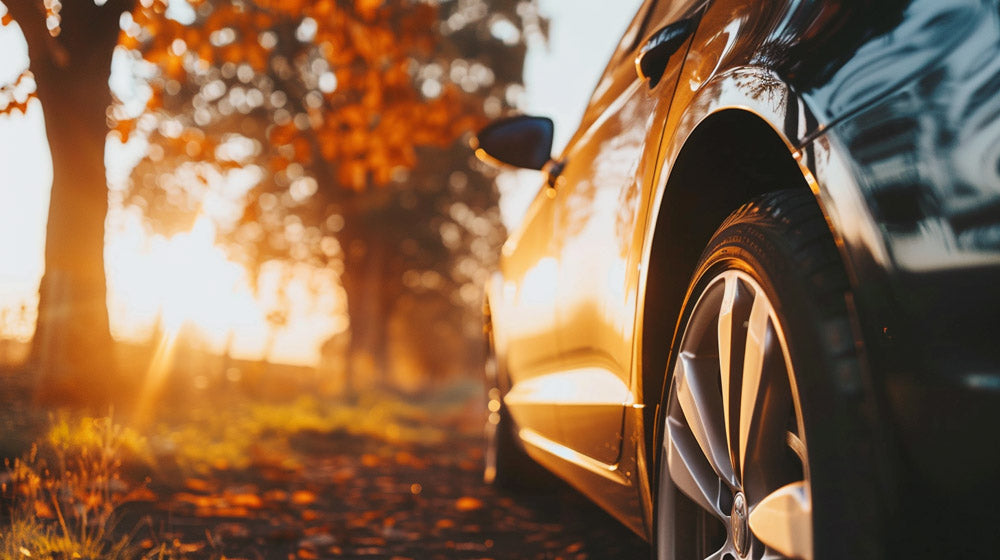
When it comes to car photography, timing is everything. The golden hour, occurring just after sunrise and just before sunset, provides the ideal light for capturing stunning car photos. The soft, warm hues during these times can enhance the car’s paint job and create beautiful reflections without harsh shadows. This makes the photos not just visually appealing, but also more professional looking.
We often see photographers struggle with lighting, especially during midday when the sun is at its harshest. The direct overhead light can cause undesirable glare and high contrasts that can obscure the car's details. Shooting during the golden hour minimizes these issues, giving us cleaner, more captivating images. Additionally, the ambient light at these times can help bring out the car's texture and color more vividly.
Beyond just choosing the right time, being prepared with the right equipment and knowing how to position the car relative to the light source is crucial. For instance, positioning the car so that the sun is behind it can create a striking silhouette effect, while having the light source at an angle can enhance depth and dimension. Combining these strategies will elevate our car photography skills and give us images that stand out.
Key Takeaways
- Golden hour is the best time for car photography.
- Midday light can create harsh shadows and glare.
- Proper light positioning enhances car details.
Understanding Photography Basics
To capture stunning car photos, it's crucial to understand the basics of photography. This involves mastering camera settings and using the right gear, understanding the role of light, and knowing how to balance the exposure triangle.
Camera Settings and Gear
When it comes to camera settings and gear, choosing the right equipment is vital. Different lenses can drastically change the outcome of your photos. A wide-angle lens, such as a 24mm, allows us to capture the entire car, showcasing its full design. Telephoto lenses, like a 70-200mm, are excellent for focusing on specific details, such as the logo or interior elements.
Using a tripod can stabilize the camera, ensuring sharp images, especially in lower light conditions. Adjusting the ISO to the lowest possible setting will minimize noise in our photos, capturing clean and detailed shots. Understanding how to manually control the camera settings gives us greater creative control over the final image.
The Role of Light in Photography
Light plays an essential role in photography, acting as the primary ingredient in each photo we take. The time of day significantly impacts how light interacts with the car. Shooting during the golden hours—shortly after sunrise or before sunset—provides soft, warm light that adds a pleasing glow to our photos.
Harsh midday sunlight often creates strong shadows and highlights that can detract from the car's features. Therefore, avoiding direct overhead light will ultimately result in better shots. We use natural light to highlight the car's contours and colors, making it appear more vibrant and detailed. Reflectors and diffusers can be used to manage light, filling in shadows and controlling contrast.
Exposure Triangle Explained
The exposure triangle consists of three critical elements: aperture, shutter speed, and ISO. Together, these settings control the exposure of a photo. Aperture affects the depth of field; for car photography, a smaller f-stop (wider aperture) like f/2.8 can isolate the car by blurring the background, whereas a larger f-stop like f/11 keeps more of the scene in focus.
Shutter speed controls the duration the camera's sensor is exposed to light. To capture motion, such as a car in action, a fast shutter speed like 1/1000 second is necessary. Conversely, slower speeds, like 1/60 second, can create motion blur effects.
ISO adjusts the camera's sensitivity to light. Keeping ISO low (e.g., ISO 100) in good light conditions maintains image quality, while higher ISO settings may be needed in darker environments but can introduce noise. Balancing these three elements allows us to master exposures and achieve the desired aesthetic in our car photos.
Planning the Photo Shoot
When planning a car photo shoot, several factors are crucial, including the selection of an appealing location, timing the shoot to take advantage of natural light, and ensuring the car is properly prepared and positioned.
Selecting the Perfect Location
Choosing the right location can significantly enhance the aesthetic appeal of your car photos. Urban environments like downtown areas provide dynamic backdrops, while natural settings like woodlands or beaches offer tranquil scenes. Avoid overly crowded areas to maintain focus on the car.
Visit the location beforehand to scout for potential spots. Pay attention to elements like background clutter, ground texture, and availability of space. Considering these factors helps in creating clean, visually appealing shots where the automobile stands out.
Timing Your Shoot with Natural Light
Natural light plays a vital role in car photography, and timing your shoot can make a significant difference. The golden hour, which occurs shortly after sunrise or before sunset, provides soft, warm light that enhances the car's features without harsh shadows.
Alternatively, shooting during the early morning can offer calm settings with minimal distraction and crisp light. Evening shoots can also provide unique lighting but require careful handling to avoid overly dark images.
Experimenting with different times of day can help determine the best light conditions unique to your location and desired aesthetic.
Car Preparation and Positioning
Ensuring the car is clean and polished before the shoot cannot be overstated. Dirt or smudges can detract from the photo’s quality. Bring cleaning supplies to the location for last-minute touch-ups.
Positioning the car correctly is just as important. Use the rule of thirds to place the car in a compositionally strong spot. Consider the angles—side profiles often highlight a car's contours best, while front and rear shots can showcase design details.
Move the car slightly between shots to capture different perspectives. This not only provides variety but also helps identify the car's most photogenic angles.
Composition and Camera Techniques
When capturing car photos, it's crucial to utilize various composition and camera techniques to emphasize the vehicle's design and personality. Let's examine how to frame the shot, master angles, and capture motion effectively.
Framing the Perfect Shot
Framing is essential in drawing the viewer’s attention to the car. We should employ the rule of thirds, placing the car off-center to create a more dynamic image. Using natural or man-made frames, such as trees or bridges, can enhance the composition and lead the viewer's eyes toward the vehicle.
Depth of field plays a significant role. A shallow depth of field can isolate the car from the background, making it stand out crisply. Conversely, a deeper depth of field is useful when we want both the car and the background in focus, showcasing the context of the scene.
Mastering Angles and Perspectives
Angles and perspectives dramatically affect how the car is perceived. Shooting from a low angle can make the car appear more powerful and imposing, perfect for sports cars. Eye-level shots, on the other hand, offer a more relatable and natural view, ideal for showcasing everyday vehicles.
Experimentation is key. By taking shots from various heights and angles, we can find the most flattering perspective for each car. Wider angles can capture the entire vehicle within its environment, while tighter shots can highlight unique details like emblems or headlights.
Capturing Motion: Panning and Blur Techniques
To convey a sense of motion, panning is an effective technique. We track the moving car with a slower shutter speed, keeping the car sharp while blurring the background. This creates a dynamic impression of speed and movement.
Motion blur can also be captured by keeping the camera steady as the car moves. Increasing the shutter speed can achieve an artistic blur, focusing on specific elements like the wheels or background, while keeping the car discernible. Practicing these techniques helps in achieving the desired effect of depicting a car in motion vividly.
Post-Processing and Editing Tips
In the world of car photography, post-processing plays a critical role in enhancing the final images. Using editing software effectively can improve lighting, color balance, and remove unwanted distractions. Here are some essential tips for refining your car photos.
Enhancing Images with Editing Software
Utilizing programs like Adobe Lightroom and Photoshop can significantly improve the quality of car photos. Begin by adjusting the contrast to give your images more depth. Use the clarity and sharpening tools to bring out the finer details of the vehicle. Clarity adjustments can help highlight the vehicle’s textures, while sharpening makes the lines crisper.
Additionally, cropping and straightening ensure the composition feels balanced. Lightroom’s crop tool allows us to maintain our desired aspect ratio while fixing any alignment issues. This ensures the car is prominently and correctly centered in the frame.
Fine-Tuning Lighting and Colors
Properly managing lighting and color settings is essential for dramatic and realistic car photos. Start with the white balance adjustment to make sure the colors are true to life. Under varying lighting conditions, you may need to fine-tune the warmth or coolness of the image.
Adjust the highlights and shadows to accentuate the car’s shape and features. Boosting highlights can add a luxurious shine to the car's surface, while controlling shadows prevents parts of the car from becoming too dark. Saturation and vibrance adjustments help the car’s colors pop without looking unnatural.
Removing Distractions for Cleaner Photos
Eliminating distractions in the background enhances the focus on the vehicle. Editing apps offer various tools for this purpose. Use the clone or healing brush to remove any unwanted elements like reflections or objects that can take attention away from the car.
Masking techniques can isolate the car from the background, allowing more precise edits. Blurring the background slightly can also help to make the car stand out. Pay attention to details like removing blemishes or dirt spots on the car, ensuring an overall clean look.
These post-processing and editing tips will help you create stunning and professional car photos that captivate viewers and highlight the vehicle’s best features.
Advanced Techniques and Professional Insights
In this section, we will explore specific techniques and expert advice to elevate car photography, focusing on night and low-light settings, as well as leveraging unique environmental elements.
Exploring Night and Low-Light Photography
Night photography brings a dramatic flair to car photos. Using light painting can emphasize a car's contours and details. By illuminating the car with a handheld light source over a long exposure, we create striking images. Managing shadows is also critical, as they add depth and dimension. A tripod is essential here to avoid blurring.
Incorporating artificial light sources such as LED panels can control the ambiance and highlight specific features. Techniques used by professional car photographers often focus on balancing these elements to create vivid, compelling visuals.
Leveraging Unique Elements for Stunning Photos
Using reflections and textures enhances depth in car photography. Shooting near glass buildings, water bodies, or other reflective surfaces can generate eye-catching images. We should be mindful of our angle to avoid distracting reflections and instead focus on those that complement the car’s design.
Patterns and surroundings play an important role too. Elements like urban textures, landscapes, and architectural features can be strategically included. Utilizing drones allows capturing dynamic aerial shots, providing a unique perspective that would be unattainable from the ground.
Highlighting a car's personality through its environment, such as commercial car photography, helps tell a story. Paying attention to small details can turn a simple photograph into a professional masterpiece.
Frequently Asked Questions
Understanding the best lighting conditions, smartphone settings, angles, editing practices, and techniques can significantly enhance car photography. Here we address common queries to help you take compelling car photos.
What lighting conditions are ideal for automobile photography?
The golden hour, which occurs shortly after sunrise and before sunset, offers the best lighting for car photography. During this time, the light is soft and warm, casting gentle shadows and enhancing the car's contours. Avoid midday when the sun is harsh and directly overhead.
Which smartphone settings ensure high-quality car pictures?
To capture high-quality car photos with a smartphone, utilize the manual or pro mode. Adjust the ISO, shutter speed, and white balance to match the lighting conditions. High dynamic range (HDR) can also help to balance the exposure in bright and shadowed areas.
Can you suggest some professional angles for capturing impressive car photographs?
Low angles can make the car appear more powerful and dynamic. Shooting from the front three-quarter view captures both the front and side, showcasing the car's overall design. Experimenting with different heights and positions, such as getting above the car for a roof shot, can also add variety.
What are the best practices for editing car photos post-shoot?
Post-shoot editing can enhance your photos significantly. Programs like Photoshop can remove blemishes and adjust color balance. However, it’s best to make minor adjustments to contrast, brightness, and saturation, ensuring the car looks as realistic as possible without over-editing.
How can amateurs get started with car photography effectively?
Amateurs should start by studying their car in different lighting conditions and practicing various angles. Understanding the basics of composition and lighting is crucial. Online tutorials, such as those on automotive photography, can also provide valuable tips and guidance.
Which techniques work best for taking striking car photos for social media platforms?
For social media, focus on capturing the car’s unique features and styling. High-resolution images with clean backgrounds work well. Utilize natural light and avoid harsh shadows, and consider using smartphone apps for quick and effective edits before posting.


