
Getting Started With Narrative Photography: Essentials for Crafting Visual Stories
Narrative Photography: A Comprehensive Guide
Mastering the Art of Storytelling Through Photography
Great photography goes beyond mere images; it communicates a unique narrative. Whether it's a poignant single shot, an expressive black and white collection, or an extensive photo essay, the essence lies in its storytelling prowess. Elevating a photography portfolio means honing in on those decisive moments that capture a narrative.
This guide serves to spark your creativity, encouraging you to conceive and develop your own narrative through the lens. It's not simply about suggesting what to shoot, but rather inspiring you to use your photography and editing finesse to express your individual stories.
- Dissecting the Story: Understand the key components that make a story impactful.
- Inspiration Hunting: Strategies for uncovering your own story angles.
- Pre-Production Essentials: Tips for planning and setting the stage for your narrative.
Let's delve into actionable insights to kickstart your narrative photography journey.
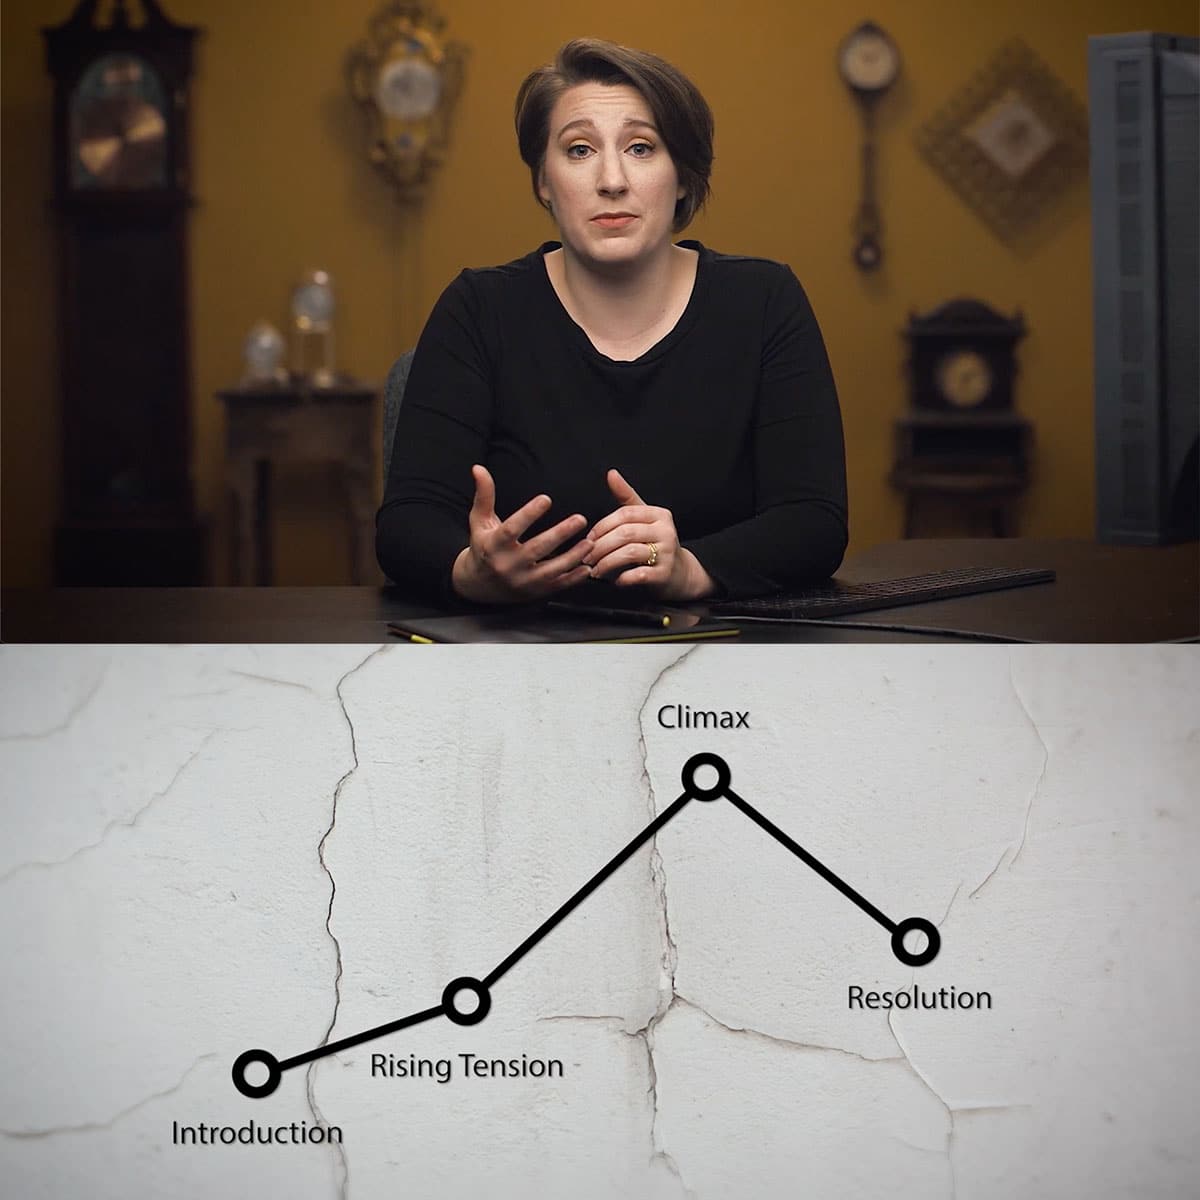
Key Components of a Story's Structure
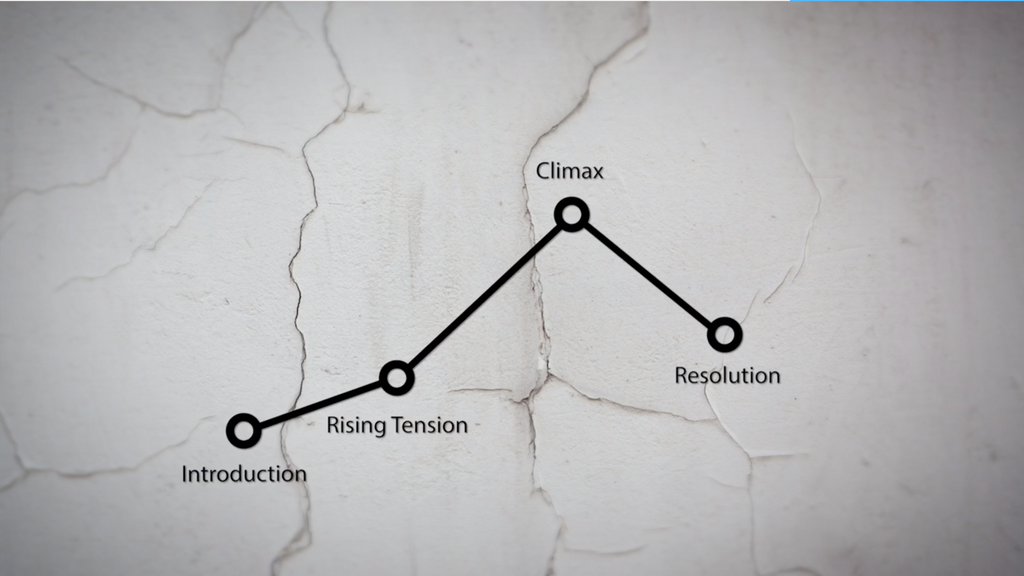
Core Segments of the Narrative Structure
The initial part of a story introduces the characters, establishes the environment, and sets the mood. It's a window through which the audience gains an understanding of the time, location, and climate of the narrative. The introduction often reveals the initial emotional state and intentions of the characters.
- Building Suspense
As the story unfolds, elements of drama or suspense are woven in. Obstacles and conflicts emerge, enticing the audience to become more invested in the unfolding events.
- Peak of Tension
The climax represents the pinnacle of the story's tension. This crucial juncture is where queries raised throughout the story are addressed, often involving a protagonist grappling with a pivotal choice or revelation.
- Denouement
The story culminates with a denouement, providing a sense of resolution and finishing the narrative. This conclusory segment reassures the audience by untangling the entwined tensions. Yet, it's not compulsory for the resolution to signify a positive outcome. An exemplar of this is the portrayal of bereavement in "War Widow: Looking at Loss Through the Lens of Kate Woodman".
A Somber Narrative Photography Example
This collection by Kate takes us through a poignant journey portrayed in a series of twelve impactful photographs. Each image captures the emotional turmoil of a woman as she processes the news of her spouse's death in combat. The photographer employs a versatile narrative structure, not limiting herself to a specific number of photographs for each stage of the narrative, but rather focusing on the depth and progression of the character's story.
- Development: Kate's thoughtful approach in the development of the character's arc.
- Visual Tools: Utilization of storyboards or mood boards for inspiration.
- Creativity: Encouragement of a unique and creative representation of the story.
Through the careful selection and sequence of images, Kate constructs a visual narrative that is both intimate and evocative, inviting viewers to engage with the narrative at a profound level.
Essential Preparatory Techniques for Narrative Photography
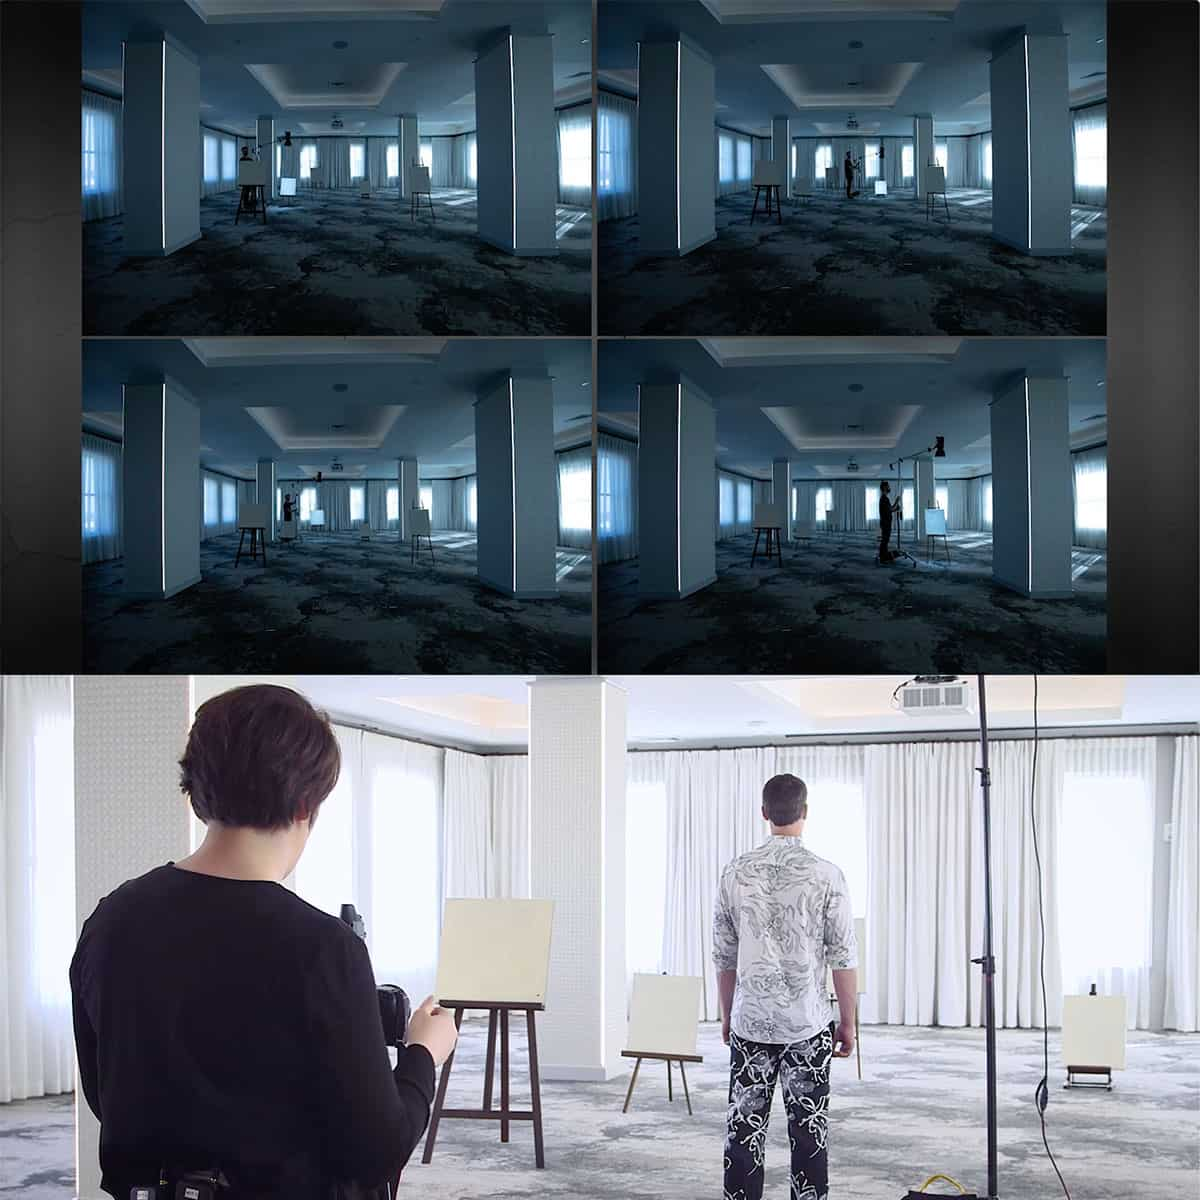
Before capturing a narrative, it is crucial to visualize the project's pathway. Creating visual guides like storyboards or mood boards solidifies the photographer's vision, transitioning from abstract ideas to concrete planning stages.
- Storyboarding ensures a coherent visual tale, plotting out scenes and transitions.
- Mood boards help in establishing the aesthetic tone.
Engaging in these steps has practical benefits:
- Identifying challenges early saves time and resources.
- Laying out scenes enhances focus and directs the photographic process.
Visual aids developed during pre-production not only sharpen the narrative but also guide camera work when actual shooting commences.
Storyboarding Applications and Assistance

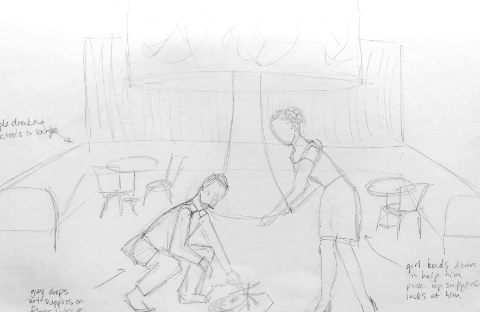
Storyboarding is essential when planning the visuals for a project. Each major shot and angle should be mapped out, allowing for a seamless visual flow of the story. While starting with a written concept can be beneficial, visual thinkers may opt to begin with sketches.
A variety of digital tools and applications can aid storyboard creation:
- Plot Device’s Storyboard Notebook: This tool is tailored for cinematography but highly useful for those new to storyboarding in narrative photography. It serves as a launchpad for crafting your storyboard.
- Traditional Sketchbooks: After gaining experience, a regular sketchbook might be all that's needed to visualize the storyboard effectively.
Users should remember that initial storyboards need not be intricately detailed. Simple depictions like stick figures can suffice to convey the concept. For instance, professionals such as Kate Woodman utilize sketchbooks for rudimentary storyboards with great success.
An important step that should not be overlooked is presenting the storyboard to a confidant. Physically narrating the story and providing a written outline can garner valuable feedback on clarity and engagement, helping refine the storyboard to resonate with the intended audience. Feedback is crucial to understand which parts of the story may require more detail and to ensure that the overall narrative will be impactful.
Gather Creative Elements Using Moodboards
Moodboards serve as a visual collection point for creative elements essential to designing a project's aesthetic. They allow individuals to curate a compilation of images and ideas that represent the intended narrative's hairstyles, lighting, makeup, textures, and more. Such conceptual collages can include a myriad of details from colors to typographic styles, helping to convey the sentiment and message of the overall story.
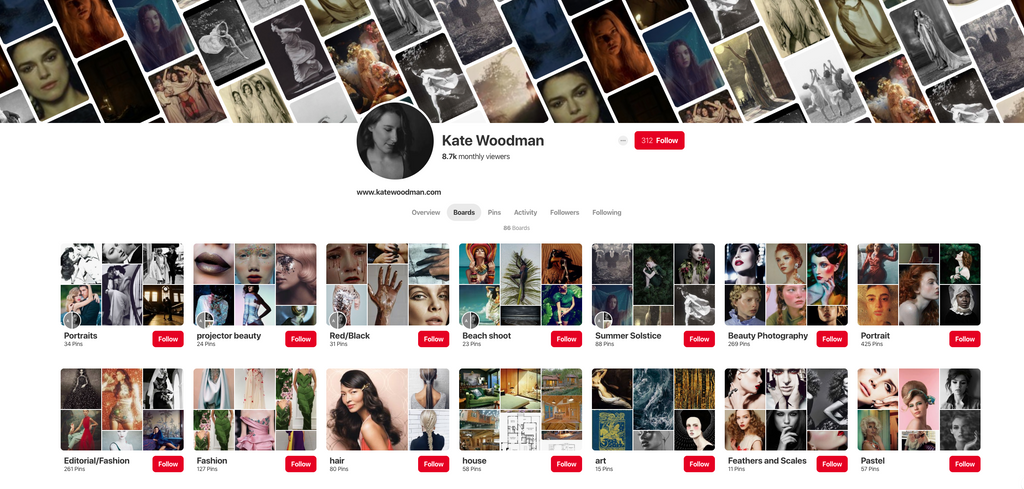
In the digital realm, moodboards can be effortlessly assembled using various online tools. Services like Pinterest provide a convenient way to hoard images and ideas from across the internet. The ability to create private boards on Pinterest is particularly useful for confidential projects, keeping the inspiration exclusive to the project's team.
Alternatively, a more straightforward approach to moodboarding might involve simply gathering images through a search engine and organizing them in a document editor like Microsoft Word or Apple Pages. The goal is to visualize the project's direction before production begins, setting a clear narrative path.
Not only do digital moodboards facilitate a smoother production process for narrative photography, but they also reduce the likelihood of errors, save on time and resources, and maintain the integrity of the story throughout the shoot. It’s a strategic step that enriches the storytelling component of photography—a crucial aspect for engaging an audience more accustomed to written narratives. This strategy infuses stories with an extra layer of depth, ensuring that even those with a predilection for text can be captivated by the visual narrative.
In essence, the construction of a moodboard is an ongoing process that evolves even as one delves into production, driving home the point that every storytelling detail, no matter how small, plays a pivotal role in the photographic narrative.
Thematic Component Integration for Narrative Imagery
Utilizing a consistent motif throughout your narrative photography can transform a simple series of photos into a captivating visual tale. Consider the impact of using only monochrome in your images to convey a strong thematic presence.
- Patterns: Introduce a subtle recurring element like a specific prop or outfit.
- Characters: A minor character or figure that repeatedly appears can create intrigue.
- Color Schemes: Adhering to a particular palette can unify a story.
Infusing your narrative with these nuanced elements encourages viewers to delve deeper and revisit your work, discovering new layers each time. For inspiration and practical tools, explore the educational resources offered by experts like Kate Woodman, including complimentary tutorial excerpts and unique Photoshop actions.
Crafting a Compelling Narrative Photography Collection
The Genesis of Visual Storytelling
Before laying out a portfolio, the initial spark of conception is crucial. Derive inspiration from diverse experiences such as exploring the outdoors, indulging in cinema, immersing in melodies, or admiring artworks. Allow inspiration to surface from a variety of sources, each shaping the nascent stages of your narrative.
Incorporate storytelling fundamentals that guide viewers through the journey of your photographs. Characters, plots, and the unfolding of events are pivotal. Enhancing your visual tale with thematic elements such as emotions, hues, and styles can add depth and resonance to your work.
Finalize your collection with a careful selection of images that embody your vision and distinctive style. A dynamic portfolio should reflect your most compelling work and be an embodiment of your artistic voice. Whether presented in print or digitally, the portfolio should captivate and leave a lasting impression on its viewers.
Essentials for Compiling Your Portfolio:
- Inspiration: Embrace the process of constant discovery and creativity.
- Story Elements: Characters, plot, climax, and resolution must be thoughtfully captured.
- Thematic Depth: Introduce emotion, color, and styling to enrich your narrative.
- Selection: Choose images that best represent your unique storytelling style.
- Presentation: Decide between digital or printed portfolios and update them regularly.
Take your curated portfolio and confidently present it to captivate and astonish your audience with your visual storytelling mastery.
Frequently Asked Questions
Essential Components of Narrative Photography Compositions
Within narrative photography, certain elements are vital to effectively convey a story. These include:
- Characters: Individuals or subjects central to the story.
- The setting or environment where the narrative unfolds.
- A plot signifying a sequence of events that drives the story.
- Conflict or tension which introduces a challenge or turning point.
- Resolution: The conclusion or denouement of the narrative.
Starting Storytelling for Novice Photographers
Beginners aiming to incorporate storytelling in their photography can adopt these strategies:
- Observe surroundings for potential stories or moments.
- Practice visual literacy by studying photographs that tell stories.
- Engage in conceptual thinking to pre-visualize scenes.
- Capture multiple perspectives to add depth to the story.
- Seek feedback and continually refine technique.
Beginnings of Photojournalism and Documentary Photography
Photojournalism and documentary photography have roots in several key historical milestones:
- 1930s: The Farm Security Administration's photography project documented the struggles during the Great Depression.
- World War II: War photographers captured the realities of conflict, bringing the front lines to the public eye.
- Magnum Photos (1947): An agency founded by renowned photographers to chronicle world events and everyday life.
Methods for Photo Selection in Narratives
Choosing the right photos for a narrative sequence involves several steps:
- Start by reviewing all images and removing any technically flawed ones.
- Look for images with strong emotional impact or storytelling potential.
- Sequence photographs to ensure they logically progress the narrative.
- Utilize feedback from peers to discern impact of the photos.
Crafting Stories with Three Images
Creating a narrative with a triptych involves considering these guidelines:
- Beginning: Establish the scene or context.
- Middle: Introduce the main subject or action.
- End: Offer a resolution that provides closure to the narrative.
Effective triptychs have a fluid transition between images and make use of composition to guide the viewer's eye.
Software Best Practices in Narrative Photography
Leveraging software for organizing and showcasing narrative photography works best when:
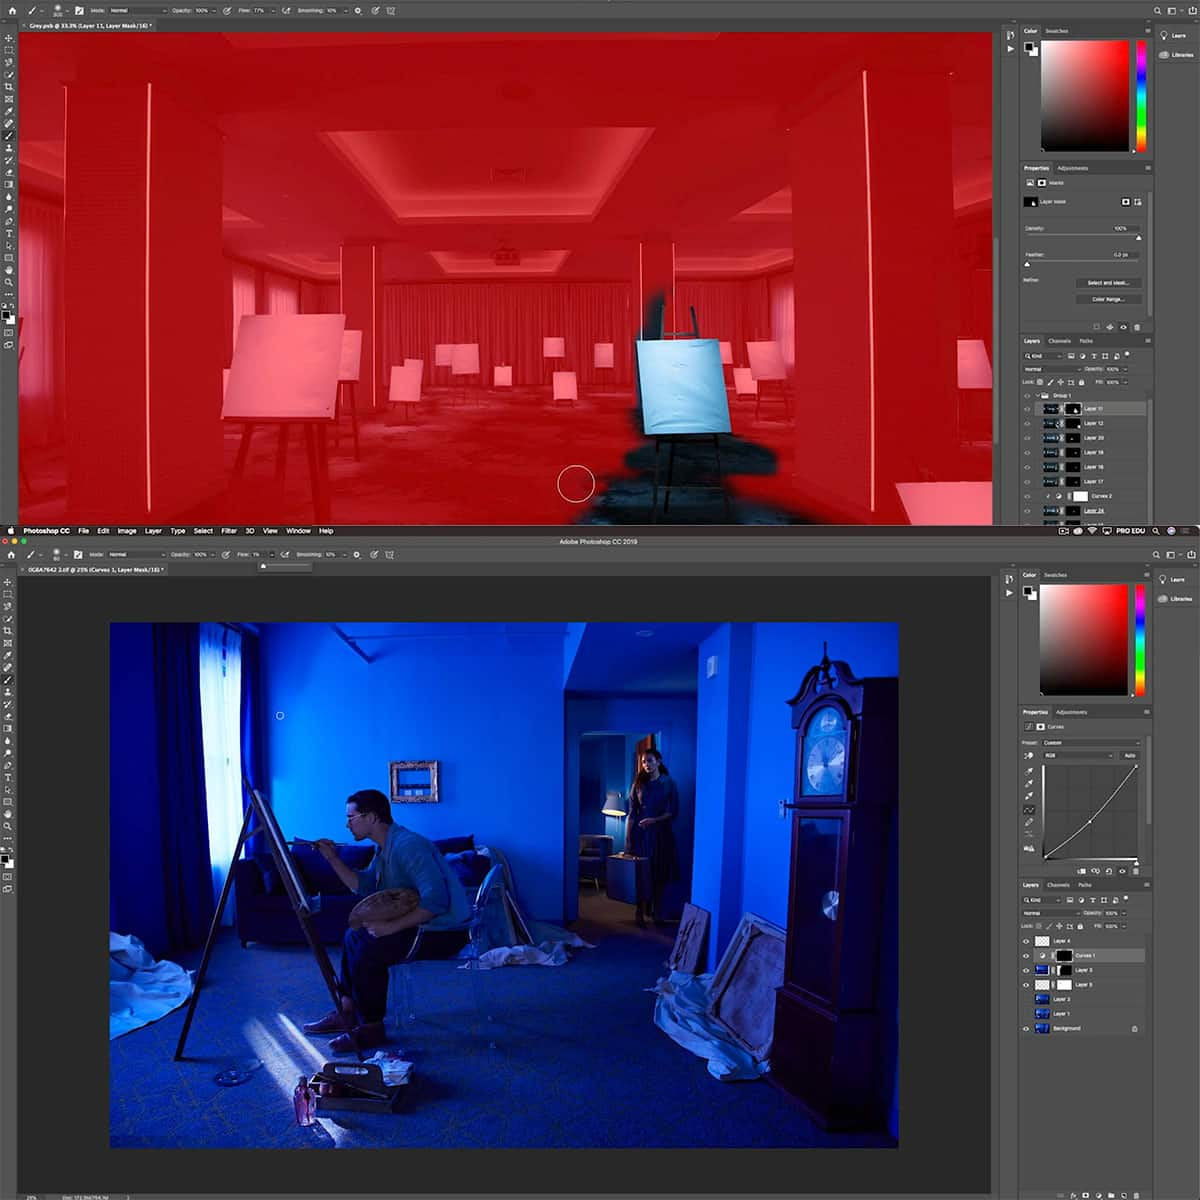
- Implementing non-destructive editing techniques to preserve original files.
- Utilizing sorting and rating tools to manage large photo collections.
- Creating slideshows or digital albums to present the narrative sequence.
- Harnessing metadata to track the storyline across the photo series.
_________________


