What Is PNG In Photoshop: A Concise Guide for Users
PNG, short for Portable Network Graphic, is a popular raster image file format that offers lossless compression, making it a great choice for various graphic design tasks in Adobe Photoshop. Widely used on the internet, PNG files provide better transparency handling and broader color support compared to other formats like GIF.
As a versatile file format, PNG is an ideal choice for creating and editing images in Photoshop, particularly when working with logos, icons, or graphics with transparent backgrounds. When exporting images from Photoshop, users benefit from the format's adaptive color management and robust feature set, which ensure high-quality output for both digital and print media.
Key Takeaways
- PNG is a lossless file format popular for its transparency handling and superior color support in Photoshop.
- Photoshop users can create, edit, and export high-quality images with PNG format for various applications.
- The convenience and versatility of PNG make it a go-to choice for digital artwork, logos, and graphic designs.
Understanding PNGs in Photoshop
PNG (Portable Network Graphic) is a popular raster image file type in web design and image processing. It is most known for its ability to handle graphics with transparent or semi-transparent backgrounds, making it ideal for complex designs and overlays. In Photoshop, this format can be easily imported and edited, as nearly all image editing programs recognize and support PNG files without the need for licensing ^[1].
When working with PNGs in Photoshop, you gain many benefits due to its transparency feature. These files allow you to stack multiple layers without flattening them while retaining the transparent background. This is crucial for creating intricate designs without having to compromise on the quality and editing capabilities of your project.
Since transparency is a key feature of PNGs, it is important to understand how Photoshop handles it. Alpha channels in the PNG file enable this transparency, allowing the blending of layers and providing levels of opacity for each pixel ^[sqrt]. This ensures that your design remains versatile and allows adjustments to be easily made without disturbing the entire composition.
To import a PNG file into Photoshop, simply locate the file on your computer and drag it onto your Photoshop document ^[sqrt]. This will automatically create a new layer for the imported image, and you can begin editing, transforming, or combining it with other elements in your project.
Overall, PNG files serve as a valuable asset when working in Photoshop due to their transparency capabilities and universal compatibility. Their ability to maintain both transparent and semi-transparent backgrounds, along with pixel-based layers, allows for more flexibility and creative possibilities in your designs.
Creating PNGs in Photoshop
Creating a PNG file in Adobe Photoshop is a straightforward process, as it is a commonly used format for a variety of design applications. To get started, open the image you want to work with in Photoshop. If you need to create a transparent background, follow these simple steps:
- In the Layers panel, double-click the background layer and click OK to unlock it.
- To remove the existing background, use tools like the Magic Wand or the Quick Selection tool, and press the Delete key.
Next, it's time to save your image as a PNG:
- Click File on the top menu and select Save As.
- Choose PNG from the Format menu in the dialog box that appears.
- Save your new PNG file to a chosen location on your computer.
PNG files have several benefits, such as preserving transparency and maintaining the quality of text and graphics. When using text in your designs, it's important to save your work as a PNG to ensure the readability and sharpness of your text is preserved. Additionally, the transparency feature of PNGs allows you to overlay text and images on various backgrounds without an unwanted background color.
In summary, using Photoshop to create PNG files is an essential skill for designers, as it offers high-quality images with transparency and sharp text. By following our straightforward steps, you can quickly and easily create PNGs for a range of design projects.
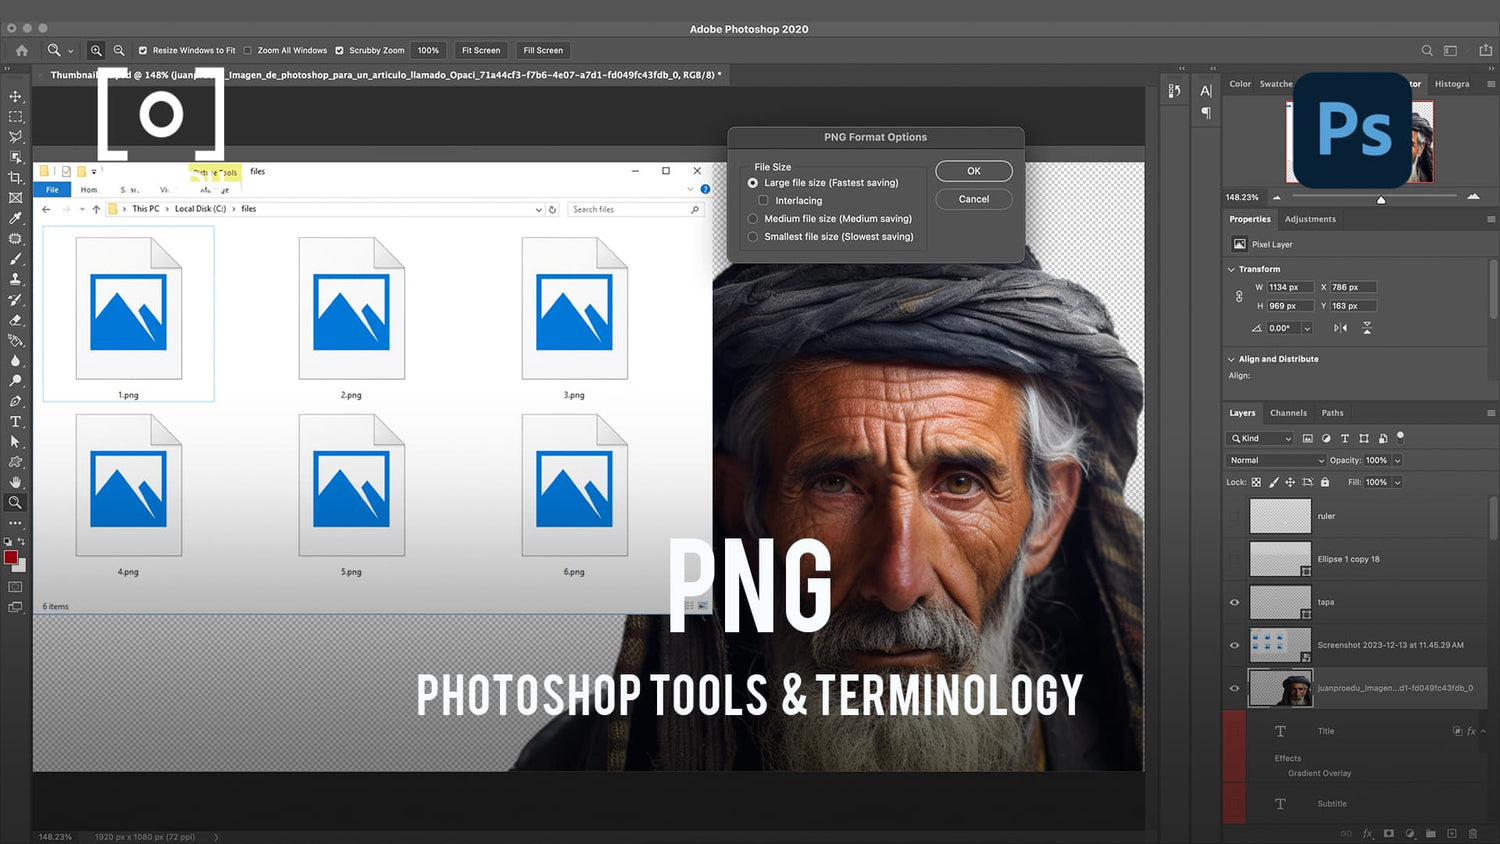
Exporting PNGs From Photoshop
When working with Photoshop, exporting images in the PNG format is a common task. PNG is a popular image format that allows for lossless compression, preserving the quality of our images. Exporting PNGs can be done on both Mac and Windows operating systems.
The primary method to export a PNG from Photoshop is the Export As option. To access this, simply navigate to the top menu and choose File > Export > Export As. In the Export As popup window, we can select the PNG format from the File Settings section. Additionally, we can specify the desired image size for the exported image.
Within the Export As dialog, we can further adjust the quality settings for the PNG file. With the PNG format being lossless, the Quality slider will not reduce the overall image quality. However, a higher quality setting will result in a larger file size due to the compression techniques used in the PNG format.
To preserve transparency in our images, we can ensure the Transparency checkbox is selected. This is particularly useful when exporting graphics or designs with transparent backgrounds. Once all settings have been configured to our preference, we can click the Export All button to complete the PNG export process.
Advantages of Using PNGs
One of the major benefits of using Portable Network Graphics (PNGs) in Photoshop is their support for lossless compression. When we save or edit a PNG file multiple times, the image quality remains intact and does not degrade. This is crucial for images that undergo frequent edits or are meant for professional use.
A significant advantage of PNGs is their ability to handle transparent backgrounds seamlessly. This feature is particularly helpful when working with non-rectangular logos or text-heavy graphics. Transparent backgrounds in PNGs allow for better blending with web pages, no matter the color scheme.
Due to their resolution quality, PNGs ensure better compression ratios compared to other formats like GIFs, while retaining a high color depth. Consequently, they support a more extensive range of colors, creating a more vibrant and visually appealing image.
In summary, by using PNGs in Photoshop, we can benefit from lossless compression, superior color depth, and excellent support for transparent backgrounds, making this file format highly versatile and suitable for various design scenarios.
Practical Uses of PNGs
PNG files are widely used in various aspects of graphic design and digital imagery. Let's briefly discuss how these versatile files can be applied in different contexts.
In the world of web design, PNGs are often used for creating intricate logos and icons. This is due to their ability to maintain transparency, which is essential for seamless integration into various backgrounds on a website1. When dealing with print materials, PNGs can be useful for printing high-quality illustrations and charts2, as their lossless compression ensures that no detail is lost during the process.
When working on digital art, PNGs serve as an excellent choice for preserving complex illustrations or designs. This format allows creators to work with multiple layers while retaining transparency, making it ideal for projects like UI designs and game assets3.
Some of the practical uses of PNGs include:
- Logos: Great for retaining their crispness and clarity4
- Photographs: Preserves details without compromising image quality5
- Charts and graphs: Maintains sharp lines and text, especially important when dealing with intricate data6
As you can see, PNG files offer a variety of uses across multiple industries and mediums. Their versatility, image quality, and transparency make them an essential asset in graphic design and digital art projects.
Frequently Asked Questions
What are the advantages of using PNG in Photoshop?
PNG (Portable Network Graphics) has several benefits when used in Photoshop. It is known for its lossless compression and support for transparency, allowing you to maintain high image quality. This is great when you need high-quality transparent graphics or plan to edit your images multiple times.
How to save an image as PNG in Photoshop?
To save an image as a PNG in Photoshop, simply open your image and then go to File > Save As. In the dialog box, choose PNG from the Format menu, and then save your new PNG file to your desired location. For more details, visit this Adobe tutorial.
What is the difference between PNG and JPEG in Photoshop?
The main difference between PNG and JPEG in Photoshop lies in the compression method and support for transparency. JPEG uses lossy compression, which can cause a loss in image quality over time, and it doesn't support transparent backgrounds. On the other hand, PNG uses lossless compression and supports transparency, making it suitable for images that require high-quality transparent graphics or multiple edits. For a more in-depth comparison, check out this article.
How do I create a transparent background with PNG in Photoshop?
To create a transparent background with PNG in Photoshop, open your PNG file and click Window > Layers. In the Layers panel, click on the Background layer, followed by OK. Select the Opacity menu within the Layers panel, and adjust it as desired for your image. This Adobe tutorial provides more detailed instructions.
Can Photoshop open and edit PNG files?
Yes, Photoshop can open and edit PNG files. After opening your PNG file in Photoshop, you can use its powerful tools to edit and manipulate the image as needed. Saving the edited image as a new PNG will maintain its lossless compression and transparency features.
How to convert an image file to PNG using Photoshop?
To convert an image file to a PNG using Photoshop, first open the image file in Photoshop. Next, go to File > Save As. Choose PNG from the Format menu in the dialog box and save the converted file to a location of your choice. The image will be saved as a PNG with its quality and transparency preserved.


