
BUILD A HEAVEN SET WITH HOT GLUE
The DIY for Photographers series continues and this week we’re looking at a very unique set build: cloud walls.
I had the idea of building cloud walls when I first started my Angels photography series. At that point, I was just putting clouds on the ground and compositing cloudscapes as backgrounds. The photos are beautiful, but the idea I had was of the clouds opening up like a door into heaven, and I knew I would need to build that for the effect of the light to work.

After brainstorming, it seemed to me the simplest way to make a cloud wall that would transmit light, be easily storable, and reusable, was to hot glue fiberfill to bedsheets. Which sounds very exciting, right?
I didn’t get the chance to craft my walls until just recently, and the results were everything I hoped for. The process is relatively simple, if intensive, and surprisingly cheap. You can have yourself several walls built in 1 day that can later be rolled up and stored for later use.
TOOLS
- Hot Glue Gun: get the biggest one you can with a “hot” setting. You’ll need to work fast and use a lot of glue.
That's pretty much the only tool you need!
SUPPLIES
- Hot glue sticks: I used 1 package of large Gorilla Glue sticks per sheet.
- Bedsheets: I used flat, twin-sized sheets that cost $4.95 each. You can get these from Goodwill or your local department store. Make sure to use flat sheets, not fitted ones.
- Fiberfill: I used 1 10lb box of fiberfill from Walmart, and that was enough to cover 2 twin-sized flat sheets.
PROCESS
You’ll need a large, flat area to lay the sheet, preferably on a hard surface. The hot glue will stick just a bit to the surface beneath the sheet if the sheet is thin, so if you only have carpet you’ll want some interfacing material, like cardboard, to stop the glue from sticking.
I used my garage floor.
You’ll also need a surface for the hot glue to rest on. I used a silicone baking sheet, but anything you don’t mind getting sticky is fine. After the hot glue gun is plugged in and set to the side, grab an armful of the fiberfill and lay it on the sheet. Pry the ball of fluff into manageable pieces that aren’t too thick.
This requires a bit of experimentation because if the section of fiberfill is too thick, pieces will peel off when you hang your wall. If the piece is too thin, you’ll see the sheet through the fiber.
I found 2-3 inch thick sections the size of a dinner plate worked well.

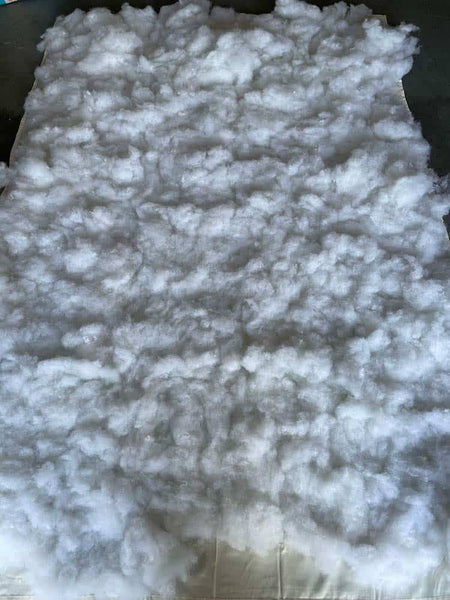
Working in sections, squeeze the hot glue on the sheet in dime to quarter-sized dollops, and then press the fiberfill onto it. I tried using long streams of glue, but it dried too fast. Using blobs of glue keeps it hot and lets you cover more surface area.
Once one section is secure, move on to the next. Try to switch hands now and then, because the constant pressure will make your fingers really sore.
Soon, you’ll have your very own cloud wall. You can light and shoot it in a million ways, then roll it up and store it (or use it like a really big pillow) when you’re done!
You can hang you cloud wall up on the wall, use a backdrop stand and clamps, lay it on the ground, or use it any other way you can think of!
I hung mine on backdrop stands with clamps, then covered the floor with the leftover fiberfill. I angled the walls so I could have a "doorway" opening in the clouds, then put an Elinchrom ELC 125 in the opening with a stripbank to fill the open space.
I used two white Vflats from Vflat World to bounce light back into the scene, then added one more strobe, and ELC 500, for fill. The fill was a bare bulb in a reflector that bounced off the garage wall behind me. Et voila! A heavenly scene.
I also used the foam armor I built for this photograph, and if you're interested in how to build armor of your own you can read that blog.

CONCLUSION
DIY builds give photographers the satisfaction of building exactly what we want and plumping up our library of sets, costumes, and props. Just remember to make the most of each piece you create!
If you DIY your own cloud wall, make sure to tag us with #proeduspotlight so we can see the amazing things you make!
If you want to learn more about taking your DIY projects and using them to create incredible fine art portraits, be sure to check out Fine Art Portraiture with Gemmy Woud-Binnendijk.


