You’ve replaced your webcam with a DSLR camera and cleaned up your audio by choosing a new mic. What’s the next step for improving the look of your video recordings? Lighting.
In the same way that off-camera flash gives you unlimited control over your images, good lighting can dramatically improve your videos. By using LED lighting for video recording you can enhance natural lighting or make a dramatic, stylized scene.
The State Of LED
There is an absurd variety of constant lighting types. There’s HMI, fluorescent, tungsten, and tungsten-halogen. If this article was written just a couple of years ago, there would be strong arguments to consider some of these options.
Nowadays, the type of lighting experiencing the most rapid growth is LED, making it the best lighting for everyone from amateur YouTubers to professional filmmakers.
LED was not instantly relevant. When LED first made its way into photo and video products, it was often discredited for flicker, color, or brightness issues. Currently, there are many advantages that make it an excellent choice.
Advantages of LED
- Low power consumption
- Power source flexibility
- Significant light output per watt
- Variety of sizes and shape
- Long bulb life
- Low heat
- Accurate dimming
Now that you know it’s a serious contender, you may find yourself typing “LED light” in google only to be instantly paralyzed by the vast selection. LEDs differ in light source type, color, output, and power source. So before we try to find the best lighting option, let’s make sure you’re aware of the difference in options.
Light Source Type

Left, an LED panel with many small LEDs. Right, a COB LED
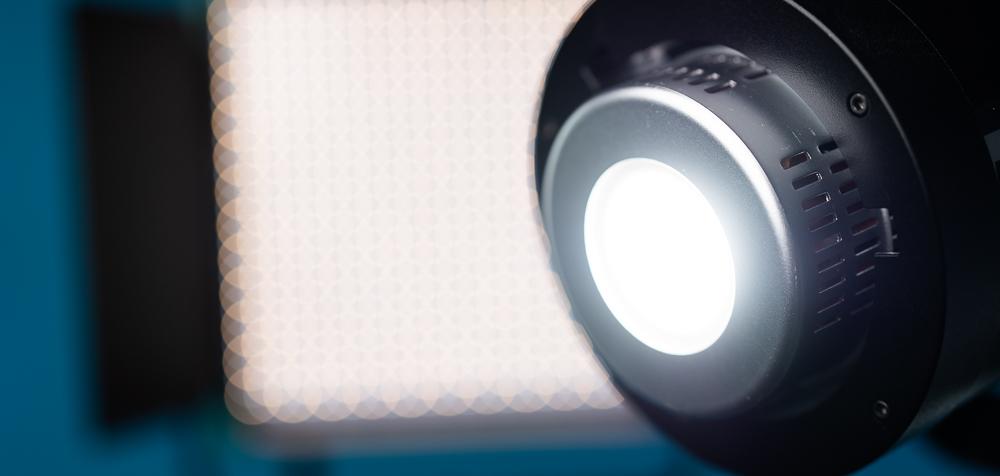
Cob (Chip On Board) LED
Most articles will probably mention COB LED products a bit lower on the page. But, given the PRO EDU reads are primarily photographers, I think it’s important that you hear about this option first. A chip on board LED is an array of densely-packed LEDs. Since there is no lens covering the LED, it maintains a very low profile.
Why do I find this so notable to photographers? COB LEDs most closely resemble a flash tube on a monolight, in that it is a “single” light source that can be manipulated with light modifiers.
This small size of this format is compatible with reflectors, softboxes, and beauty dishes, something LED panels just can’t do. If you’re a boss with flash, you’ll feel right at home when it comes to shaping a COB light source.
The most popular chip on board LEDs use the Bowens mount for light modifiers. If you’re already using Bowens mount flash equipment, this can save you some serious cash. If you don’t have any Bowens modifiers already, one massive benefit is that it’s so widely used.
You can get everything from budget softboxes like the Glow EZ Lock Series, to gourmet beauty dishes like the Mola Setti. Having access to these modifiers allows for unlimited control of light quality and shadows.
COB LEDs are housed similarly to a monolight. Because the LEDs are packed so tightly, they are attached to a heatsink with fans for cooling. This is the biggest pain point, as whirring fans create noise which is the enemy to good audio.
If you are considering a COB LED, I would strongly suggest researching how audible the fans are before buying. Budget-level COB LEDs tend to use cheap fans that create distracting levels of noise. Thankfully, companies like Aputure, Nanlite, and Godox make some near-silent options.

Closeup of COB LED panel
Panels
Panels are the most common type of LED light. Instead of densely packing the lights onto a tiny chip, they are spread out over a larger space. Typically the individual LED bulbs are behind lenses, to project the light into a tighter area and effectively increase the output.
While there are many varieties, which we’ll go over, one major benefit of all LED panels is they are silent. Because the bulbs are spread over a larger space, there is less concentration of heat than on COB LEDs. With less heat, they can be passively cooled.
Some panels have no heatsink at all, resulting in very lightweight and portable units. More powerful panels are backed with a large heatsink, making them thicker and heavier. Silent lighting is welcome when making a video, as you won’t have to worry about it affecting your videos and live streaming.
A double-edged sword of the panel style is that you can choose a specific size light to avoid using a light modifier at all. A 2x1’ panel will have soft light similar to a COB light with a 2x1’ softbox. But, with each panel having a unique size, there is no standardization of modifiers.
This means that anything you purchase is proprietary and useless beyond that specific light panel. Modifiers are also far more limited. Many have diffusion and barn doors, and occasionally you’ll find a softbox. The idea of projecting the panel into a tight area at a far distance (easy with a fresnel in front of a COB light) just isn’t possible.
Diffusion Variety
A negative of spreading out hundreds of small LEDs over space is a boxy, pixelated effect in shadows. This occurs because each LED acts as an individual light source. Since they are positioned in rows and columns, cast shadows fall off in distinct box patterns rather than natural light and shadow gradations.
For this reason, LED panels always include some type of diffusion. The “standard” light panel will have a removable sheet that diffuses the shadows and creates more even lighting.

The not-so-natural shadow pattern created from independent light sources casting multiple shadows
Other panel lights use a permanent layer of diffusion over the LEDs. This diffusion can vary from thin sheets of plastic diffusion to such high levels that the diffusion surface appears white.
While I appreciate that these lights diffuse unnatural shadows, it also results in unnecessary light loss when using external diffusions such as umbrellas or scrims. While this is fine on behemoths like the Arri S60, it’s a sacrifice on lower-powered lighting.
Size Variety
I mentioned above that a huge benefit to panels is they come in all sorts of shapes in sizes. The most common lighting panel is usually around 1 x 1’, which makes for an excellent off-camera light at short distances.
Looking beyond the standard, you can get ridiculously picky about size and still find a solution. Remember, the size of your light source will determine the softness of shadows.
The Aputure Amaran AL-F7 is designed to mount directly on the hot shoe of a camera. If you want a circular light source to mimic the soft light of a softbox, check out the 21” Falconeyes SO-68TD.
A ring light makes for great fill light. A Lume Cube can be slipped into your pocket. Or you can get an LED stick such as the Nanlite PavoTube, which doubles as a fun lightsaber.

LEDs come in many shape and size options
Color
Hopefully, either a COB or an LED panel jumps out as a better solution for your video lighting needs. To take greater control of your video lighting, you’ll want to consider the color of your LED lighting as well. Maybe you want a clean video with natural lighting. Or maybe you want a splash of color in the background of your live stream.
Daylight
At first, LED lights were almost exclusively made available in daylight, just like flash for photography. This is yet another double-edged sword in choosing an LED for video lighting. The benefit to the daylight LED is that the light’s peak brightness is at 5500-6000 kelvin temperature.
The negative is that daylight LED lights require gels when you want to change their color temperature. A strong gel can significantly decrease the brightness of your lighting, not to mention the hassle and additional cost.
Tungsten
Similar to daylight LEDs, there is tungsten only LEDs with a color temperature of roughly 3200k. They are far less common than the daylight version, and I’d only suggest them if one were lighting a video that has other tungsten lights visible.
Bi-Color
If the hassle of gelling a light sounds miserable to you, then Bi-color LED video lighting is the way to go. Bi-color LED lights work by using a mix of warm and cool LEDs. It then controls the brightness ratio between the different bulbs to create various color temperatures.
So imagine an LED panel has half Daylight (6000k) bulbs and half Tungsten (3200k). To create 4400k, both lights can be powered on all the way. To create 6000k, the 3200k bulbs have to be completely off and vice versa.
The only real drawback to a Bi-color LED light is that it’s peak brightness tends to occur in the 4000’s, so if you’re looking for daylight white balance you won’t get the peak performance out of the light.

An array of (out of focus) Bi-color LEDs
Bi-color capabilities aren’t limited to just panels. Aputure just dropped the Light Storm 300 X, a bi-color version of their popular 300w COB LED constant light.
Other companies have tried this before, but with alternating rows of Bi-color lights, you would see split colored shadows, similar to the boxy shadows I mentioned earlier. Aputure seems to be the first to solve this issue with a new lens in front of the LEDs to blend the colors.
RGB (RGBW / RGBWW)
The new kid on the block is RGB. LED Lighting with RGB capabilities adds the entire RGB spectrum, something previously only accomplished with gels. This obviously affords you a ton more flexibility.
Lights do this a few different ways, and those differences greatly affect usability.
For instance, on the Yongnuo YN360 LED stick, it had 40 RGB LEDs across the bi-color panel. So you could have Bi-Color lighting OR make any fully saturated RGB color.
More recently, companies have crammed 4-5 tiny LEDs into a tight array to act as a single bulb. These include Red, Green, Blue, Warm, and White (RGBWW). Some companies call this RGBAW with the “A” referring to amber.
By mixing the amber and white bulbs with RGB, the user can adjust the saturation of colors or even change the color temperature of the light source while picking a color or gel simulation.
While this was initially available only on large and very expensive lights (see Arri Skypanels S60), the technology has made its way down to compact and budget solutions like the Aputure MC. So whether you need color in your life or you just want to future proof your lighting selection a bit more.
Output
The next thing to consider is what type of power you need from an LED light. After all, what good is buying a light if it’s not bright enough for your camera to see?
LED lights range from pocket lights at 10 watts, to 500+ watts for power users looking to replace HMI and tungsten incandescents. Thankfully, since we are focused on lighting for home video recordings and live streaming, the demand for power isn’t that high.
If your lights are in close proximity, it’s unlikely that you’ll really need to go beyond the 30-60 watt range. For example, I use a 300w light for filming videos. Because it’s about 3 feet from my face when recording, I keep the light below 5%.
That means I’m using roughly a 15 watt light source. This makes sense because my background light on the other hand (roughly 3 feet from the wall it lights) is a 15w RGB LED and is always at 100%.
This all depends on your video recording environment. I turn off the ceiling light in my room when recording, and my window is covered as well to block the ambient light. If you are trying to show a bright background such as outdoor scenery through a window, you may need a 100w+ LED light source.
It’s impossible to make specific recommendations here given everyone has a unique space. I feel 30w is safe and provides flexibility for most indoor spaces away from direct window light.
Power Source
The last thing to look into before picking an LED light is its power source.
AC Powered
The most basic option is to power an LED directly from an outlet. Just about every LED light on the market can be powered directly from the wall, but some lights offer no alternative. The benefit of a mains-powered LED is you never have to worry about charging batteries.
Provided you pay your electric bill, your lights will function non-stop. The negative is they lack portability. If you ever plan on using your lighting setup for a video outdoors away from power, your only option is to buy another portable power source.

AC Powered Godox / Flashpoint FV150 LED
Internal Battery
Smaller, lower-powered LED lights may have an internal battery. This is true of the Aputure MC and Nanlite PavoTube that were mentioned above. One perk of an internal battery is that it’s impossible to forget.
When you pack the light you already brought the battery. The negative is when your internal battery dies, you either have to attach it to an AC power source, or wait for it to recharge to use it again. A lighting kit filled with dead internal batteries is useless.
NP-F Battery / V Mount Battery
By far the most common battery option for smaller lighting kits is the Sony NP-F style battery. These are fantastic as they are used in so many video applications. They are used to power cameras, monitors, and LED lighting.
They also come in various sizes with different levels of capacity, so you can choose based on how long you want your gear to be powered vs how lightweight you want to keep the light.
Once you get into the territory of lights more powerful than 40w, NP-F batteries will no longer cut it. Higher powered LEDs instead use the larger V Mount battery. V Mount batteries offer greater capacity and deliver a higher voltage.
The great thing about both of these batteries is that you can buy as many as you need to get you through long periods of shooting. Unlike an internal battery, your light won’t need any downtime to recharge to continue using it in a portable fashion.
Additional Specs
I feel if you’ve taken the time to carefully consider the light source, color, output, and power source of an LED, you’ll end up pleased with your purchase. However, if you want to dig a bit deeper into the specs of lighting kits, I’ll explain a few more things to look out for.
- CRI: The “Color Rendering Index” is a number from 0-100 that describes how accurately the light source represents colors. 90 is adequate. 95 is excellent. Beware, below 85 CRI tends to mean the LED is very weak in the R9 rating, a critical area for skin tones.
- TLCI: The “Television Lighting Consistency Index” is very similar to CRI and also on a 0-100 scale. Over 90 in this figure is excellent.
- Cooling: A light that is “passively” cooled requires no additional electronics to cool it. A light that is “actively” cooled means there are fans to blow the heat away from the light.
- Lumens/Lux: These are two linear measurements of the intensity of light. You can use these to determine how much brighter one light source is than another.
10 Awesome LED Lights
The number one goal of this article is for new LED users to be informed enough to explore lighting kits and feel confident in building their own lighting setup. I hope I’ve accomplished that. In my own journey making lighting videos I’ve handled dozens of LEDs, and want to share the best lighting options on the market. I’ve included a variety of budget levels.
Aputure MC ($90): Tiny and inexpensive RGBWW panel. It uses an internal battery and is not very powerful. Makes for a great hair light or colored accent light.
CLAR Lumiere 320 ($70): On-camera sized RGB / bi-color light panel. NP-F battery powered. Makes for great fill light.
Godox SL60 ($124): Daylight, AC powered COB light. Incredible power per dollar. Adequate CRI. The fan noise may be too loud for use as a close key light.
Viltrox VL-40T ($159): Budget bi-color panel with AC / NP-F battery power. Modify with an umbrella or scrim to use as a key light, or simply use it as a fill light.
Nanlite Forza 60 ($214): Daylight COB LED. Very quiet fans, great power per $. AC by default but can be powered by battery as well.
Falconeyes SO-68TD ($464) 68w 21” bi-color round soft light panel. An excellent modifier-free key light.
Nanlite Pavotube ($99+) Available in 10”, 2’, and 4’ options. RGB and bi-color with an internal battery. Stick format with easy control. Good light for coloring backgrounds.
Godox VL150 ($399) 150w daylight COB LED. Aputure 120d level CRI and power at half the price, with ultra-quiet fans and silent at low power levels. Excellent for use with a softbox as a key light.
Aputure LS C120d II ($745) 120w daylight COB LED. No LED list is complete without this light, as it’s near-silent with a ton of power. This light paved the way for affordable COB lighting options. AC / V Mount battery powered.
Aputure LS C300X ($1199) 300w bi-color COB LED. AC / 2x V-Mount battery powered. Brings Bi-color capabilities to a beloved series of lighting.

Robert Hall is an editorial photographer in Michigan. He shares his views of the photography industry on his Youtube channel and High ISO Podcast.
90 Days Of Content
Over the next 90 days we are going to be working with some top artists to explore recommendations giving you solutions to problems we have all gone through. We are paying the writers a really fair wage for every original article, and we are writing about things that aren’t sponsored by any brand. There is no one but our opinion behind it. We would love it if you do use our affiliate links here so we can continue to keep writing awesome articles that you can trust.


