Macro photography is a fascinating way to capture the world around us in stunning detail. It involves taking extreme close-up photos of small subjects, often showing details that are not visible to the naked eye. This technique can make even the most ordinary objects look extraordinary, highlighting textures and patterns that might otherwise go unnoticed.
In our blog, we'll explore the essential gear and technical fundamentals needed for successful macro photography. From choosing the right lenses to understanding magnification, we'll guide you through each step to help you capture life-size images that bring tiny subjects to life. We'll also discuss the importance of lighting and composition, and how they can dramatically impact your photos.
We'll delve into the common subjects of macro photography, such as insects and flowers, and the unique challenges they present. Our goal is to equip you with advanced tips and techniques to perfect your macro shots. Our comprehensive guide aims to spark your creativity and enhance your skills in this captivating form of photography.
Key Takeaways
- Macro photography magnifies small subjects, revealing intricate details.
- Essential equipment includes specialized lenses and proper lighting.
- Understanding technical fundamentals and composition is key to great macro shots.
Understanding Macro Photography Equipment
To capture stunning macro photographs, it's essential to have the right equipment. We'll cover the most vital gear, focusing on lenses and supplementary tools.
Choosing the Right Macro Lens
The most critical piece of gear for macro photography is the macro lens. A dedicated macro lens offers a 1:1 magnification ratio, meaning the subject looks life-sized on the camera sensor. This is crucial for capturing fine details. Lenses with focal lengths in the 80-120mm range are versatile, providing enough working distance to avoid disturbing the subject.
Some cheap zoom lenses claim to be “macro,” but they usually fall short. They may only offer 1:3 or 1:2 magnification. For true macro work, we should invest in a proper lens like a Tamron 90mm f/2.8 macro or something similar. Furthermore, choosing between a DSLR and a mirrorless camera impacts the lens selection, as different mounts may require adapters.
Supplementary Gear for Macro Shots
Besides the main lens, several supplementary tools enhance macro photography. Extension tubes are a cost-effective way to increase magnification by increasing the distance between the lens and the camera sensor. They are simple to use and come in various lengths.
A reversing ring allows us to attach a lens backward to the camera body, effectively turning any standard lens into a macro lens. This can be a budget-friendly solution for those just starting.
Stability is key in macro photography, so a sturdy tripod is necessary. It helps maintain focus and prevents camera shake. Ring lights provide even light distribution, reducing shadows and highlighting tiny details. For those using a DSLR or mirrorless camera, finding compatible flash solutions ensures perfect lighting.
In conclusion, investing in the right macro lens and supplementary gear like extension tubes, reversing rings, tripods, and ring lights significantly improves our macro photography results.
Technical Fundamentals of Macro Photography
Understanding the technical elements of macro photography helps us achieve stunning close-ups with clarity and detail. Key areas include magnification ratios, depth of field settings, and focused techniques for precision.
Working with Magnification Ratios
Magnification ratios are crucial in macro photography. They indicate how much larger the subject appears on the camera sensor compared to its actual size. A 1:1 magnification ratio means the subject is captured life-size on the sensor. Ratios like 1:2 or 2:1 change this scale, making the subject appear larger or smaller.
Using the right equipment, like macro lenses or extension tubes, helps achieve these ratios. For instance, a lens with 1:1 ratio is ideal for capturing intricate details of small subjects, while extension tubes increase magnification without altering the lens’ focal length.
Depth of Field and Aperture Settings
Depth of field (DoF) is another critical aspect. In macro photography, achieving a sharp focus on the entire subject is challenging because the DoF is usually very shallow. To control DoF, we adjust the aperture settings. A smaller aperture (larger f-number) increases DoF but requires more light or a slower shutter speed.
For example, setting the aperture to f/16 might keep the whole subject in focus, though it might make the background less blurred. Precise aperture adjustments enhance image sharpness and detail, which is vital for capturing high-quality macro photos.
Focusing Techniques for Precision
Focusing in macro photography demands precision. Manual focus is often preferred for detailed control over what portion of the subject is sharp. We adjust the focus ring slowly to find the exact point of sharpness. Using a tripod stabilizes the camera, making focus adjustments more accurate.
Another technique is focus stacking, where multiple shots at different focus points are combined into one image to achieve greater depth of field. Our camera settings, like shutter speed and ISO, also play a role. Using adequate lighting and maintaining a steady camera ensures clear and sharp images.
Light and Composition in Macro Photography
Mastering light and composition in macro photography is essential for creating stunning images. In this section, we'll explore techniques for using natural and artificial light as well as tips for composing compelling macro shots.
Mastering Natural and Artificial Lighting
Lighting sets the mood of a photograph. In macro photography, we often work with natural light because it’s soft and flattering. Cloudy days are ideal since the clouds act as a giant diffuser, spreading light evenly. This minimizes harsh shadows and enhances the details of our subjects.
For controlled conditions, artificial light is vital. Using a flash with a diffuser can replicate soft daylight. Ring flashes are particularly useful for even, shadow-free lighting. Focus peaking can help as it highlights in-focus areas, making it easier to achieve sharp detail. Too much light from one direction can create harsh shadows, so it's essential to balance the light using additional diffusers or reflectors.
Creating Artful Compositions with Macro Subjects
Composition in macro photography involves careful placement of the subject within the frame. We can use techniques like the rule of thirds to guide the viewer's eye. Placing the subject off-center often results in a more dynamic shot. Lines, whether leading or diagonal, can add depth and guide the eye through the photo.
The background should be simple to keep the focus on the subject. We often use a shallow depth of field to blur the background, enhancing the subject's details. Colors play a crucial role in composition; contrasting colors can make the subject stand out, while complementary colors can create harmony. Proper composition transforms ordinary subjects into extraordinary images, emphasizing the beauty within minute details.
For more detailed guidance on macro photography composition, you can check out the article on Composition Basics in Macro Photography.
Macro Photography Subjects and their Challenges
Macro photography offers a unique way to explore and capture the intricate details of small subjects. Some popular subjects include insects, plants, and textures. Each subject presents its own set of challenges, such as lighting and movement.
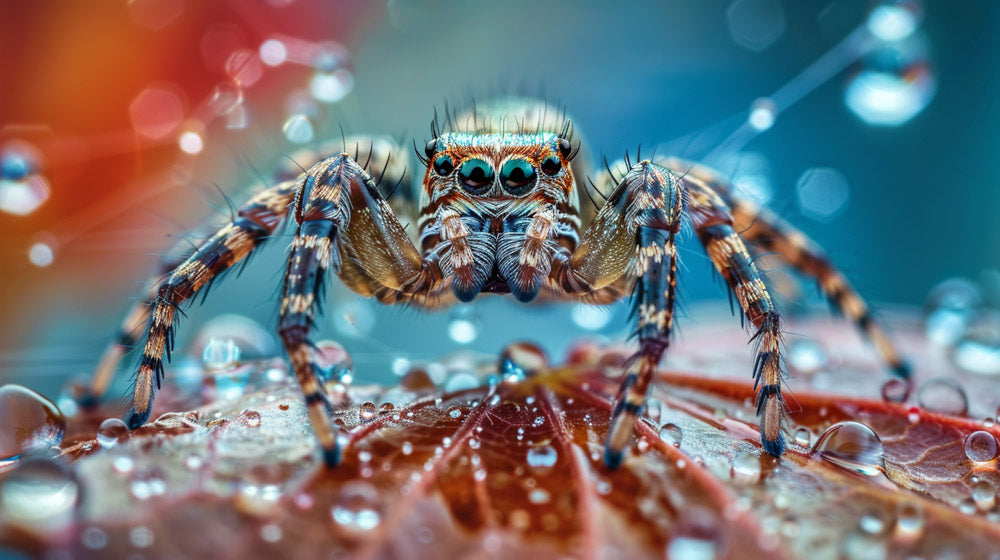
Shooting Insects, Plants, and More
When we photograph insects, flowers, and plants, we reveal details often unseen by the naked eye. Insects are fascinating due to their tiny structures and varied colors. Capturing these details requires patience and a steady hand.
For flowers and plants, highlighting textures and patterns can create stunning images. Nature provides a wealth of subjects, from the delicate veins in a leaf to the intricate designs on flower petals. Animals and even small food items, like berries, can be captured in exceptional detail through macro lenses.
Overcoming Common Macro Photography Issues
One common challenge in macro photography is dealing with movement. When shooting insects or plants outdoors, even a slight breeze can cause blurriness. Using a tripod and a fast shutter speed can help minimize movement issues.
Another issue is achieving proper lighting. Since we work with small subjects, we need to avoid shadows that obscure details. Ring lights or external flashes can provide consistent light. Working at life-size magnifications (1:1) can also be tricky, as even tiny movements of the camera can affect the focus. To counter this, we should use a remote shutter release or the camera's timer function to avoid camera shake.
Creating sharp images requires precise focus. Using a focus rail can help us make tiny adjustments to the focus distance. By addressing these challenges, we can better capture the minute details that make macro photography so captivating.
Macro Photography Techniques and Advanced Tips
In macro photography, mastering both basic and advanced techniques is crucial. Key elements include proper camera settings, use of specialized equipment, and a strong understanding of light and composition.
Tips for Beginners and Enthusiasts
For those starting, the right techniques can make a big difference. Use a tripod to keep your camera steady, minimizing handshake. Switching your camera to "Macro Mode" helps in closer focusing. Manual focus is often better than auto-focus for macro shots, as it gives precise control.
When setting up, keep the ISO as low as possible to reduce graininess. Aim for small apertures (like f/8 or f/11) to increase depth of field. Using a macro flash can illuminate details without casting harsh shadows.
To get the whole subject in focus, plan your shots carefully. Start with simple subjects like flowers or insects which don’t move much. With practice, more detailed compositions are easily achievable.
Exploring Advanced Macro Photography Methods
Advanced macro techniques involve more specialized gear and refined methods. Using macro focusing rails allows precise frame-by-frame adjustments for focus stacking, capturing intricate details in well-defined layers. Adding extension tubes can turn a standard lens into a macro one by shortening the minimum focus distance.
For handheld shots, steady your arms and use burst mode to capture multiple frames quickly. Adjusting camera settings like shutter speed is crucial; a faster shutter reduces blur from movement.
Combining techniques like focus stacking with tripod use and lighting adjustments produces sharp, high-quality pictures. Planning your macro photographs to include creative light angles and unique perspectives adds depth and interest.
Advanced photographers often experiment with different lenses, like dedicated macro lenses, to achieve higher magnifications. These small changes can greatly enhance the final macro pictures. For more detailed guides and professional tips, check out resources like Photography Life and Expert Photography.
Frequently Asked Questions
We often get questions about how to get started with macro photography, its differences from micro photography, and the equipment needed. Below are some of the most common queries.
How can one get started with macro photography as a beginner?
To start with macro photography, you can use a standard camera with a macro lens or extension tubes. It's important to use a tripod to avoid blurriness. Educate yourself on fundamental techniques like focusing and lighting.
What are the main differences between macro and micro photography?
Macro photography involves capturing subjects at life size or greater magnification, typically 1:1 or higher. Micro photography magnifies subjects much more, often involving microscopes to see details beyond the capability of the naked eye.
In what ways is macro photography utilized?
Macro photography is used in various fields, from capturing the intricate details of insects and flowers for scientific documentation to creating unique and artistic shots in commercial and fine art photography.
What are some techniques for capturing macro photographs with a smartphone?
Start by using a clip-on macro lens for your phone. Ensure good lighting and use the phone's manual settings to adjust focus. Stabilize your phone to prevent shaking, which can be done using a small, portable tripod.
Can you provide examples of macro photography?
Examples of macro photography include close-up shots of a bee's eye, the texture of a leaf, or the intricate patterns on a butterfly's wings. These images highlight details that are usually invisible to the naked eye.
What is essential to understand when performing macro photography?
Using proper lighting is crucial to avoid shadows. Stability is key, so use a tripod or other support. Familiarize yourself with magnification ratios, such as 1:1 and 1:2, to achieve the desired close-up effects.


