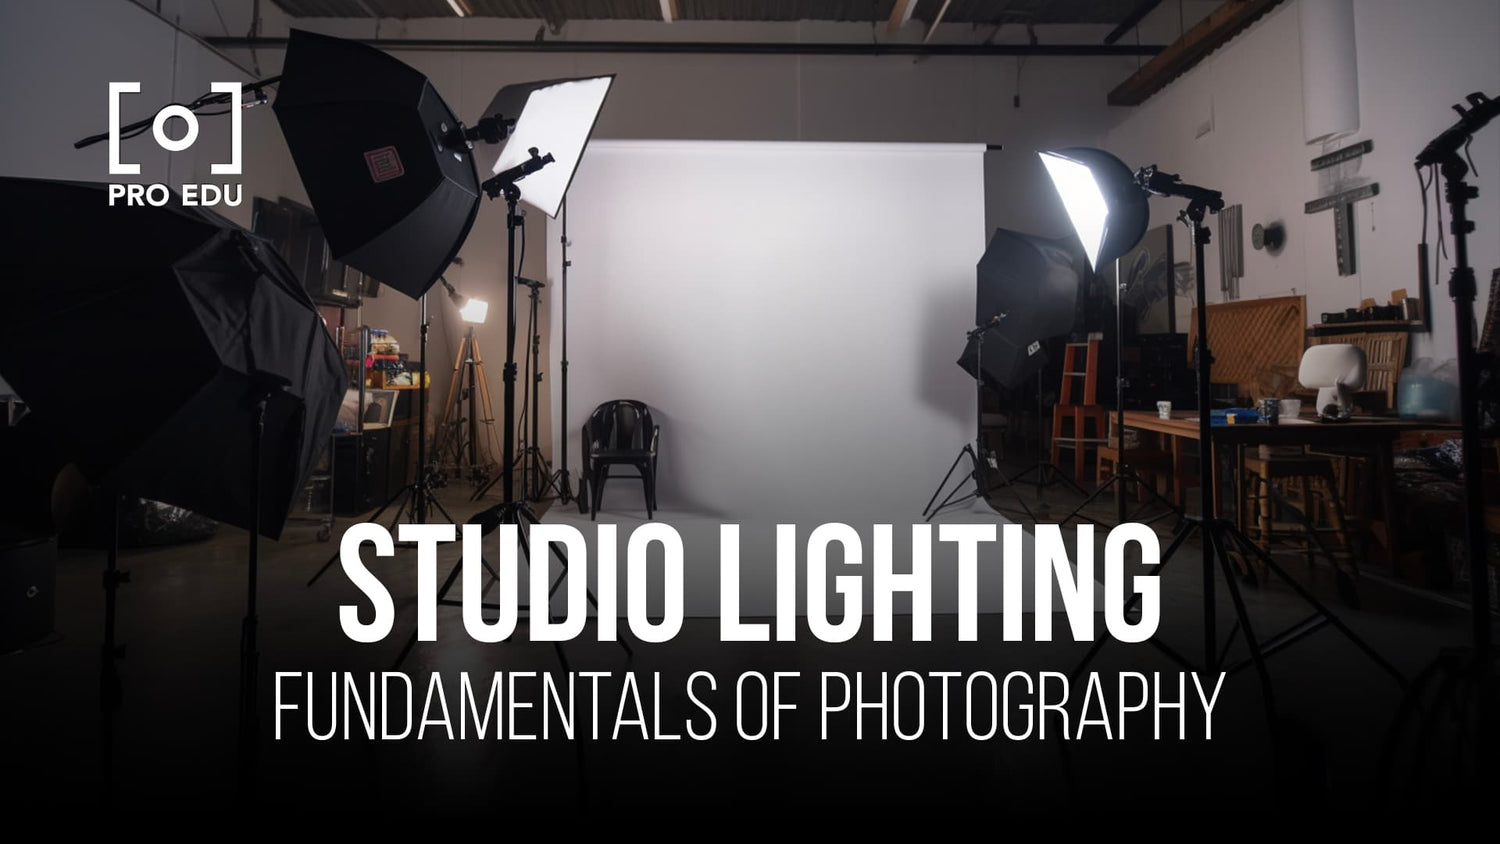
Studio Lighting Essentials: Crafting the Perfect Photographic Environment for Professional Results
Creating the perfect photographic environment requires a strong foundation in studio lighting essentials. Understanding how various lighting equipment and techniques can shape and elevate your images is vital for producing stunning photographs. By gaining knowledge about the role of natural and artificial light, photographers can craft a well-balanced and visually appealing scene.
As any experienced photographer will tell you, mastering studio lighting is a process that requires practice and experimentation. From simple setups with a single light source to more complex arrangements combining multiple lights and modifiers, it's crucial to have full control over the lighting in your shooting space. By testing out different techniques and learning about essential equipment, you can create a tailor-made photographic environment that best showcases your subject.
Key Takeaways
- Studio lighting knowledge is crucial for crafting visually appealing photographs.
- Experimenting with different equipment and techniques will help you gain better control over the lighting in your shooting space.
- A well-balanced combination of natural and artificial light can create the perfect photographic environment.
Understanding Studio Lighting
Light Quality and Its Importance
When setting up our studio for photography, light quality is an essential aspect to consider. The quality of light can affect many things such as sharpness, texture, and the overall mood of the image. To create stunning photos, it is vital to understand the importance of light in photography.
Different light sources can produce various light qualities, such as soft or hard light. Soft light can help create gentle transitions between shadows and highlights, while hard light is known for producing strong contrasts. By controlling light quality, we can manipulate the desired outcome and visual impact of our photos.
Using a Light Meter
A light meter is a valuable tool to ensure proper exposure and balance in our studio lighting setup. It helps us measure the amount of light, ensuring our subject is correctly illuminated for the desired outcome. Using a light meter can significantly improve the final image quality by providing consistent results and saving time in post-processing. This guide elaborates on various photography lighting equipment, including light meters.
Continuous Lights vs Flash
There are two primary types of studio lighting to consider: continuous lights and flash. Continuous lights provide constant illumination, allowing us to see the effect of lighting on our subject before capturing the photo. They are particularly useful for beginners and when shooting videos. However, continuous lights may generate heat and require more power.
On the other hand, flash lights (or strobe lights) give a burst of light only when the photo is taken. They offer more control over the intensity and duration of the light, and a greater power output than continuous lights. Flash lights are often preferred by professionals for their versatility and control in achieving the desired photographic effects.
Each type of light source has its advantages and drawbacks. Thus, it's crucial for us to consider our needs and preferences when setting up our studio lighting environment.
Studio Lighting Equipment
Softboxes and Umbrellas
Softboxes and umbrellas are two essential lighting modifiers that help to create a soft, diffused light in a studio setting. Softboxes come in various shapes and sizes, and they work by enclosing the light source and directing the light through a diffused panel. This creates a more even and flattering light on the subject. Digital Photography School provides a comprehensive guide on how to choose the right softbox for your needs.
Umbrellas, on the other hand, are lightweight and portable light modifiers that either bounce or diffuse light. They come in two types: reflective and shoot-through. Reflective umbrellas bounce light off their inner surface onto the subject, while shoot-through umbrellas allow light to pass through the fabric and diffuse onto the subject. You can experiment with different sizes and types of umbrellas to find the ideal lighting setup for your photographic environment.
Flash and Speedlight
Flashes and speedlights are essential lighting sources for studio photography. Flashguns, also known as studio flashes, are powerful and versatile light sources that can be used as key, fill, or background lights. You can adjust the power output to suit your needs, and they often have modeling lights to help with focusing and pre-visualizing the final result.
Speedlights are smaller, battery-powered flash units that can be mounted on a camera's hot shoe or used off-camera with a light stand, providing quick and portable lighting options. Digital Camera World offers helpful tips on studio portrait lighting setups using flashes and speedlights.
Light Stands and Modifiers
Light stands are essential for securely mounting your lighting equipment, such as flashes or speedlights. They come in various heights and styles to accommodate different studio requirements. Tripods, for example, can be used for lightweight portable setups, while heavy-duty stands are more suitable for larger studio setups.
Modifiers, like softboxes and umbrellas, help shape the light to create the desired effect on your subject. Reflectors are another modifier useful for directing and bouncing light back onto the subject to fill in shadows. According to this beginner's guide, it's essential to invest in a selection of light stands and modifiers to enhance your creativity and versatility in a photography studio setting.
Essential Lighting Techniques
https://www.youtube.com/watch?v=coqlcCyxQ5k&embed=true
Key Light Usage
The key light is the main light source in a studio setup. It helps to define the subject's shape and features, as well as create depth in the image. When properly positioned, the key light helps to enhance the subject's facial features, providing a three-dimensional look. Using light modifiers, like silver brolly, is significant for controlling the light's intensity and direction.
Backlight and Rim Light
Another essential lighting technique is using a backlight, which is positioned behind the subject. It creates a halo effect, separating the subject from the background, and adding depth to the image. A rim light, which is a type of backlight, shines directly on the subject's edges, producing a more dramatic effect. Experimenting with different lighting directions will help you determine the ideal backlight and rim light setup.
Rembrandt and Split Lighting
Rembrandt lighting is named after the famous painter, who used this technique in his portraits. In this setup, one light source is positioned at a 45° angle and about six feet high to create a distinctive triangular patch of light on the subject's cheek. A reflector is placed opposite the light source to bounce light back into the shadow side, reducing contrast and creating depth.
Split lighting, on the other hand, divides the subject's face into two equal halves, with one side well-lit and the other in shadow. This technique is ideal for creating dramatic, moody portraits. Using a fill light can help to soften the overall effect by reducing the contrast between the lit and shadowed areas.
By incorporating these lighting techniques in your studio setup, you can craft the perfect photographic environment for your subject, adapting to different styles and preferences to bring your creative vision to life.
The Role of Natural and Artificial Light
Natural and Soft Light
Natural light refers to any source of light that is created by the sun. Soft light is a type of natural light that has a gradual transition between light and shadows. This type of lighting is often desirable for photography as it gives subjects a more even and flattering appearance. We can achieve soft lighting by utilizing overcast days or using diffusers to scatter sunlight in a controlled manner.
Artificial and Hard Light
Artificial lighting includes any light sources created by humans, such as tungsten or fluorescent lights. Hard light is a type of artificial light that has a sharp and direct transition from light to shadows. This type of lighting can create dramatic effects, emphasize textures, or add depth and contrast to an image. To achieve hard lighting, we can use focused, high-intensity light sources without diffusion materials.
Understanding Ambient Light
Ambient light is the general, overall illumination in a scene. It can come from natural sources, artificial sources, or both. In photography, ambient light sets the base exposure, providing a context for additional light sources we choose to introduce. To create a balanced and harmonious photographic environment, it is essential to understand and work with ambient light.
When working with natural light, factors like time of day, weather, and surrounding objects can affect the quality and direction of ambient light. Conversely, with artificial lighting, we can control the intensity, color temperature, and placement of light sources to create the desired ambiance.
In conclusion, mastering the use of natural and artificial light, along with understanding ambient light, is crucial for crafting the perfect photographic environment. This knowledge will enable us to make informed artistic decisions and achieve stunning images in various lighting situations.
Creating the Perfect Photography Environment
Studio Work vs Outdoors
When it comes to photography, the environment is critical, and we can either choose to work in a studio or outdoors. Studio work allows us more control over variables such as light, background, and overall scene. On the other hand, outdoor photography involves working with natural light, weather conditions, and landscapes, which can create unique, dynamic images but may be harder to control.
Positioning for Portraits and Product Photography
In both portraiture and product photography, positioning is crucial. For portraits, we strive to create a flattering angle while considering lighting and camera settings that best highlight the subject's features. In product photography, our goal is to convey the product's form and features effectively. Seven essential elements for photography home studio can help us achieve ideal positioning for these types of shots.
- Portraits: Keep the subject at an angle to the camera, utilize natural or studio lighting, and consider the background.
- Product Photography: Position the product for optimal light exposure, use a neutral and clean background, and employ techniques like softboxes to avoid harsh shadows.
Understanding Contrast and Backdrops
Contrast is a vital component in photography, and backdrops play a significant role in creating it. We can create soft or dramatic contrasts by manipulating lighting or incorporating different color backdrops.
- Doubling as a backdrop: A background can either support or distract from the subject, depending on its color, texture, and complexity. Neutral tones like white, gray, and black are popular choices and collapsible backgrounds are easy to work with.
- Contrast: Contrast can emphasize the subject or draw attention to specific elements in the photograph. Low contrast images appear soft and muted, while high contrast images are dynamic and bold. Manipulating lighting and color can help achieve the desired contrast level.
Frequently Asked Questions
What are the key components of a well-lit photography studio?
A well-lit photography studio typically includes a combination of main lights, fill lights, and background lights. Main lights are the primary source of illumination, while fill lights help to reduce shadows and create a balanced exposure. Background lights ensure your backdrop is evenly illuminated, tying the whole scene together. Proper positioning of these components can greatly enhance your final images.
How do different light modifiers affect photos?
Light modifiers, like softboxes, umbrellas, and reflectors, are used to sculpt the light quality, direction, and intensity in a studio setting. Softboxes create diffused, even light that's flattering for portraits; umbrellas provide a wider, but still diffused, light coverage; and reflectors bounce light back onto your subject, filling in shadows and balancing exposure. Experimenting with these tools will help you achieve a desired look in your photos.
Why is studio lighting crucial for professional results?
Studio lighting allows you to create controlled, consistent, and high-quality images, regardless of external factors like weather or time of day. By mastering studio lighting techniques, you can ensure your subject is well-lit and properly exposed, ultimately producing a more polished and professional result. It empowers you with creative control and is essential for expanding your skills as a photographer.
Which types of lights are essential for a photography studio?
There are several options for studio lighting, and each has its pros and cons; however, some essential types include LED lights, strobes, and continuous lights. LED lights are energy-efficient, versatile, and lightweight, making them a popular choice for many photographers. Strobes are more powerful and adjustable, ideal for freezing motion or creating dramatic effects. Continuous lighting is suitable for beginners, as it allows you to see the final result before the shot is taken.
How can I arrange lights for optimal product photography?
For product photography, start with a single light source placed at a 45-degree angle to the subject. This provides a good balance of highlights and shadows, creating depth and three-dimensionality. After that initial setup, consider adding fill lights or reflectors to control the appearance of shadows. You might also want to include a background light for seamless, evenly-lit backdrops. Feel free to experiment and adjust the configuration to best suit the specific object you're photographing.
What's the difference between continuous and strobe lighting?
Continuous lighting emits light continuously, making it easier to see the final result before taking the shot. It's generally less powerful than strobe lighting but suitable for beginners and videography. Strobe lighting, on the other hand, produces powerful bursts of light, essential for freezing motion or creating dramatic effects. It often requires a more in-depth understanding of lighting principles, but can produce stunning results when used correctly.


