PORTRAIT PHOTOGRAPHY LIGHTING 101: Rembrandt Style
"If you want something to look interesting, don't light all of it.” – John Loengard
Rembrandt light has been one of the most enduring light patterns for portraiture since it was popularized by Dutch painter Rembrandt Van Rijn in the 1600s, so it was natural that portrait photographers would mimic this light.
WHAT IS REMBRANDT LIGHT?
Every portrait photographer wants to create beautiful light that captures the features of their subjects and tells a story. There are as many lighting techniques as there are photographers, but one of the most enduring key light patterns is the basic Rembrandt lighting setup.

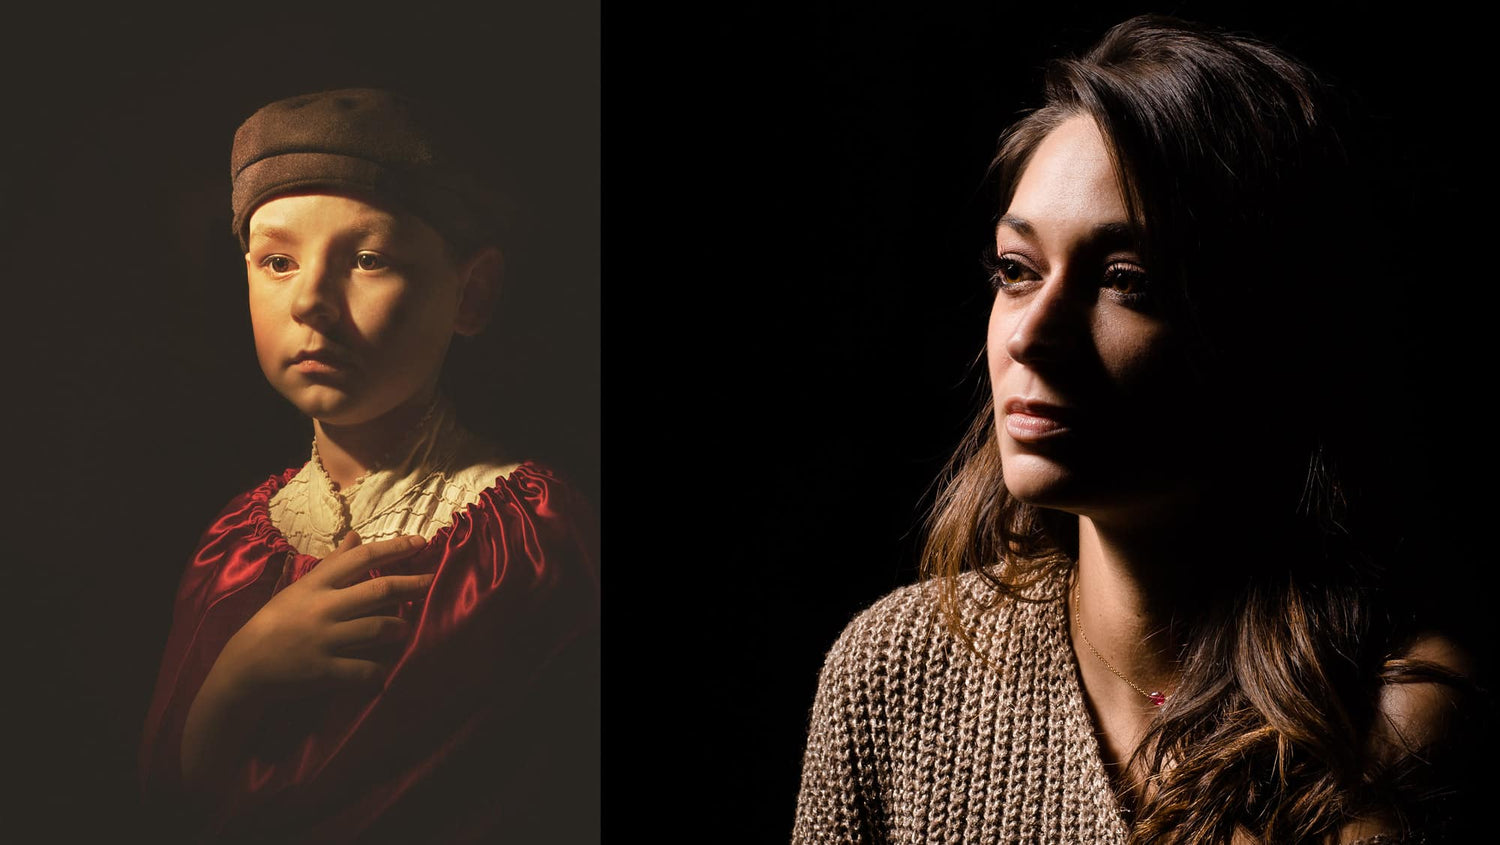
Rembrandt light is characterized by the little triangle of light that appears on the cheek below the eye on the side of the face opposite the main light source. This is the result of the nose casting a shadow across the face that connects with the shadow of the cheek, lip, and jaw.
This light pattern is flattering to many face shapes, creates depth, and accentuates form. It’s still one of the most commonly used light shapes, and a technique every photographer should master.
Rembrandt Van Rijn, self portrait
HOW TO CREATE REMBRANDT LIGHT
Very simply, Rembrandt light can be created by placing the light approximately 45 degrees off-axis from the subject’s nose at eye level, then raising the light so it creates a shadow longer than nose. Adjust the angle and height until you create the light triangle on the opposite cheek.
There should be just enough light in the eye on the shadowed side of the face that the eye is visible and looks evenly lit when compared to the eye on the opposite side of the subject.

Like any light pattern, Rembrandt light can be used broad or short with a single light source.
Broad light illuminates the face from the on-camera side of the face. Short light illuminates the face on the off-camera side of the face.

For broad Rembrandt light, start with the light about 45 degrees from the subject’s nose toward the camera, then move it closer or farther back until you have a triangle of light on the subject’s off-camera cheek.
For short Rembrandt light, start with the light about 45 degrees from the subject’s nose away from the camera, then move the light closer or farther away until that magical little triangle appears.
The side of the face away from the camera will be fully lit, while the side of the face nearest the camera will be mostly in shadow.
This is especially flattering for people with wider faces.

Broad Lighting Rembrandt Lighting

Short Lighting Rembrandt Lighting
"Light makes photography. Embrace light. Admire it. Love it. But above all, know light. Know it for all you are worth, and you will know the key to photography."
— GEORGE EASTMAN
TOO HIGH AND TOO LOW LIGHTING
The look of Rembrandt lighting can also change depending on how high or low the light is set. Portrait photographers will often be careful to put the light only high enough that they can retain illumination and catchlights in the subject’s eyes, but it’s not an absolute necessity.
As with any lighting decision, the photographer’s intention comes into play. If you want to cultivate a sense of mystery, drama, or danger, you could allow the client’s eyes to stay darker.

Too High

Too Low
LIGHTING TOO FAR FOR REMBRANDT
You can tell when you’ve moved your light too far in either direction because you’ll lose the triangle of light on the subject’s face. The shadow from the nose will get too short, resulting in Loop Lighting, or close off the triangle fully, resulting in Split Lighting.
All that’s needed to bring the shape back is to move the light or ask your subject to move their head.

Split Lighting Too Far

Loop Lighting Too Far
HOW TO MODIFY YOUR REMBRANDT LIGHTING
You can make the same modifications to Rembrandt Light you would make to any other lighting pattern. Rembrandt light can be hard or soft. You can use fill light, accent light, gels, and reflected light to modify this light shape.

USING FILL LIGHT
Fill light can be used to manage the ratio between the highlight and shadowed side of the face. Strobe, reflectors, V flats, and negative fill using a black V flat or other black material are all modifiers you can introduce to finesse the light pattern.

Strobe Fill Example

REFLECTED FILL Example

How To Use Accent Lighting With Rembrandt

Rembrandt With an Accent Light with Strobes

Rim Lighting Example Rembrandt Light with Strobes

Hair Light Rembrandt Lighting with Strobes

Gelled Light Rembrandt Lighting with Strobes
Conclusion
Rembrandt lighting is a versatile, flattering, classic portrait light that any photographer can create and use, either in studio or with natural light. Mastering this technique will give you several options for flattering any client, creating depth, and making compelling portraits. And when you master the Rembrandt light, your portraits are instantly more captivating and compelling. With this tutorial in your pocket, you'll be able to create stunning images with any client that will leave them looking their best - without much post needed! Learn more and explore dramatic lighting today by downloading our tutorial "Dramatic Portraiture" with Chris Knight You can thank us later for helping you make great photos happen.


