
Luminosity masks can be used for all kinds of post processing effects, from color grading to adding contrast. But one of the fastest and most helpful uses for luminosity masks is highlight protection.
If you’ve ever photographed a scene that is full of light or taken a portrait backlit by a bright sky, you probably know the struggle of perfecting your image while protecting the highlights. It’s far too easy to fully blow out a sky while making adjustments to things like contrast. This is where luminosity masks can save the day.
In his tutorial Advanced Skin Retouching, Nino Batista shares a quick way to create a luminosity mask that protects the highlights while he edits. Since backlighting is one of the lighting styles he enjoys, he’s had to perfect ways to protect highlight areas while still having the freedom to use other techniques. And while there are several ways to make a luminosity mask, Batista finds this technique quick and accurate.
Before you start working with luminosity masks, though, it’s good to know exactly what they are.
What is a luminosity mask?

Quite simply, a luminosity mask is a mask created to affect only certain tones, such as blacks, darks, midtones, highlights, or whites. You can even make luminosity masks for those in-between tones, like medium highlights, or dark midtones.
It does this by creating a greyscale map of luminance, where the white areas allow editing adjustments to show through the mask, and the dark areas conceal adjustments.
Grey areas will allow some of the adjustment to affect the image, but it will be subtle. The closer the tones are to pure white, the more the edit will affect the image.
Why use a luminosity mask?
It may initially sound complicated, but luminosity masks are relatively easy to create, and are very powerful tools in a retouching bag of tricks. They allow you to apply effects and adjust specific tones with a greater amount of control than an average layer mask. Once you get the hang of it, you can create luminosity masks for even the most complicated image.
They can also speed up your editing process because they create highly detailed masks without needing to paint in every detail by hand. You can still paint in detail if you need to, but much of the leg work is already done for you.
Create your mask
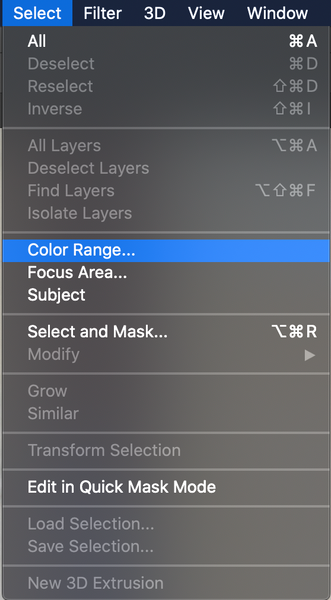
Batista creates the mask by going to the top menu bar and choosing Select > Color Range > Highlights. This ensures a mask is created based on the brightest parts of the image.
Move the Fuzziness and Range sliders in the dialogue box to ensure the selection affects only the parts of the image you want to protect. Click ‘Okay.’ You should see the selection, like marching ants, around the brightest parts of the image. Create a new adjustment layer from the adjustment panel you’ll use to protect the highlights, like Levels or Curves.

In the layer panel, you should now see a new layer with your recently created mask. If you Option+Click the newly created layer, you’ll notice the mask is still white on the areas you want to protect. Press Command/Control + I to invert the mask. This will turn the white areas black, protecting them from adjustments.
Once your mask is in place, it’s time to start making your adjustments. However, just because your brand new luminosity mask is guarding those highlights, that doesn’t mean you don't need to be careful with adjustments. You still need to keep a close eye on the transition areas where your highlights begin, because you can get halos around those areas if you push things too far.
You can also use the luminosity mask you've made to create selections of different areas of the image for other editing techniques, such as dodging and burning or to blend exposures.
Fine tune it
If you need to make more minute adjustments to the mask once it’s created or in place, you can press Option + click the mask, then press Control/Command+M. This brings up a curves adjustment layer that will let you fine tune the mask and perfect transitions and light or dark areas.

If you need to make multiple types of adjustments, such as color or saturation, without affecting the highlights, you can use the same mask on any adjustment layer you create. Simply hold down the Option key, and drag the mask to the new layer. Once the mask is in place, release the Option key you’ve a multipurpose mask that will protect your sky and your highlights.
Conclusion

Nino Batista uses this trick to control the highlights in environmental portraits, but it can be used for editing photography of any style, from landscape photography to food photography or composite art.
All editing takes time, but professional photographers must remember that the longer editing an individual photo takes the less money they earn per hour. More streamlined workflows mean more time spent on the activities that actively earn money, such as marketing, shooting, and customer service.
Nino developed a Photoshop Plugin called Lumizone with his team to combat just this problem, and it will be available soon in the PRO EDU store! If you want updates about the release, be sure to sign up for the PRO EDU newsletter or sign up for the early release of Nino's tutorial.
Have you ever used luminosity masks to edit your photos? What is your favorite technique? Sound off in the comments.


