
As photographers, especially those that handle their own post-processing, many of us don’t exactly enjoy the hours spent in front of a screen.
I’m not just speaking for myself when I say that the aim for most is to minimise screen time in favour of being able to use our time shooting and creating more
To implement and optimise a good RAW processing workflow will first and foremost do just that – save you time.
Furthermore, the ability to show your images in near real-time to clients and team members will not only make you look professional but - again - save hassle and time for everyone involved.
Implementing RAW image editing - organising your files and saving your steps for processing RAW images - will present huge benefits to your turnaround times and sanity, especially for large batches of images.
The tools and functions of RAW processing software are countless. Here is why you should streamline your RAW process right away, and which tools to implement!
What Is A RAW Image?
RAW data is good “elastic data” It is resilient to changes, and flexible for those clients unsure of which direction to go in.
Without getting overly technical, the difference to you as a photographer is vast when it comes to the potential of a RAW file compared to a far less flexible format like JPEG. RAW files have bundles of flexibility when it comes to changes in exposure, contrast, colour, and other edits.
On a technical level it’s easy to explain. A JPEG file has a mere 256 steps from either end of the scale of pure black to pure white. A RAW file can contain as many as 64,000+ steps. Trying to flex the limited range of a JPEG will lead to a degradation in image quality, which I am sure is undesired. Even a simple correction like changing the white balance is severely limited in a JPEG file.
A JPEG has a predetermined contrast curve and colour look determined as a “one solution fits all” from the manufacturer. It’s not the way forward to delivering optimal results for yourself and your clients.
Of course, you can “get it right in camera” and that should always be the goal, but even the most perfect JPEG doesn’t mean the end of the creative process.
Colour grading, retouching, changes to contrast, and exposure (no matter how minute!) are still valid as tools to realise the final shot. Capturing images in RAW retains the image quality needed to deliver the best result. Furthermore, it gives the flexibility to experiment with several different creative looks and effects.
But doesn’t shooting in RAW files slow the whole process down? You could argue some years back that larger RAW files would mean a slower workflow. Capturing direct (tethered) to a RAW processing application these days is instantaneous, even with large megapixel counts. Browsing RAW files, editing, and exporting now is equally seamless.
Any RAW converter will give you the ability to save a “preset” if you want to dial in your own pre-determined looks. So, there is no time penalty here either. It’s simply about getting a good workflow in place.
Tethering
The processing of your RAW files isn’t technically confined to “post” production and hence don’t just start once the shoot is finished. To see your images appear in near real-time, tethered straight into your software has countless advantages for many creatives.
The first big benefit of tethering is the improved and instant visibility of your images while you take them. To have your photographs appear on a screen much larger than the one on the back of your camera is not only beneficial to yourself but also those working with you.

While you keep an eye on your lighting and camera settings, your team of creatives, from makeup artists to stylists, can see their individual work in detail, able to react to any necessary flaws and adjustments.
In most genres of photography, but especially close up beauty work, fixing issues on set and getting your image to look as good as possible straight out of camera saves you a ton of time in post-production. After all, most shoots are a collaborative effort so sharing the outcome and having people contribute live will produce the best results! Teamwork makes the… you get the idea.
When it comes to clients on set I want to be able to present the images they’re paying for in the best possible way. Making subtle adjustments to the first RAW files I take during a shoot and automatically having these applied to every picture taken after shows the client results that are as close to the finished image as possible whilst shooting.
Clients squinting at a tiny camera screen while you try to explain what an image would look like after retouch is not beneficial in any professional studio environment.
Your clients can see what they get, communicate concerns and avoid nasty surprises from getting a contact sheet several days after the shoot, realising they wanted different hair and no hands in shot…
Things To Tweak in your RAW Files
RAW processing tools are countless and every photographer uses their post-production software of choice to the extent that is most suited to their style and genre.
Here are the tools that make my life as a beauty photographer easier and can be applied to most other fields.
Image Correction
Adjustments I will do at the beginning of a shoot are those that can be globally applied to the whole set of images I’m intending to take.
I’m a big campaigner for “getting it right in camera” for reasons mentioned above. Just because something CAN be fixed in post doesn’t mean it has to be. Just like in old school darkroom photography, where process method and desired effects are chosen, there is no shame in fine-tuning your images until you arrive at a look that suits your creative vision.
Exposure, contrast and saturation are a baseline starting point to get more out of your images. Enhancing shadows and highlights by adjusting the high dynamic range is another powerful tool.
To save even more time, regularly used adjustments can be saved as a style. When shooting for the same client on different days or when you simply “like that look” you achieved, a saved style can be applied to past and future sets of images with ease. Styles allow you to set start shooting with the desired adjustments at an instant.
Colour Correction
Colour corrections are an adjustment that can either be done globally to batches of images or applied to specific areas of a picture only.
If the effect is global and consistent for the set I will make those adjustments at the beginning of a shoot, having them applied to all consecutive pictures
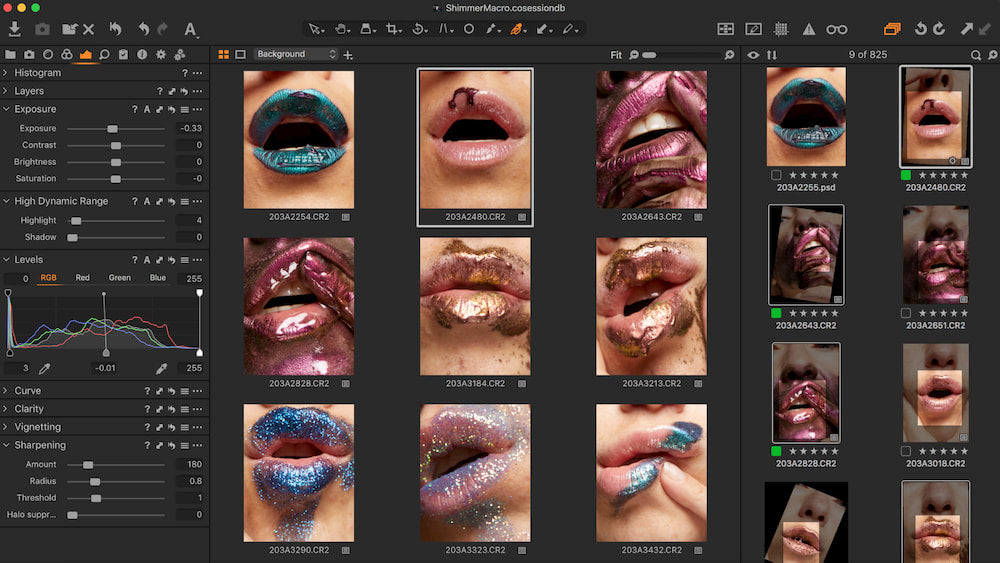
One of the most useful time-savers in regards to colour management, found in Capture One, is the Skin Tone tool as part of the Colour Editor tab. Beauty and portrait photographers, in particular, will agree that most humans have varying skin tones when it comes to face, ears, neck and hands. This tool allows you to unify your subject’s tones across the image in just one slide of a button, saving a bunch of time in fiddly post-production!
If corrections are specific to an area I will tackle those after a shoot, as a little more care is required. Local adjustments can be assigned to parts of the image, typically by picking a colour via the eyedropper tool or masking the area to be corrected. In either case the chosen criteria might change from one image to the next and therefore doesn’t make it an adjustment I want applied to a whole set.
For example, setting a physical mask to a model’s lipstick in order to correct its shade will only work repeatedly when copied and pasted into another image if your subject’s lips are in the exact same position again. And that doesn’t usually happen with human subjects… These adjustments I will do individually post-shoot.

Layers/ Masks
While above-mentioned colour correction masks are physical shapes and need to be re-assigned for each image, other masks are perfectly applicable for batch work.
Radial and linear masks are a good example and used for vignettes as well as local creative effects.
Assigning a mask to a specific luminosity range via a luma mask furthermore allows you to adjust your shadows, midtones, and highlights. Since THIS mask isn’t assigned to a physical shape but rather to the parameters and range you predefine, it can be copied and applied to a range of images.

Organisation
Having an assigned, organised place for your images to live in is not only convenient but saves you time looking through them.
RAW processing software offers convenient tools for session setups and naming, selection and culling of your images as well as fast export and processing options
Session Setup & Naming
Getting organised before the shoot pays dividends in not having to think about your setup when the day of the shoot comes. Software like Capture One is designed to make setting up easy with their session workflow style of file management.
A basic “session” setup, even without personalising it, creates a nest of folders in just one click, separating future files into Captures, Outputs, Deletes (Trash) and Selects. You can expand on these options easily by dividing up your folders into specific subfolders.

The last things I want to be thinking about on or after the day are the various naming conventions, so this is another part of the process I like to standardise and setup prior to the shoot.
You can personalise file names in countless different ways, my personal go-to for commercial clients is a simple Date – Client Name – Location setup:

The goal is to be able to set up, plug in your camera, and be ready to go instead of messing about in menus and repeating the same setups shoot after shoot. Work smarter not harder.
Selection & Culling
When it comes to the selection and culling of your images there is no standard way of doing so. This step is mostly down to personal preference. Whichever process is your favourite, using your RAW processing software to sift through and discount large numbers of images will make their future management a whole lot easier.
I made it a habit to cull and select during the shoot and after every look. While the next makeup look is being created I go through the “fresh off the press” images, delete anything that isn’t useful or out of focus and use the star rating and colour rating tools to make selections.

The colours are usually my own selects and the star rating the choices of the client.
For personal projects and tests, I scan the images quickly and “green” them. On further inspection (for example sharp vs undesirable focus) I “red” the best ones of those. And lastly, when looking at the red selects as a whole set I can identify repeats in poses and expressions and make one last, narrower selection of “blues”.
Tagged or rated images can then easily be filtered into solitary views or smart collections made just to show those.
Export & Processing
When it comes to exporting and processing your images, this can be hugely time-consuming. Different clients demand different output adjustments, formats and resolution. Some clients require proof images for selection first. This mostly varies from client to client. Laboriously going back and forth into an export dialogue is not efficient for this.
Streamline your output by looking into the possibilities of creating an export preset. Returning to the example of Capture One, this is made easy with Process Recipes. I can set up any number of different export types and select 1 or several recipes and export simultaneously.
Conclusion
Optimising your RAW process is first and foremost designed to save you time. Time we can use to plan, network and shoot.
Having identified the importance of shooting in RAW format to begin with, streamlining its consequential treatment will save you a ton of hassle.
Start getting the most out of your RAW processing software by using its powerful tools for image editing, colour toning, masking and organising in your advantage, especially for batches of images.
Save even more time by saving regularly used adjustments as presets to get future shoots set up ready to go in seconds.
Using RAW processing software to shoot tethered gives you, your team and your clients the possibility to see the results instantly. Having this visual information available makes corrections on set and immediate image edits a breeze, and portrays your work in its best light. Avoiding mistakes as they happen save time and effort to fix them later.
Organising your files as well as selecting, naming, and exporting them in a format that suits you and your clients in one click is a priceless tool for the busy professional!
Feel free to share any tips, questions and feedback in regards to your RAW processing with me on @tina_eisen.

90 DAYS OF CONTENT
Over 90 days we are going to be working with some top artists to explore recommendations giving you solutions to problems we have all gone through. We are paying the writers a really fair wage for every original article, and we are writing about things that aren’t sponsored by any brand. There is no one but our opinion behind it. We would love it if you do use our affiliate links here so we can continue to keep writing awesome articles that you can trust.


