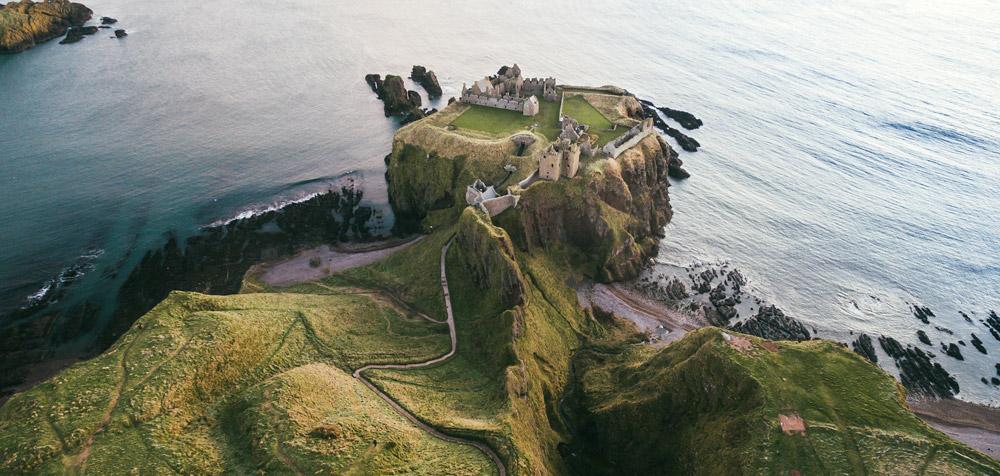
When I was a kid, I used to dream about what it would be like to live like a bird, flying high above the rest of the world. The idea of seeing the world from above has always fascinated me.
So, when drone photography became widely accessible, I jumped at the chance to add aerial landscapes to my arsenal.
The introduction of drones has undoubtedly been one of the biggest shifts we’ve ever seen in photography. What used to require a trip in a helicopter and a DSLR can now be achieved with a battery-powered device that you can fit in your pocket.
Drones are now widely used by enthusiasts and commercial photographers alike, whether it’s for landscapes, real estate, or wedding photography. And, despite the low barrier to entry, aerial photography is a real skill, and achieving great results isn’t just a case of taking flight and hoping for the best.
This guide will cover:
- Drone safety and regulations
- How to choose a drone
- Aerial photography techniques
- Settings for drone photography
- Drone accessories
Type of Drone
Aside from beginner gear, there are two main types of drones; camera drones and racing drones.
Camera Drones
Camera drones, as the name suggests, drones with cameras made for shooting stills or video and usually sit in the $500 to $1500 range, with some exceeding $2000. They’re very intuitive to use even for beginner drone operators and if you’ve ever played a video game, you’ll be able to fly drones with cameras.
They’re designed to provide a steady platform for the camera, whether that’s built-in or added on. Most of the widely available drones with cameras feature in-built cameras with a gimbal which helps to produce a sharp and stable image. As well as utilizing gimbals to stabilize the camera, the drone will connect to several satellites which help to stabilize its position in the sky.
As drones have become more advanced, their features have become more impressive. Top-of-the-line camera drones now have the ability to follow preset flight paths, follow moving objects, and avoid collisions.
On average, drones with cameras will have a flight time of around 20 minutes. That said, the total flight time can vary depending on how much you’re filming, how warm it is, and even how windy it is where you’re flying.
Racing Drones
Racing drones (or FPV drones) are becoming increasingly popular, in part due to the rise in competitions and incredible cinematography being produced.
They’re usually smaller than camera drones, allowing for speed and agility over stability. What makes these drones so exciting (aside from crazy speeds) are the first-person-view headsets. A bit like wearing a virtual reality headset, these FPV headsets put you in the racing seat and allow you to navigate a course with precision.
On the whole, racing drones are cheaper than camera drones. At the low end of the spectrum, you can pick one up for around $100+, and at the higher end, you can expect a price tag of around $700.
USA Drone Laws & Regulations

Before you get caught up in the buzz of buying your first drone, let’s chat about some of the important considerations, rules, and regulations. I know, it’s not exciting, but it needs to be done.
Drones are getting more and more regulated and the laws are specific to each country. In this article, when I reference regulations, I’m primarily referring to drones laws in the USA.
Recreational Drone Laws USA
Here are some of the key recreational drone laws and regulations in the USA:
- You need to register your aircraft with the FAA
- You must only fly for recreational purposes and not commercially
- You must keep your UAS in line of sight
- Your drone must be under 55 lbs unless certified by a community-based organization
- Do not fly near other aircraft
- You can only fly in Class G airspace and if you need to fly in B, C, D, or E airspace then you will need to apply for airspace authorization
- Do not fly near emergency response situations
Commercial Drone Laws USA
Here are some of the key commercial drones laws and regulations in the USA:
- You need to have a Remote Pilot Certification for commercial operations
- You need to register your UAV with the FAA
- You must fly at or below 400ft
- You must fly at or under 100mph
- Do not fly directly over people
- You need to fly within Class G airspace
- You must not fly from a moving vehicle unless in a sparsely populated area
- Your aircraft must weight less than 55 lbs
Despite the strict regulations even for commercial drone flights, you can apply for certain waivers. A Part 107 waiver will grant you an exception to some of the regulations such as flying at night, flying beyond your line of sight, and flying over 400ft.
You can also apply to fly outside of Class G airspace by using LAANC to request airspace authorization. Drone Pilot Ground School has an excellent guide on this which covers the topic in detail.
The above information is by no means exhaustive and you should do further research. UAV Coach has compiled a master list of drone laws organized by state and county.
How to Choose a Drone

Finding a drone can be as overwhelming buying your first DSLR. Drones come in all shapes and sizes with different capabilities suited to a variety of different uses.
Like any other photographic equipment, the better the gear, the more pricy it will be, and what you buy will ultimately be constrained to your budget. As well as financial and technical considerations, there are also legal and safety steps to be considered when purchasing a drone.
Whenever I get asked “what’s the best drone?” or “what camera should I get?”, I usually try to avoid firing off specific suggestions. Ultimately, your unique application of the drone will dictate what drone you should choose.
For example, a hobbyist drone photographer who wants to use a drone to post images to Instagram won’t need anything near the level of a professional drone operator for big-budget campaigns. Also, most of the time, a hobbyist can’t justify spending as much money on a drone as a commercial drone photographer.
When I look at which drone to buy, I’ll take into account several key considerations like image quality, sensor size and type, flight time, and stability to name a few.
Image Quality
Your image quality will primarily be determined by the camera’s sensor size and how many megapixels it can produce. The DJI Mavic Air 2, for example, can produce images up to 48 MP whereas the Mavic Mini can produce 12 MP images.
The camera’s sensor size can influence how your drone handles low-light situations as well as dynamic range. Generally, larger sensors can handle a higher ISO without compromising too much on image quality.
Drone Size & Weight

For me, drone size and weight is a crucial factor that will influence my purchasing decisions.
I primarily use my drone for landscape photography which results in me carrying it in my bag while I hike up a mountain. Combine this with packing your DSLR, lenses, batteries, food, and whatever else, you’ll soon notice the weight of all your gear.
When I first started shooting with my DJI Phantom drone, I hadn’t properly thought through size and weight and I opted for a bulky drone that doesn’t fold down. Mine actually takes up a whole backpack on its own and I need a separate one for all of my camera gear.
Many newer drones can fold up to a small size and will even fit in a large pocket. However, if you’re not likely to be hiking with lots of equipment, you can maybe get away with something a bit bulkier.
RAW, DNG & JPEG
If you want to maximize what you can do with your images in post-production, you’ll want a drone that captures in RAW or DNG format. Both of these are uncompressed, high-quality image formats that give you more color and light information to play with.
Most decent new camera drones will allow shooting in RAW or DNG format. Some older or cheaper models will only capture JPEGs which I’d advise against unless your budget doesn’t allow for better.
If you want a better understanding of image file formats, take a look at PhotoUp’s guide to file format differences.
Max Flight Time
If you’re going for a mid to high-end drone, you shouldn’t expect much less than a 20 minute max flight time. Newer drones are not getting to the 30+ minute mark. For most situations, the difference between a 25 and 30 minute flight time isn’t going to mean much, especially if you have spare batteries with you.
Keep in mind, max flight time is usually listed without wind speed taken into consideration. On a windy day, your drone will eat up the battery life more quickly than on a still day.
Max Transmission Distance
Another consideration I didn’t think about when buying my first drone was the maximum transmission distance.
Some drones will have a max distance of 100-500m and some will be in the 5km+ range. Obviously, the further your drone can fly from you, the more flexibility you will have in terms of creativity for stills and video. Remember to be mindful of the law stating that you need to keep your drone within your line of sight.
Don’t get confused when reading spec lists. Max flight distance is not the same as the max transmission distance. Max flight distance refers to the drone’s battery when flying at a specific speed whereas transmission distance is how far your drone can be from your remote controller.
Best Drones for Photography

Since drones first came out, they’ve evolved massively and even year-to-year we can see some impressive improvements.
DJI Mavic 2 Zoom
The Mavic 2 Zoom by DJI is one of the best all-round camera drones for photography. Aside from being lightweight and extremely portable, the image quality produced is adequate for enthusiasts and professionals alike. It sports a 12 MP 1/2.3" CMOS sensor and can shoot video in up to 4k at 30fps.
DJI Phantom 4 Pro 2.0
The Phantom 4 Pro is an impressive piece of equipment at a higher price point, making it ideal for the serious professional drone photographer or videographer. While the lack of foldability will be a drawback for some, the Phantom provides a more rugged and durable device for those who will put it through its paces. The camera boasts an impressive 20 megapixels and 4k 60fps video resolution.
DJI Mavic Mini
The DJI Mavic Mini is one of the best affordable beginner drones on the market. It has a 12 MP camera and shoots video in 2.7k at up to 30fps. Even for professionals who don’t need very high-resolution images, you could get by with this bit of gear. It’s foldable, has a max range of 4km, and only weighs 249g.
How to Take Amazing Aerial Images

Similar to traditional photography, successful aerial photography requires skill, patience, timing, and an eye for composition. Despite how easy it is to fly a drone, getting a great image doesn’t often happen through luck.
Time of Day
Unless you’ve got a super high-end drone, I’ve found that most drones will struggle to handle harsh daylight and high contrast scenes. Most of my best images, like the one above, are taken during golden hour or on overcast days.
Since your dynamic range is lower, you’re able to capture more details in the shadows and highlights. Additionally, during golden hour there is a unique vibrancy and saturation to the image that is hard to achieve midday.
Lines and Patterns
Lines and patterns almost always dictate how I set up my aerial compositions. In landscapes, it’s amazing how an elevated view can highlight odd lines and patterns in the land that you simply can’t see from the ground.
Whether it’s an obvious leading line, like in the image of the rail bridge above, or more subtle, like in the image below, shooting lines help you to control how the viewer navigates their eye through your image.

Notice how your eye navigates that image. For me, my eye starts at the hut and is pushed up the image to the peak of the mountain. The more horizontal lines to the left and right of the peak help to push your eye back towards the center of the image.
Stay Low, Look Forwards

When you get a drone, the temptation is to stick it as high in the air as you physically can. Sometimes you can get can far better results by staying low and looking forward, almost as if you’re using your drone as a really tall tripod.
Exposure Bracketing
Since a lot of images have a small sensor and lower dynamic range, exposure bracketing will become your best friend.
Exposure bracketing is the process of taking multiple images at different exposures and then blending them in post-production. A lot of drones actually have an HDR feature which makes the process fairly automatic and will do the blending for you. If you’re confident enough, I’d recommend shooting the process manually so that you have more control over the end result.
As well as improving dynamic range, you can also increase your pixel count by stitching multiple images together as you would taking a panorama.
Manual Settings
I made the mistake of shooting everything in automatic for a while before I even realized I could manually control settings just like you can with a DSLR. Having full control over settings like ISO can help you drastically improve your image quality. When you’re in automatic mode, your drone can bring your ISO up too high (introducing lots of noise) or lower your shutter too much (introducing motion blur).
Get a Bigger Screen

Most drones make use of your mobile phone as the view screen, plugged into your controller. While this is handy, it’s not super practical for setting up compositions as it can get hard to see what you’re doing.
If you’re serious about producing good images, I’d highly recommend investing in a dedicated monitor for your drone, like the DJI ChrystalSky Monitor. They come in a variety of sizes and significantly improve the viewing experience.
If all you’re looking for is a bigger screen, you could actually use a tablet like an iPad. However, the dedicated monitors produce a smoother video display by using real-time optimized video decoding. In turn, this helps to reduce any jitters and latency.
Drone Camera Filters - Why You Should Use Them

As I mentioned earlier, many drones struggle in terms of dynamic range due to their small sensors. This can result in a lack of vibrancy in the colors and a lack of information in the highlights and shadows.
Filters for drone cameras act exactly like they do for DSLRs. In case you don’t know, filters are semi-transparent pieces of glass that attach over the glass of your camera’s lens. They can help you control the amount of light entering the camera, giving you more control over the image.
As with traditional cameras, you can use a few different kinds of filters with drones:
- ND filters
- Polarizing filters
- Hybrid filters
- Natural night filters
In most instances, an ND (neutral density) filter will make a big difference to your image quality. A lot of the time in drone photography, it can be hard to get get a fast enough shutter speed to properly expose your image. The ND filter will help you reduce the amount of light, avoid over-exposure.
If you want to reduce reflective glare or capture more saturation in bright colors (like the sky), I’d recommend investing in a set of polarizing filters. Designed to filter reflected light, polarizers can help you achieve effects you can’t fix in Photoshop.
Closing Thoughts
Drone photography makes a fun change from traditional photography and it can allow you to get more creative.
As always, safety should be your priority, especially when it comes to commercial drone photography. Aside from the rules and regulations, have fun with it. Your first few flights will be scary but trust your drone, relax, and go make something special.
Author Bio

Connor Mollison is a full-time photographer with a passion for exploring the highlands of Scotland in his free time. His love of landscape photography kick-started his career into commercial photography.
Website: https://www.connormollison.co.uk
Instagram: https://instagram.com/connormollison
90 Days Of Content
Over the next 90 days we are going to be working with some top artists to explore recommendations giving you solutions to problems we have all gone through. We are paying the writers a really fair wage for every original article, and we are writing about things that aren’t sponsored by any brand. There is no one but our opinion behind it. We would love it if you do use our affiliate links here so we can continue to keep writing awesome articles that you can trust.


