How To Change The Perspective Viewport in C4D
When working as a 3D artist, there are times that I like to change the focal length of my perspective viewport to match something similar to my final camera. Though this isn't always the case, it helps gauge compression and the base for composition as I work.
The default focal length of the Cinema 4D perspective viewport is 36mm, which isn't bad when navigating. It can be odd when viewing products at various distances due to the distortion of a wide-angle. Generally, I like to choose a longer lens for products when navigating 3D space to help visualize how compression would affect the model's appearance at various angles.
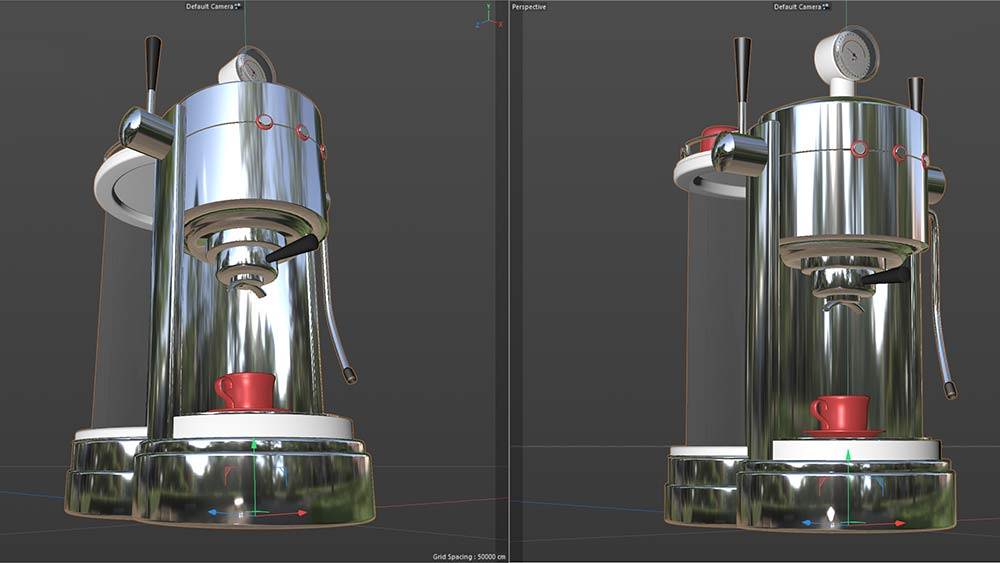
In the example below, the perspective view on the left is the default focal length of 36mm, with 85mm on the right. The compression of the longer lens helps quite a bit and looks closer to what I might actually use for a product shot.
The best part about that when you create a camera for rendering will inherit the focal length of the viewport, which is nice when wanting consistency between the two. I often explore cameras and composition this way.

CHANGING THE PERSPECTIVE'S FOCAL LENGTH
You can access the Settings for the viewport focal length by heading to your viewport menu (upper left of the viewport) and entering the "Options" Dropdown. Then head to "configure down at the bottom of the list.

In the Attribute Manager, you'll see the options for the viewport. Twirl the small chevron icon next to "linked camera" to access the focal length parameters for the camera.

By pressing the hotkey SHIFT+V, you will enter the same configure settings for the viewport that's mentioned above.
The easiest interactive way to change the focal length is by using a simple hotkey. By pressing 2 + Right Click and dragging, you will be adjusting your focal length. Pulling to the right will increase your focal length, and dragging left will decrease the length of your lens. You can see the adjustments made in the attribute manager as to where your focal length sits.
This method also works when having a camera in the scene if you're exploring focal lengths that way. I'll explore lens lengths more often than not by using the interactive hotkey above and round up to the nearest integer for my final adjustment.
CONCLUSION
Many aspects of photography play prominent roles in creating compelling imagery in CGI, regardless of subject matter. Everything from focal lengths, lighting, and composition needs to be pulled together to convey your message to an audience. Hopefully, this bit of information helps your camera exploration process a bit more smoothly as you begin to work with it.


