
In the land of the Photoshop vs Lightroom debates, there is an up-and-coming product that is finally ready to take Lightroom head on - Exposure X5. Originally developed as a film simulation software by the company Alien Skin (who have since changed their name to Exposure), Exposure X5 is now the mature, robust photo editing software we’ve been waiting for.
I’ve been an Exposure software user since Exposure X2 was released back in 2016. While it was a fun, creative way to run film emulations and play with textures (a la Sue Bryce), it wasn’t anywhere near the Lightroom challenger it is today. Let’s dive into an overview of the program, why it’s become my Lightroom replacement, and how I use it to create my fantasy images.
What Is Exposure X5 And Why Is It Important?
Exposure X5 is a RAW editing software program that has a simple, intuitive interface to allow us photographers to get down and dirty with the creative side of photo editing. Don’t let the simple interface fool you — this photo editor has some of the best creative tools I’ve seen across any of the ‘Big’ photo editing programs. Some of my favorite features include:
- 3D Color Masking: can we get a ‘Hell Yes’ for the ability to do masks according to Hue, Saturation, and/or Luminance? We sure can!
- Repositionable overlays: Built right into the interface, say goodbye to clicking a billion windows or having to export out of Lightroom and into Photoshop just to put an overlay or texture in.
- 500+ presets: No longer limited to just film emulation, Exposure X5 now carries hundreds of presets that do just about everything (and they stack on top of each other!)
- Bokeh panel: While also present in other programs (like Photoshop) there’s just something about the way Exposure’s software calculates and renders focus control that makes it appear more natural and more easily controllable than anything else I’ve worked with on the market.
- Robust customer support: It doesn’t take me more than a couple of hours to get an answer to a question and the company makes a determined effort to provide in-depth videos on all its tools.
Exposure X5 vs Lightroom: Where Exposure X5 Wins
Exposure X5 has taken the best of what Lightroom has to offer — a familiar interface, simple but sophisticated tools — improved them and then taken the additional step of stripping away the things I, like most photographers, absolutely hated.
Additionally, the company has a history of excellent customer service - getting feedback from the Exposure community and incorporating it into new release.

The Interface
There’s a couple of great things that Exposure has done with it’s interface. First, it’s familiar and intuitive. Those of us coming from the Adobe suite will find an almost identical set of controls and tools. For people like me who have trouble remembering what tool is buried where, Exposure has labeled just about everything — which makes finding things a breeze.
Second, are you tired of switching between Lightroom modules? Me too. Exposure’s entire system is built inside of one module. I don’t need to go to my ‘Library’ to view my entire collection of images and I don’t need to navigate back to the ‘Develop’ module to work on my photos. In Exposure, everything is laid out right at my fingertips.
The last advantage Exposure has in the interface is the customizability. Not a fan of where something is sitting? You can head into the settings and rearrange just about everything. Work on two monitors? Head to the preferences and set up a completely customizable second workspace.
They’ve set up four areas that Exposure calls “quadrants” that can be configured and customized. The quadrants sit in docks on the left and right side of the screen which can be minimized for optimal viewing. You can also segregate those docks onto a separate screen, allowing all of your editing tools on one screen and your image on the other.
Speed
The biggest win against Lightroom that Exposure has is speed. Lightroom (especially the new Lightroom Classic CC) has long been plagued by stories of the software chewing up CPU and RAM usage regardless of the size of the collection or catalog you’re using — a thing that other programs (looking at you Capture One) have been able to do with relative ease.
Exposure X5 has become the fastest program I use. I’m now able to get through hundreds of huge files in a matter of seconds rather than getting bogged down in Lightroom. Even when I’m elbow deep in layers on a 46mp file, X5 rarely slows down.
No More Complicated Import Process
Say hello to EASY. One of Lightroom’s biggest drawbacks was — and is — a hugely complicated import process. Do you select Collections? Folders? Sessions? What’s the difference?
Remembering the subtleties and differences between them could leave your head spinning for weeks. Even veteran Lightroom users have lost photos due to the complexity of it all.
Not Exposure. The software pulls your photography directly from your computer’s directory. No more complicated process of importing your images into the program. Simply navigate to where you store your photos on the computer, add them to the Folders panel, and go!
The developers at the Exposure took Lightroom’s process and made it clean, efficient, and what we’ve always wanted — easy.
Bookmarks
The ‘Folders’ panel also has another neat feature: Bookmarks. If you’re like me and tend to keep your photography organized by year or month, then you’ll often find yourself navigating back to the same starting place. By using Exposure’s ‘Bookmark’ feature, I can have those parent folders without having to click more than once.
Export Process
The ‘Export’ preferences also allow for (what I think) is a much more organized system for setting up custom exports. Exposure comes with pre-optimized profiles for Facebook, Twitter, Instagram, 500px, SmugMug, and more — a nice time saver for anyone exporting to these requirements often. For those of us on Wordpress or Squarespace, you can create custom export conditions to match each of your needs.

Advanced Masking
The 3-D color masking tool is one of the biggest advantages Exposure X5 has over both the previous iterations of the software and over Lightroom. Lightroom’s color and range masks are clunky and awkward — even in the best of times, I find myself fiddling with the brush tool to refine it. Forget about stacking or layering the masks.
Exposure’s 3-D masking is simple and gives me complete creative control with ease. It generates a mask using luminance, saturation, or hue — and you can either use Exposure’s predetermined range masks, adjust them yourself, or create your own.
It’s also easy to see where in the image your mask is taking effect. If you notice an error you can use the brush tool to clean up or apply the mask elsewhere. In the case that you need some extra support or training, Exposure has several in-depth tutorials to show you how to utilize this tool to its fullest.
If you need to apply the mask to different photos — simply copy and paste from one image to the next. The mask will automatically adjust its boundaries in the image — saving a TON of time. It’s true the mask isn’t always perfect but it's close, and the controls are easy (and quick!) enough to adjust that it’s hardly a bother.

Layers
Ah, yes. Lightroom’s consistent drawback — layers. Or rather, the lack thereof. It’s perhaps the single most reason I don’t use Lightroom on a consistent basis. Exposure, however, has ALL the layers. Having layers is a phenomenal and powerful tool but perhaps the best part of this program having layers is what you can do with them.
Opacity Tools
Inside the layers panel are two Opacity sliders: One slider controls the overall opacity of the image and the other controls the individual layer. The ability to control the opacity of individual layers is game-changing for the software — and opens up entirely new possibilities.
Not only do you have opacity control, but you also have control over individual layer masks and you can also apply individual layer presets. Like the look of a preset but only in certain areas? Create a new layer, apply the preset to that layer, and then utilize the mask tools to apply it in certain areas.
Presets
One of Exposure’s biggest features has been and remains its multitude of photography presets. With over 500 presets, choosing one can be more than a little daunting. Luckily the company has created the “Audition” feature which allows you to compare presets side by side.
I’ll be the first to admit, I miss my favorite preset packs from Lightroom. However, after a quiet afternoon and one quick chat with customer service and I had replicated most of my Lightroom presets over to Exposure.
With Exposure’s presets, I can stack them in an infinite number of ways and combinations to create a look that is truly my own.
Getting Creative with Exposure X5
When working with Exposure X5, my favorite thing to do is to have almost no predetermined idea of what I want the image to come out looking like and to allow myself to be creative. This allows me to use the full extent of what Exposure has to offer without boxing myself in.

Focus Control and Blur
When editing my images, I often find myself using Exposure’s Blur and Focus Control tools in my photography. The ability to control where my bokeh begins and ends is a neverending playground for my photography.
In this particular case, I went ahead and retouched the image in Photoshop, brought it over in Exposure X5 and went wild. Exposure’s Blur allows me to select a particular lens effect while also controlling the strength and shape!
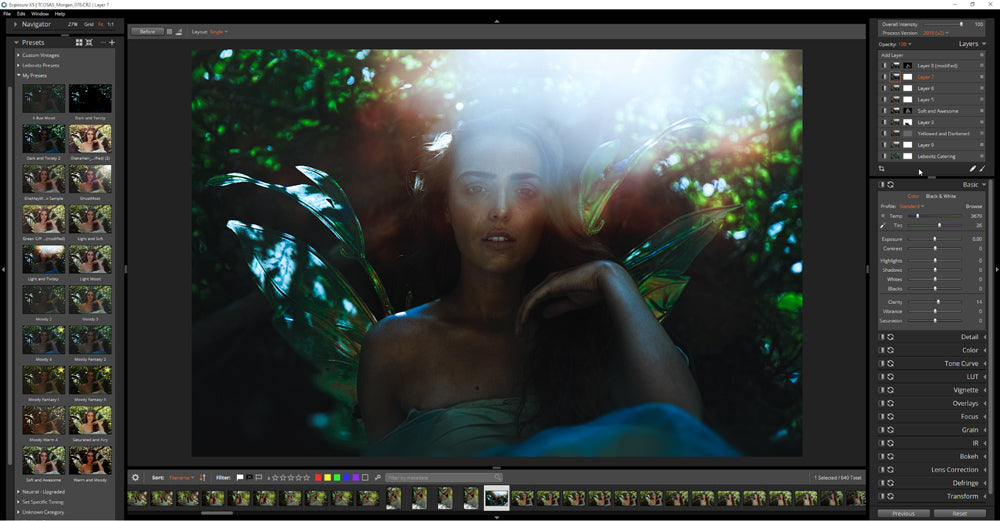
Creative Light Effects
Another one of my favorite things in Exposure X5 is REPOSITIONABLE light effects. In previous editions of Exposure, both the company’s light effects as well as custom light effects could not be adjusted on the image, but now in X5 we’ve been given the tool for complete control!
In the image above, I decided to shoot this photo knowing that I would add in my own light flare in Exposure. I placed a light on set to ensure that the effect would look appropriate, and then brought the image into Exposure to play with the various light effects. This is the image, pre-retouching.
After settling on this light effect, I repositioned it to where I wanted, and then retouched the image in Photoshop to complete the final look.

Textures
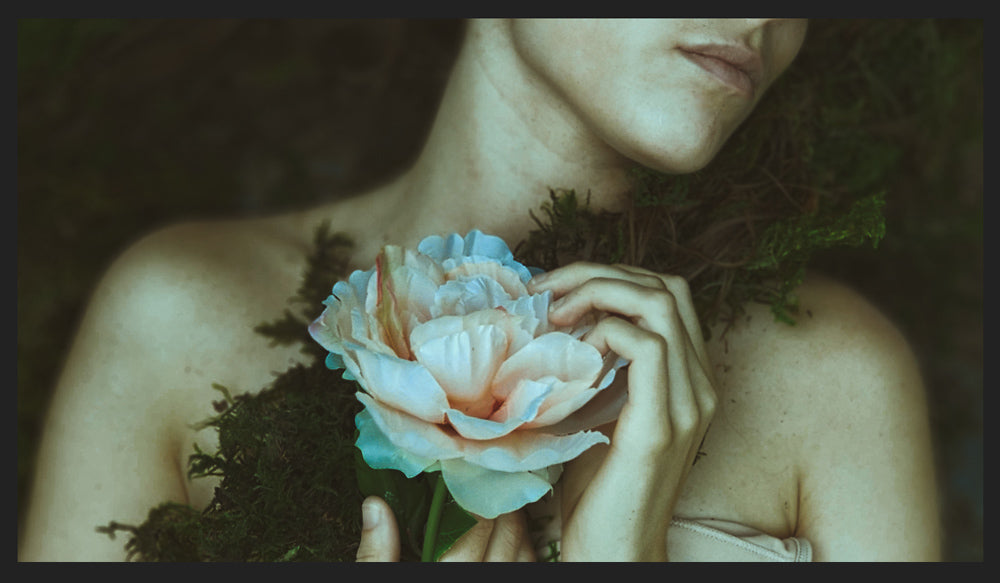
Textures are often an overlooked part of a final look. I’m sure we’ve all seen the lovely effects of photography completely covered in some sort of “paper” effect that looks absolutely horrid. With Exposure, I find it’s often really easy to introduce subtle textures and control them appropriately.
With this image, I found as I worked on it that I needed an additional “oof” to make it pop. Once I knew I had the color look I wanted, I opened the Textures panel on a new layer to take a look at my various options.
After choosing the right texture, I used Exposure’s “Protect” tool to ensure that the texture would stay off of the areas like her face. Exposure’s “Protect” tool works both for textures and for light leaks and enables you to ‘protect’ areas of the photograph you don’t want the effect applied to - a super-fast way of creating a mask.

Creative Colors
Before the introduction of Pratik Naik’s ‘Infinite Color Panel’ viewer, Exposure X5 was the only software I knew of that had a robust color previewing system. There are still some tweaks to be worked out but overall, I still find Exposure to be one of the fastest ways for me to preview color looks for my photographs.
Take the image above — there were several ways I could go with this image I wasn’t immediately sold on the pastel look of the RAW, so I utilized Exposure’s Audition mode to check out several of my custom presets on the image.
Exposure’s Preset panel will give you a small preview of the preset on your image and once you’ve decided you like something but want to see it larger, you can use the Audition feature to really get the comparison.
For this shot, I ended up choosing between an overall more moody, blue-based image, or an interesting — but also moody — green-based image. Being able to quickly compile looks and then easily compare them made the selection streamlined the process and saved me valuable time in front of the computer.
Wrap Up
All in All, Exposure X5 is a wonderful photo editing software that allows photographers to quickly, easily, and efficiently come up with creative images. Is it a true Lightroom replacement? I certainly think so — and perhaps a bit more.
Does it replace Photoshop? No. However, Exposure works hand in hand with Photoshop; it offers a multitude of tools, some extremely unique features, and an easy way of handling images and multiple looks.
I can’t wait to see what you all create next.
You can try Exposure X5 FREE for 30 days with their free trial here.

Ayden is a fantasy fine-art photographer based in Dallas, Texas.
90 Days Of Content
Over the next 90 days we are going to be working with some top artists to explore recommendations giving you solutions to problems we have all gone through. We are paying the writers a really fair wage for every original article, and we are writing about things that aren’t sponsored by any brand. There is no one but our opinion behind it. We would love it if you do use our affiliate links here so we can continue to keep writing awesome articles that you can trust.


