
Reflectors in Photography: Shaping Light Beautifully – A Quick Guide
Reflectors play a crucial role in photography, helping to shape and enhance lighting in various settings. By understanding how to use reflectors effectively, photographers can create stunning images with controlled lighting, making the subject stand out beautifully.
Reflectors are versatile tools that can be utilized in various genres of photography, such as portrait and product photography. Even for beginners, mastering lighting techniques with reflectors can vastly improve the overall quality of their photos.
Key Takeaways
- Reflectors are essential tools for controlling and enhancing lighting in photography.
- Learning to use reflectors allows for exquisite portraits and product shots.
- Familiarizing oneself with reflector techniques can greatly improve image quality.
Understanding Reflectors
Photography reflectors are essential tools that help us shape and control light in our images. They come in various shapes, sizes, and colors, each with a specific purpose. We will cover some of the most common reflectors and their uses in this section.
White reflectors are known for providing a soft and neutral bounce of light, resulting in flattering and even illumination. On the other hand, silver and gold reflectors generate harsher light, with gold imparting a warm tone suitable for matching the light of a setting sun.
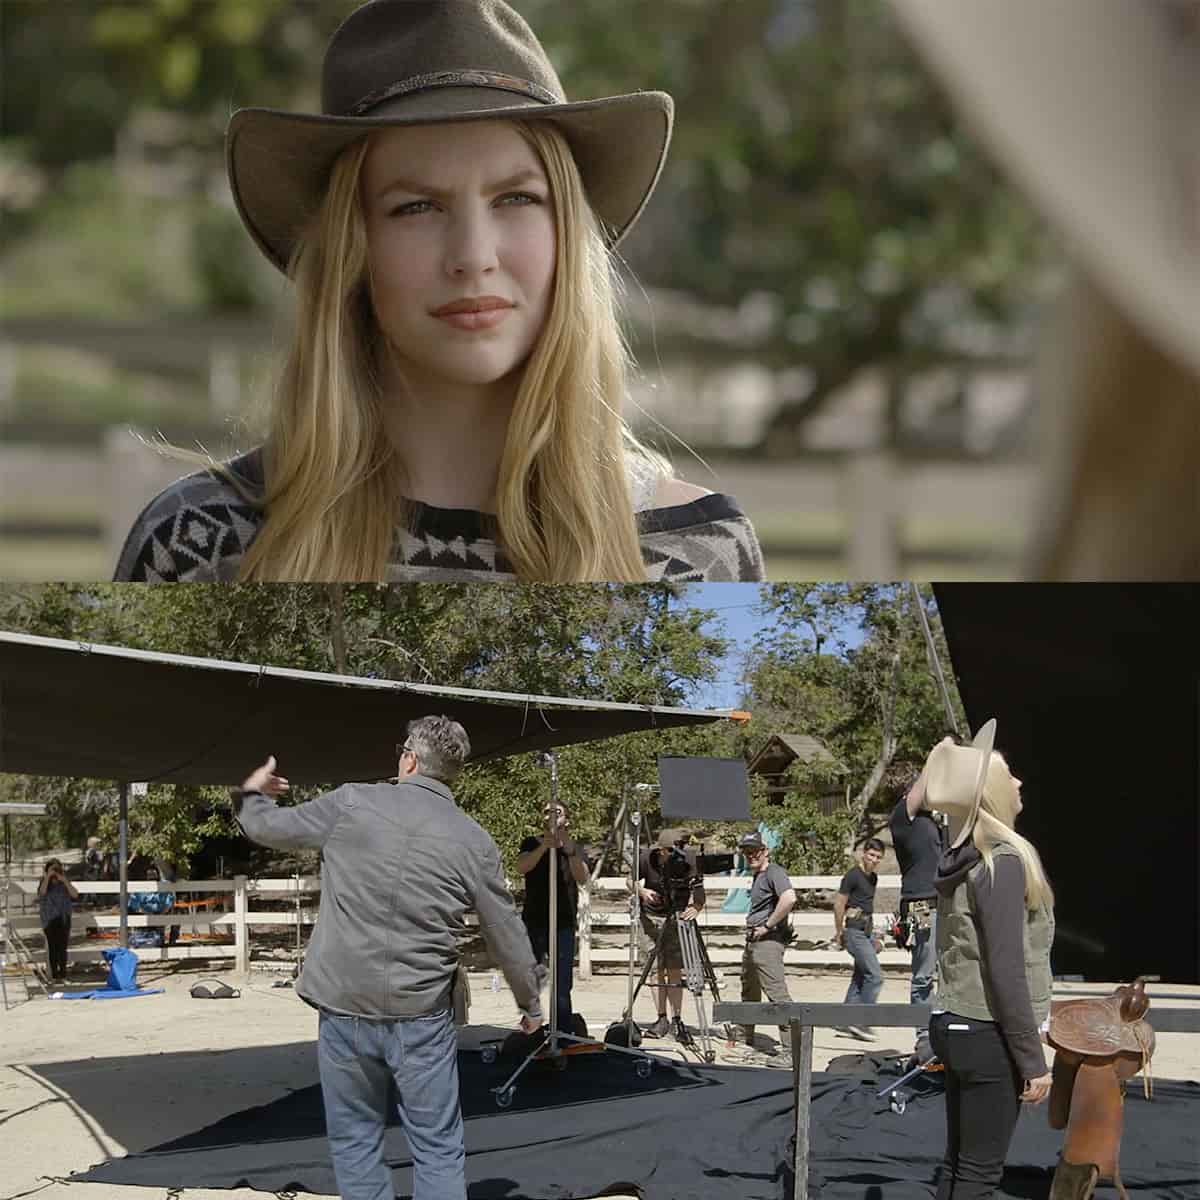
Black reflectors, or flags, help absorb light and increase shadows, useful for minimizing light spill or adding depth to a scene. Translucent reflectors diffuse the light, softening harsh direct light sources and creating a more natural look.
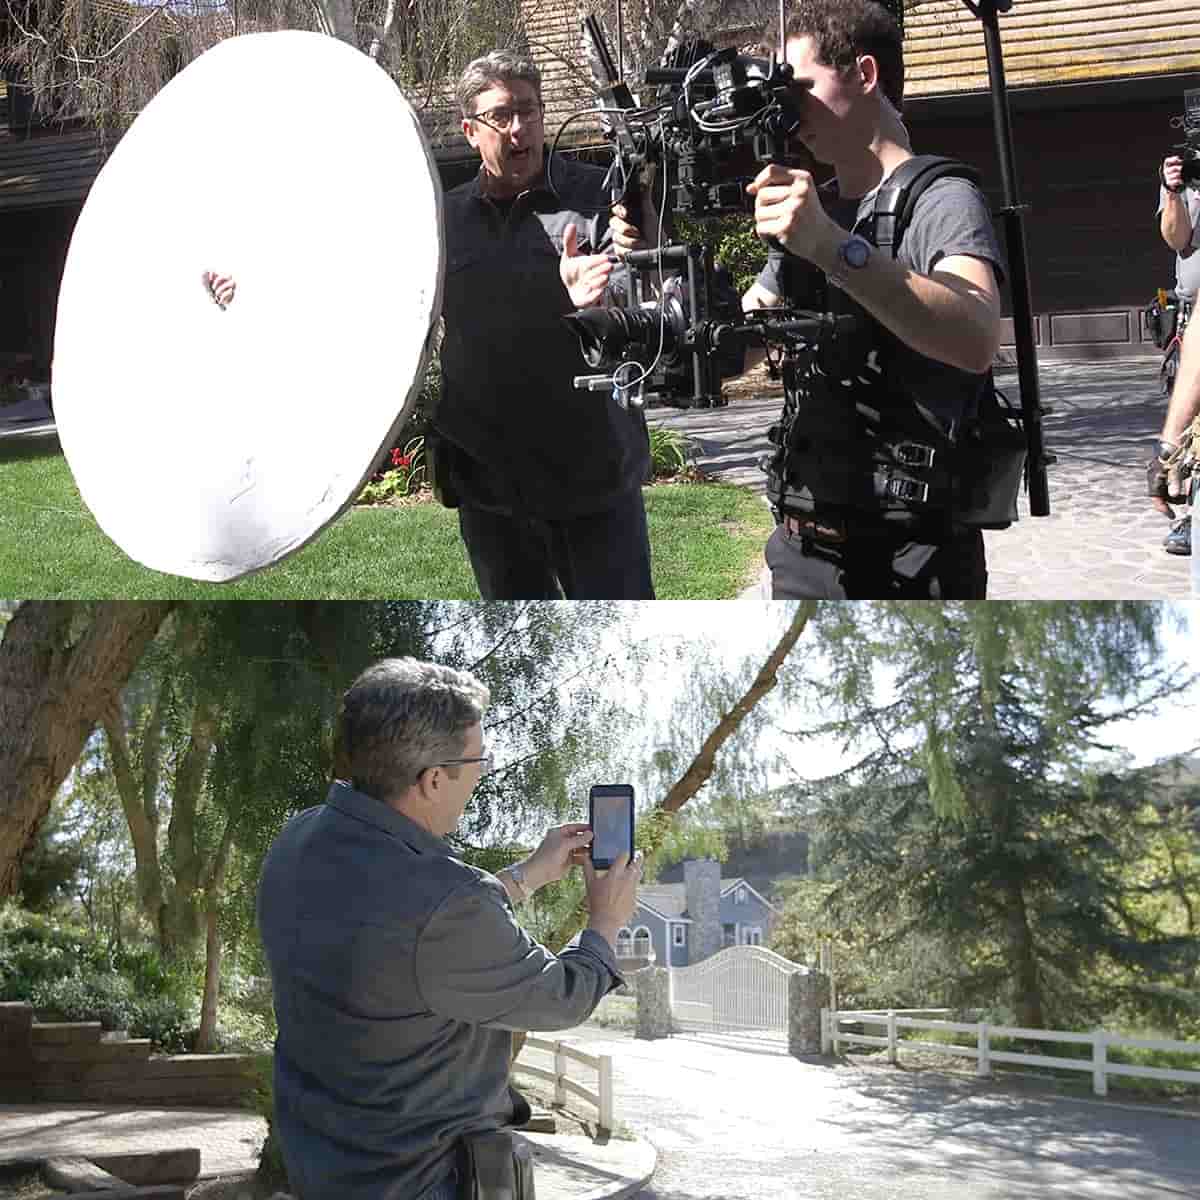
Using reflectors effectively requires an understanding of how to bounce light at the right angle to achieve the desired effect. Positioning is crucial; we can hold the reflector ourselves, have an assistant hold it, or use a stand to provide support. The angle and distance from the subject can significantly affect the overall look of the image.
Round reflectors are popular due to their versatility and ease of use. Learning how to use reflectors in your photography can vastly improve your lighting control and greatly enhance your final images. The key is practice and experimenting with different setups to find the perfect balance for your artistic vision.
PRO EDU offers a variety of professional photography tutorials, which may provide further insight and knowledge on using reflectors and other tools to improve your photography skills.
Mastering Lighting Techniques
When working with photography, mastering a variety of lighting techniques is essential to create beautiful and dynamic images. One essential tool to help us shape and control light is a 5-in-1 reflector. This versatile tool consists of five different surfaces that each serve a unique purpose.
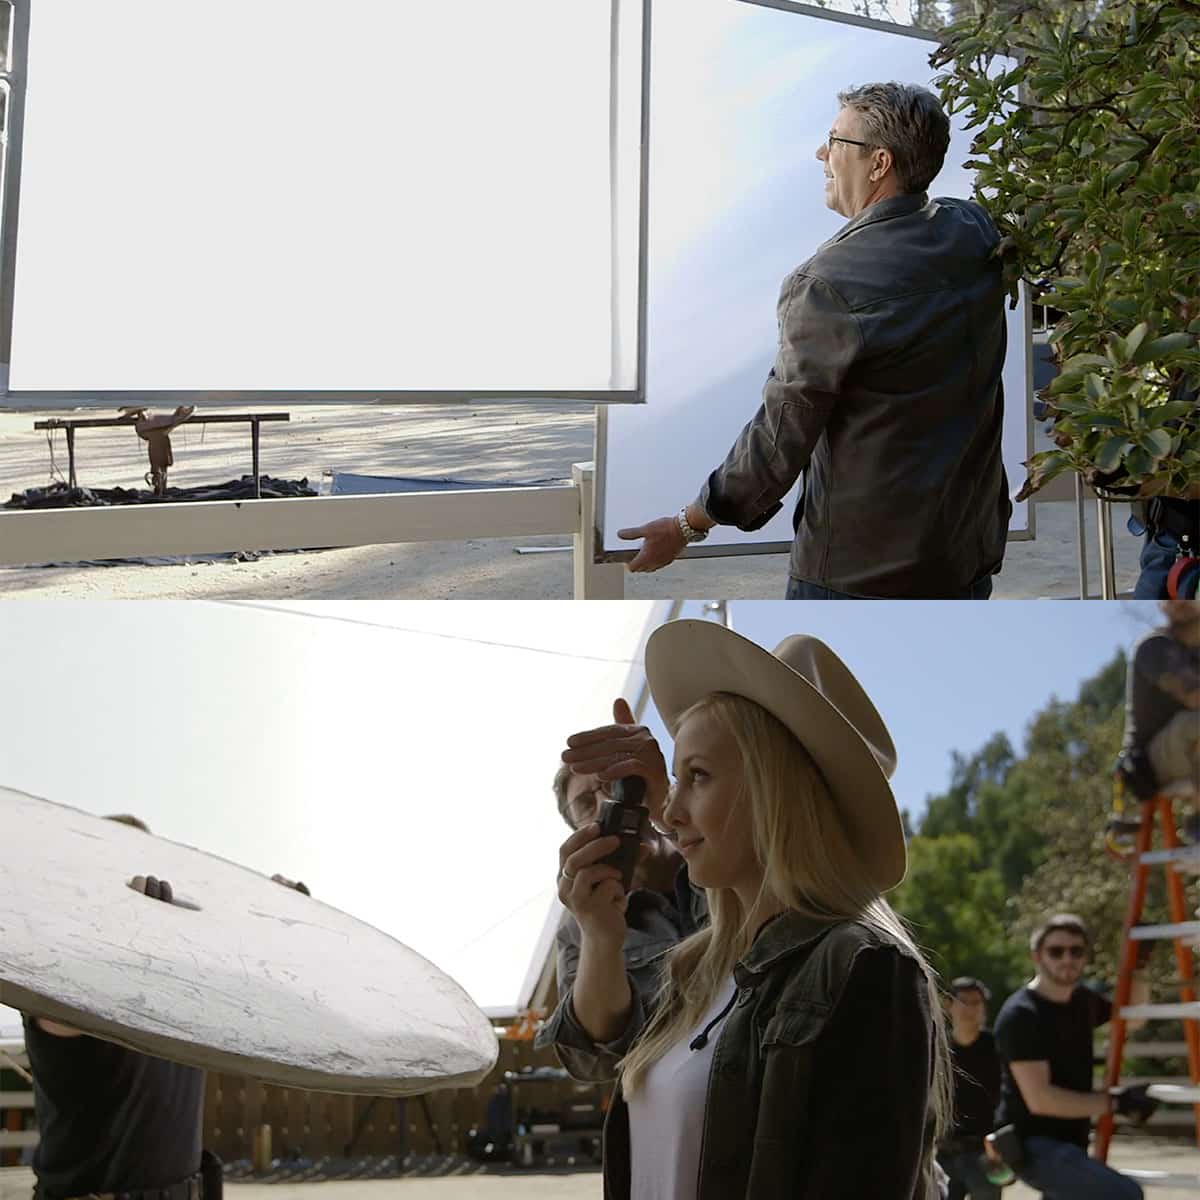
A translucent surface, for instance, is perfect for diffusing light. When using this surface, we can create a soft and even illumination on our subject, particularly when dealing with bright sunlight or strong studio lights. We can also use the reflector to introduce fill light to our composition, which helps to even out shadows and improve the overall exposure.
In a studio setting, the use of artificial light sources like flash can be mixed with a reflector to create more direct or diffused light, depending on the desired outcome. For product photography, manipulating these light sources becomes crucial to achieve a desirable level of detail and depth.
When capturing images outdoors, we often work with natural light. This can be challenging, especially during different times of the day or when dealing with weather variations. Reflectors can assist us in both managing direct sunlight and enhancing ambient light. For example, backlighting with the sun can produce visually appealing effects when paired with a reflector to bounce light back onto our subject.
Using reflectors, we can also experiment with various lighting ratios to create moods and emphasize texture. For instance, by adjusting the main light source in relation to the fill light, we create depth and shape in our subject while maintaining proper exposure. Another technique is creating a rim light effect, which highlights the edges of our subject and offers a more dramatic look.
As we continue to hone our skills with lighting techniques, experimenting with different reflector positions and surfaces can vastly improve our creativity and image quality. Remember to practice with both artificial and natural light, as well as explore resources like advanced photography courses to deepen our understanding of light manipulation.
The Role of Reflectors in Portrait and Product Photography
In portrait photography, reflectors play a crucial role in enhancing and shaping light. They can be used with both natural and artificial light sources, making them versatile and essential tools. Reflectors come in various shapes and sizes, with oval and round being the most common.
Different reflectors serve distinct purposes. The silver reflector provides a brighter, more specular reflection, whereas white reflectors give a softer, more diffused effect. Gold reflectors, on the other hand, produce a warm, golden tone, making them ideal for adding warmth to portraits.
Using reflectors in a portrait session, we can redirect the main light source creating more pleasing lighting on people. For example, placing a reflector at particular angles can fill in shadows, backlight or even create rim light. Working with an assistant or using a tripod can help handle reflectors and make adjustments easier.
In product photography, reflectors are utilized for similar purposes, such as controlling the reflection, enhancing brightness, and creating desired effects. By using different materials and panels, one can create interesting shades and silhouettes. Flags, for instance, can be employed to create negative fill and bring out details in the product's texture.
In both portrait and product photography, the right reflector can make a significant impact. By experimenting with various types, sizes, and positioning, we can create stunning photos that capture the essence of our subjects and products.
Handling and Manipulating Reflectors
When using reflectors in photography, handling them is crucial to achieving the desired result. We need to consider the size and angle of the reflector to control the light effectively. By mastering the angles, we can bounce light onto our subject and create the perfect balance of light and shadows.
A reflector is a versatile tool that can make a difference in any location. It is essential to choose the proper size to match the distance from the light source and the subject. This will prevent unwanted shade or overly bright areas in the photo. Holding the reflector closer to the subject will create a more concentrated light, while moving it away will diffuse the light for a softer effect.
When working with reflectors, sometimes an assistant can be helpful, making it easier to adjust the reflector and hold it at the perfect angle. However, if you find yourself without an assistant, you can use a tripod or stand to support the reflector. This will free up your hands to manipulate the camera and make necessary adjustments.
One of the main goals when using a reflector is to manipulate light effectively. To do this, we have to redirect the light source towards our subject. This allows us to achieve the desired brightness and create different effects, such as catchlights in the eyes or a soft hair light. Remember to keep a steady grip on the reflector and be patient while adjusting its position to master the art of reflector photography.
Conclusion
In our exploration of reflectors in photography, we have discovered their undeniable ability to shape light beautifully. By understanding the different types of reflectors, such as white, silver, and gold, we can take control of lighting situations and improve the overall quality of our photos.
We know selecting the appropriate size, shape, and material are essential factors in making the most out of a reflector. For instance, a 5-in-1 reflector offers versatility with various reflective surfaces and is often collapsible for easy transport.
We have learned that when using a reflector, positioning is crucial to diffuse, bounce, and manipulate light effectively. In situations like portrait photography and product photography, a properly placed reflector can fill shadows, soften harsh lights, or even create a silhouette effect.
Mastering the use of photography reflectors greatly enhances our ability to control available lights, be it ambient light or external sources like flash. An assistant can come in handy while positioning and adjusting reflectors to achieve the desired effect accurately.
In conclusion, with the knowledge we've acquired, we, as photographers, are now better equipped to control light in various scenarios creatively.
Frequently Asked Questions
What is the best way to use a reflector for enhancing natural light?
We recommend holding the reflector at an angle that bounces natural light onto the subject. This could involve positioning it below, above, or alongside the subject to fill in shadows and add dimension. Make sure to experiment with different angles to achieve the desired lighting effect. A photography reflector can be used to bounce, diffuse, or flag natural and artificial light.
How do different colors of reflectors affect a photograph?
Different colored reflectors can have various effects on a photograph. A white reflector bounces soft, even light onto the subject, while a silver reflector adds more contrast and brightness. A gold reflector contributes warm tones, and a black reflector can be used to reduce light or create shadows.
What types of diffusers are commonly used in photography?
In photography, we commonly use diffusers to soften the light source and create a more flattering appearance. Some popular diffusers include umbrella diffusers, which spread light over a larger area, and softboxes that provide a controlled and even light. Other options include scrims and diffusion panels for softening harsh sunlight.
How to properly position a reflector for desired lighting effects?
To achieve the desired lighting effects with a reflector, we suggest positioning it at the correct angle to direct light onto the subject. This may require moving the reflector closer or further away to create soft or more defined shadows. Experiment with different positions to find the ideal lighting effect.
When should a black reflector be used in photography?
A black reflector is primarily used to subtract light and create shadows. We recommend using a black reflector when you want to control and manipulate the lighting to emphasize the shape, form or contours of your subject. This technique is particularly effective for dramatic portraits and product photography.
How can a reflector be used effectively for outdoor photography?
To effectively use a reflector in outdoor photography, we advise utilizing the reflector to bounce sunlight back onto your subject to fill in shadows or add depth. This can be especially useful when shooting under harsh sunlight or when the sun is low in the sky. Consider using a diffuser to soften the sunlight and create a more flattering, even light on your subject. Experiment with different reflector sizes and positions to find the optimal effect.


