
As image makers we love playing with photos to create different looks. And for many of us adding texture to photos often plays a big part of crafting those looks, letting us transform a nice, clean photo into something else completely.
Using Photoshop to Add Texture
Sometimes this just means adding a little texture on top to ‘rough’ up the image a little. And other times it means stacking layers of textures to create a totally new look. Photoshop’s Blending Modes play a big part in this process, giving us a powerful tool that lets us create a variety of moods with our images.
Using Overlay Blending Mode for Adding Texture
The most common way to add a texture layer is to use the Overlay Blending Mode. Here we see 2 versions of a shot of a marble stair case. On the left is the original image, while on the right we’ve added one of the textures from Kelly Robitaille’s texture pack, (2-Dilapidation). In this case we used the Overlay Blending Mode and set the opacity to 60%.


On the left is the original stock shot, on the right is the shot combined with the texture in the middle.
As you can see the Overlay Blending Mode can not only add some ‘grit’ to your image, but it also affects the contrast and saturation of the image as well. (Learn more about Overlays here)
Add Texture With Adjustment Layers
For another look at how we can use textures to add drama to a photo let’s take a look at the shot below. This view from the Houston skyline shows an interesting building, but alone it’s just not that interesting of a shot.
But adding this interesting texture, 10-Grass, from Kelly’s selections, along with a couple of Adjustment Layers lets us turn that so so shot into something with a lot more drama.


Combining the texture with the shot of the buildings lets us create an image with a lot more drama.
In this case the buildings were rendered as a B&W shot using Adobe Camera Raw, and the texture was also converted to B&W then added using the Multiply Blending Mode.
Adding Both Texture and Color
Continuing our exploration of textures in the example below we can see that often times textures can be used to add both texture and color to an image. Below we have a shot of rusty drums that have some possibilities, but again could use something extra to really create something more intriguing. In this case one of the textures from the Lace section of Kelly’s textures was combined with the barrels using the Overlay Blending Mode.


Here, the lace pattern texture adds both color and texture to the barrels.
Using Textures to Add Light and Shadow
So far we’ve looked at how textures can add grit and color to an image. But another use for textures is to add light, or shadow to your image. The images below show a fashion shot by Emily Teague. In this case the straight shot was combined with the texture, 1-Crest, from the Light section of Kelly’s textures, using the Color Dodge Blending Mode. (Learn more about Essential Photoshop Tools)


The texture in the middle was combined with the original shot to add some light.
Stack Multiple Textures
All of the examples we’ve seen use a single layer, but what happens if we stack more than one texture together? In the shot below we have a scene take at night of the Freeway heading to the beach in Santa Monica.

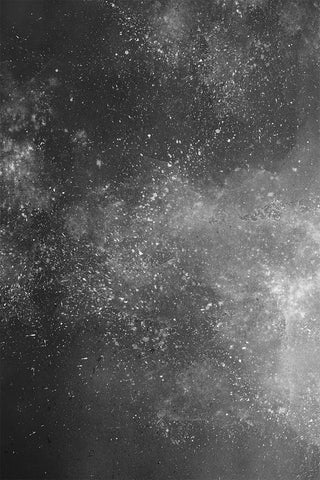


The shot of the freeway was combined with the Splatter and Gradient textures to transform the image.
Here the 7-Splatter image was added using the Color Dodge Blending Mode so the lighter tones in the layer would work to add some speckled light effects. Then the 8-Gradient texture was added on top using the Hard Light Blending Mode, finally a Layer Mask was used to keep the Gradient texture from blowing out the area where the traffic lights are converging in the distance.
Different Methods of Adding Texture Create Different Photos
The goal with showing you these five examples is to illustrate different ways we can use textures to create totally different images. Sometimes the effect is subtle, and other times dramatic, but the key is to allow yourself to explore and take a look at the “What ifs”
Want to practice with free professional textures?


