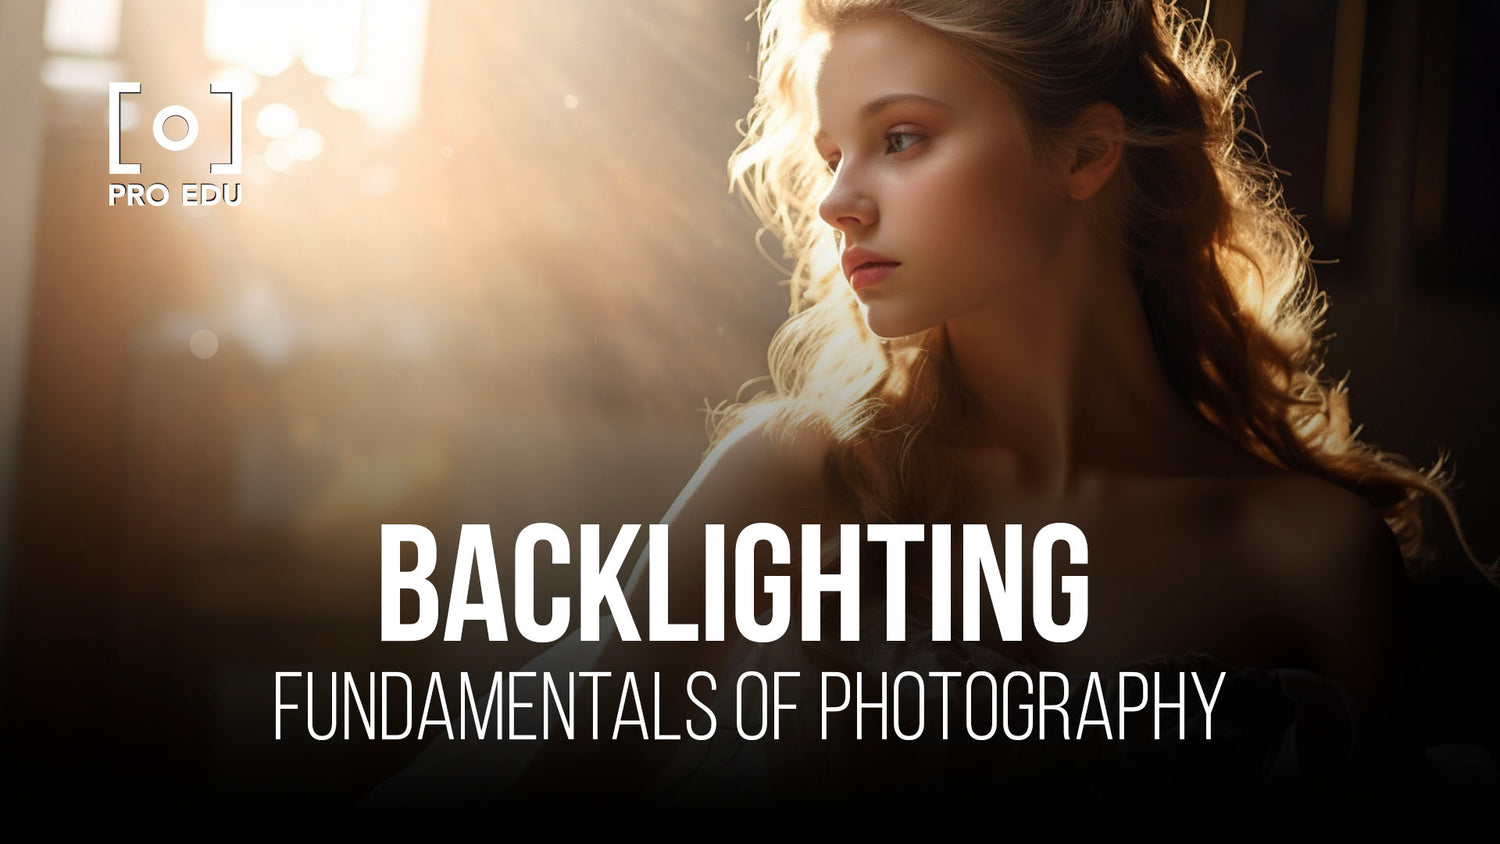
Backlighting in Photography: Techniques and Tips for Stunning Images
Backlighting in photography is a popular method for creating dramatic and visually captivating images. This technique involves placing the main light source behind the subject, resulting in unique lighting effects and, often, stunning silhouettes. Mastering backlighting can add depth and contrast to your photos, making them stand out from the rest.
To achieve the best results with backlighting, it's important to understand how various camera settings and techniques can impact the final image. By experimenting with different positions, angles, and light sources, you can find the best approach for capturing the perfect backlit photograph. Additionally, understanding how to control exposure settings and adapting your technique for different subjects can significantly improve your photography skills.
Key Takeaways
- Backlighting in photography adds depth and contrast to images.
- Experiment with positions, angles, and light sources to achieve desired effects.
- Mastering exposure settings and adapting techniques for different subjects improves photographic skills.
Understanding Backlighting in Photography
Backlighting in photography refers to the technique where the main light source is positioned behind the subject, illuminating them from the back and facing the camera. This method is used to create visually stunning and dramatic effects in photographs. Let us take you through some essential tips and techniques for mastering backlighting.
Firstly, it's crucial to understand exposure when working with backlighting. As the light is coming from behind the subject, it can cause the subject to appear dark or even create a silhouette effect if the exposure is not managed correctly. A solution is to use spot metering or exposure compensation to adjust the exposure and ensure proper lighting on the subject's face.
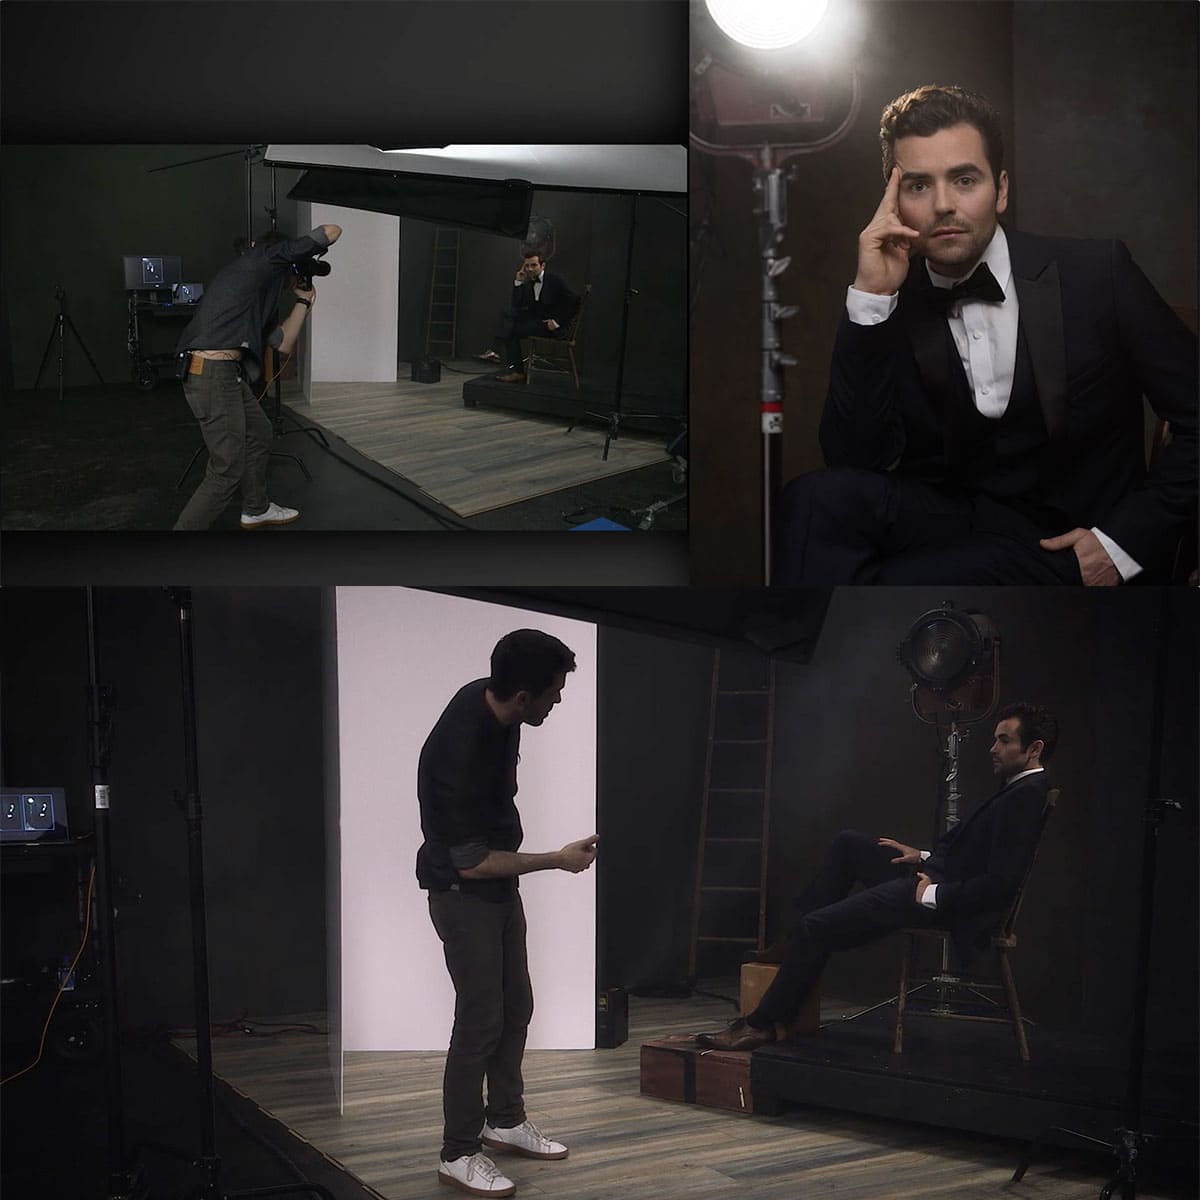
Angle plays an important role in backlight photography. Position the subject at an angle to the light source, creating a rim light or a subtle halo effect around them. Rim light helps separate the subject from the background and adds a three-dimensional feel to the image. Experimenting with the angle of the light will generate different effects and levels of depth in your photographs.
Creating a silhouette is a popular application of backlighting in photography. To achieve this, you'll need to have the subject framed against a bright background, like a sunset or a brightly lit window. Keep the exposure low to darken the subject while maintaining the vibrant and radiant backlight. This contrasting technique can produce striking and emotive images.
In conclusion, mastering backlight photography requires understanding and manipulating exposure, angles, and light placement. Striking visuals can be achieved by applying techniques like silhouette and rim light effectively. Practice and experiment with these skills to improve your photography dramatically.
Backlighting Techniques
When using natural light as a backlight, it's crucial to choose the right position for the light source. For instance, you can place the light directly behind the subject, while experimenting with the distance between the light and the subject ^1^. In outdoor settings, cutting out the sky can help avoid overexposure and create a more balanced image ^5^.
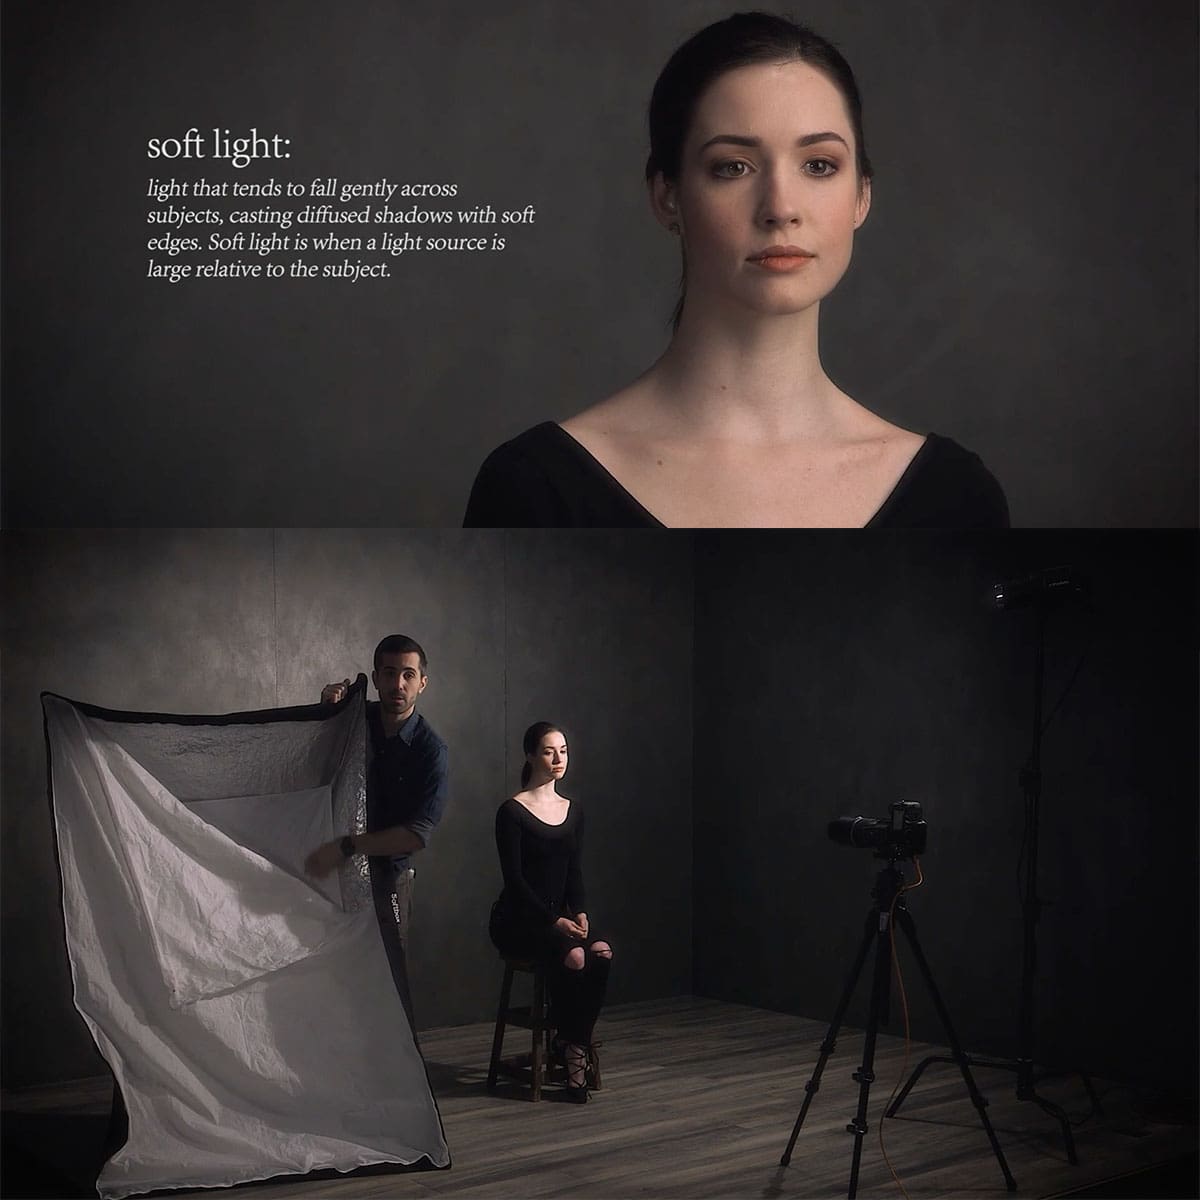
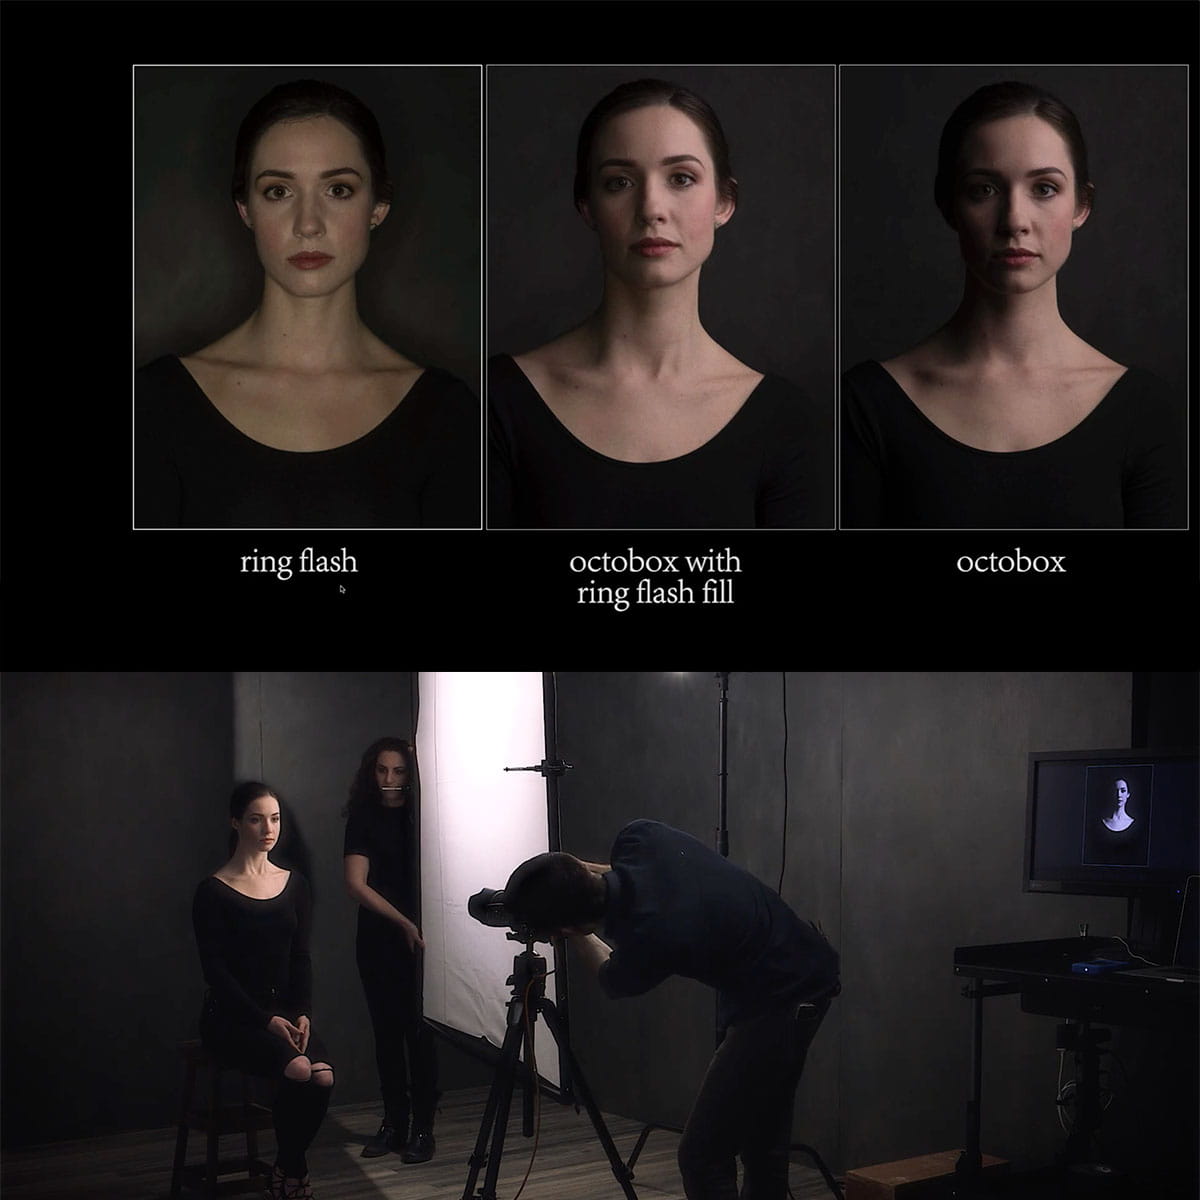
Artificial light sources, such as flashguns and LEDs, can also be used as backlighting. Position the light source at the right distance and angle relative to the subject for optimal results ^1^. Ensure your fill light is balanced with the backlight to avoid unattractive dark patches on your subject, while maintaining the desired dramatic effect ^4^.
Utilizing spot metering is a valuable technique when managing backlighting. It allows precise exposure control by selecting a small area to meter, instead of averaging the entire scene. This helps retain detail in the subject while maintaining the desired backlight effect ^3^.
To capture an artistic lens flare, position the camera lens so that the backlight source hits the lens at an angle, scattering light and creating interesting effects ^3^. Be mindful of the ambient light in the environment, as to not overpower or compete with the backlight ^2^.
Set.a.light 3D is a helpful tool when planning backlighting setups. It allows you to visualize and design lighting setups in a virtual 3D environment, making it easier to replicate and modify lighting arrangements in real-life setups ^1^.
Camera and Exposure Settings
When working with backlighting in photography, it's essential to get the right camera and exposure settings to achieve stunning results. We'll go over some crucial aspects to consider when setting up your camera for backlighting photography.
To capture the best backlit images, it's important to have control over your camera's settings. We recommend using the manual mode to have full command over aspects like aperture, shutter speed, and ISO. This allows you to make adjustments based on your desired outcome and the lighting conditions.
Exposure settings play a critical role in backlit photography. Since the light source is behind the subject, it can sometimes result in underexposed shots. To avoid this, you can use exposure compensation to deliberately overexpose the image by one or two stops, which helps in retaining details in the subject's face and foreground elements.
Setting the right aperture is key to creating beautiful backlit images. Using a wide aperture (like f/1.4 to f/1.8) can help isolate your subject from the background by creating a shallow depth of field. This effect results in a pleasing bokeh, focusing the viewer's attention on the subject.
When working with backlit subjects, white balance can be tricky. As some images might have an excessively warm or cool tone, you may need to adjust the white balance accordingly. By compensating or setting your camera's white balance manually, you can achieve the color temperature that best suits your image.
In some cases, using aperture priority mode can also be beneficial in backlit photography. This mode allows you to set the aperture while the camera automatically adjusts the shutter speed to achieve the correct exposure. It's a helpful option when you want to maintain a specific depth of field or experiment with different aperture settings.
By carefully considering and adjusting your camera's settings, you'll be better prepared to capture stunning backlit photographs that showcase your subject in a unique and compelling way.
Practical Tips for Capturing Backlight
When capturing backlight in photography, there are several key points to consider that can help us create stunning images. We'll discuss some practical tips that can enhance the effect of backlighting in your photographs.
Golden hour, the time shortly after sunrise or before sunset, offers soft light that is great for backlighting. During golden hour, the sun's position creates a natural rim light around our subjects, providing depth and dimension in our photographs.
Using a reflector is an important tool when working with backlight. Reflectors allow us to bounce light back onto our subject, filling in shadows and illuminating details. By utilizing a reflector, we can ensure that our subjects are not underexposed, while still keeping the backlight prominent.
In some situations, using flash can be particularly helpful. A fill flash can help to properly expose our subject when the background is brightly lit. By controlling the intensity of the flash, we can balance the lighting between the subject and background while maintaining the visual appeal of backlighting.
To control the camera's exposure, we can use spot metering to ensure our subject is correctly exposed in a backlighting situation. Spot metering takes a reading from a small area of the frame, allowing us to meter for the subject and not the bright background.
A lens hood can help minimize lens flare caused by backlight. Using a lens hood also reduces glare and improves overall image contrast.
Diffusers help us soften harsh direct sunlight, creating a more pleasing effect. In addition to diffusers, we can also use gels to modify and control the color temperature of our light sources. These additions, like diffusers and gels, give us more creative control over the final image.
By following these practical tips and techniques, we can master the art of capturing backlight in our photography, making our images more captivating and visually appealing.
Applying Backlighting for Different Subjects
When photographing objects, backlighting can enhance the texture and shape. For example, when working with intricately detailed subjects like leaves, backlighting can highlight their fine details and veins. Experiment with the angle of light to achieve different effects.
In portraits and product photography, backlighting can create a separation between the subject and the background, giving an illusion of depth and a more professional look. This can be achieved by positioning the light source behind the subject, ensuring it's not directly pointing at the camera lens.
For people and animals, backlighting can create a dramatic effect, especially when capturing the subject's outline or hair. Be mindful of silhouettes when using backlighting on subjects with distinctive shapes, such as buildings or monuments.
Buildings can be emphasized with backlighting, and it can add a sense of depth to architectural photography. When using backlighting outdoors, cutting out the sky from the photo helps in maintaining the exposure and avoiding overly bright areas.
In summary, applying backlighting effectively in photography requires an understanding of your subject and the desired outcome. Experimenting with light positions and angles will lead to a greater mastery of this technique.
Frequently Asked Questions
What are the essential techniques for capturing backlit photos?
To capture backlit photos, position your subject between the light source and the camera. Experiment with the distance between the light and the subject to find the optimal balance. The golden hour is an ideal time to capture backlit images with a natural, warm light.
How can you properly expose a backlit subject?
Proper exposure for a backlit subject can be achieved by metering off the subject's face or using spot metering to measure the light. You can also use exposure compensation to adjust brightness. Check out the ultimate guide on backlighting for further tips on exposure.
What are the creative ways to use backlighting in portrait photography?
Backlighting can create a variety of effects in portrait photography. Placing the light behind the subject can create a halo effect, separating the subject from the background. Backlight can emphasize contours, add depth to the image, and create a soft, dreamy appearance.
How can you control lens flare in backlit photography?
To control lens flare in backlit photography, use a lens hood or shield the lens with your hand to prevent direct sunlight from entering. Adjusting your angle and position can also help minimize lens flare. For more information, consult this article on backlighting tips.
Which camera settings work best for backlighting situations?
In backlighting situations, it's essential to shoot in manual mode or use aperture-priority mode to control depth of field. A wide aperture (low f-number) can help create a pleasing background blur, while a narrower aperture (high f-number) can result in sharper background details. Adjust shutter speed and ISO accordingly to achieve the desired exposure.
How do you achieve successful silhouette effects with backlighting?
To create silhouette effects with backlighting, position your subject directly between the light source and the camera. Meter off the background or use spot metering on the brightest area. This will cause your subject to appear darker and create a silhouette. More tips on backlight photography can be found online for achieving various effects.


