You don’t need a full complement of studio strobes to master photography lighting. In fact, much of what you need can already be found in your home.
Studio lights make life as a photographer easier, yet many still forgo purchasing them because studio lighting for photography can be intimidating, and cost can be an obstacle. Dedicated lights give photographers control and efficiency, so I will always recommend building your lighting kit, but lack of “professional light” doesn’t mean you can’t create photographs to be proud of.
These 5 inexpensive DIY lighting hacks you can help you learn photography lighting to make great images from the safety of your own home. Once you understand how light behaves, you can manipulate any light source to get what you want. DIY lighting is no less valid than expensive strobes.
Let’s go over a primer on light behavior so we know what aspects of light we can manipulate.
Light Behavior
These are a few of the qualities of light all photographers should learn to use whether they’re building a DIY photography lighting kit or a studio setup for photography.
Intensity and the Inverse Square Law

Light intensity is one of the most important aspects of light a photographer controls. Light disperses as it travels away from the source, so it’s critical to understand the Inverse Square Law if you want to manipulate photography lighting successfully.
The Inverse Square Law states that the intensity of the light is inversely proportional to the squared distance from the source. So, if light intensity diminishes the farther it travels from the source, we can control light intensity by altering its distance to the subject.
If the light source is fixed, like the sun, then we have to rely on other methods to control the intensity, such as diffusion and transmission.
Diffusion and Transmission


When light strikes a translucent surface, say the diffusion panel on an octabox or flash diffuser, it is transmitted. The light energy spreads through the fabric and radiates out. Since it spreads, it loses intensity, as explained by the Inverse Square Law, so this property allows photographers to control light intensity and light quality.
Light quality, it’s hardness or softness, is determined by the size of the light in relation to the subject. To make a hard light softer, make it larger in relation to the subject.
Placing a piece of translucent fabric between the light source and the subject creates a new, larger source of light. Because the fabric is not a smooth, hard surface, the light released will be diffused, traveling in many directions and leaving soft-edged shadows, which is often desirable in photography lighting.
Reflection

When light strikes a highly reflective surface, like a piece of aluminum foil, it bounces off at an angle equal to the angle at which it struck. The angle of incidence is equal to the angle of reflection. Hard, metallic surfaces will reflect a good deal of light, creating brighter more specular light, while softer matte material will diffuse the light. Beauty dishes take advantage of this principle by firing the flash into a deflector that bounces light back into the dish before reflecting it forward. You can take advantage of the same principles.
Color

Light consists of several wavelengths that, when split apart, appear as different colors. Light color can be controlled by time of day (cooler in the morning, warmer in the evening,) the source of the light ( fluorescent lights vs tungsten lamps), by the environment (green canopy light or colored light reflected from a surface) or by adding elements, like gels, to the light itself. Color can go a long way in making photography lighting look natural, or in creating mood.
Direction

All light has directionality. Not all light shapes are flattering, though, so controlling direction is paramount. If the light source is mobile then the light can easily be moved. If it is a fixed source, like the sun, then the subject and photographer have to do the moving.
Absorption

Dark material absorbs light, causing the radiation to become heat. You’ve experienced this if you’ve ever worn a dark shirt in the sunshine. You can exploit this behavior because dark surfaces “eat” the light, creating more contrast or stopping light from hitting areas you want to keep dark.
These light behaviors are common to all light, which means that once you understand how light behaves, you can manipulate any light source. That doesn’t mean any light source is suitable for any project, but it does mean that all of it is usable as photography lighting.
If you have windows in your home, a garage, a covered porch or patio, lamps, a flashlight, or just a place to stand outside in the sunshine, you have lighting you can shape and mold. I grabbed my oldest son and dragged him through a few photography lighting scenarios anyone should be able to replicate. The images are unedited because I wanted the light to be uncontaminated by post-processing. Before we get to the ways you can use natural light or DIY studio lighting, let’s look at the tools I used.
The Tools
To manipulate and create light, I used photography tools you probably either have or can get your hands on with little expense. Creating these DIY lighting hacks is only the work of an afternoon, but if you would rather purchase than make some of these tools, I’ll include links to them as well.
Scrim
I created this DIY scrim with PVC pipe and ripstop nylon. If you don’t want to buy fabric, you can use a shower curtain or old bed sheets. The scrim diffuses light and helps control the intensity of your light source. If you’d rather buy one, this scrim is a photography industry standard.

If you’re into product photography, making a few smaller versions of this can create a creditable light box. It can also be a flash diffuser if you buy flashes or strobes.
Vflat
The vflats in the example images are from Vflat World, but here is a photo of a DIY vflat I made from foam core, poster board, and duct tape. It cost me about $12 each for a white and a black one, and can be used to reflect light or absorb it. They double as backdrops in a pinch, and can be found in most photography studios.

Light Stands
The light stands used in these images are cheap, but they work. You can use these to brace gear, hold lights, to prop up reflectors, or anything else that strikes your fancy. Sturdy photography light stands are well worth the investment, though!
Flashlights
Flashlights can be purchased for around $30 just about anywhere. Many flashlights even have adjustable heads that let you widen or tighten the beam, and are super handy for DIY photography situations.
Clamps
Common to most garages and photography studios, these clamps are also inexpensive and can do everything from hold up backdrops to adjusting the fit of clothes. I recommend having a few in multiple sizes, but Gaffers Tape or duct tape will work as a DIY solution in a pinch.

Backdrop
My backdrop was hand painted by PRO EDU’s own Kate Woodman, but a small roll of seamless paper is affordable. You could also use your Vflat, a shower curtain, bedsheets, or any fabric you’ve got that works for your idea as a DIY hack.
Now that we’ve got the basic tools, let’s look at some setups you can use at home.
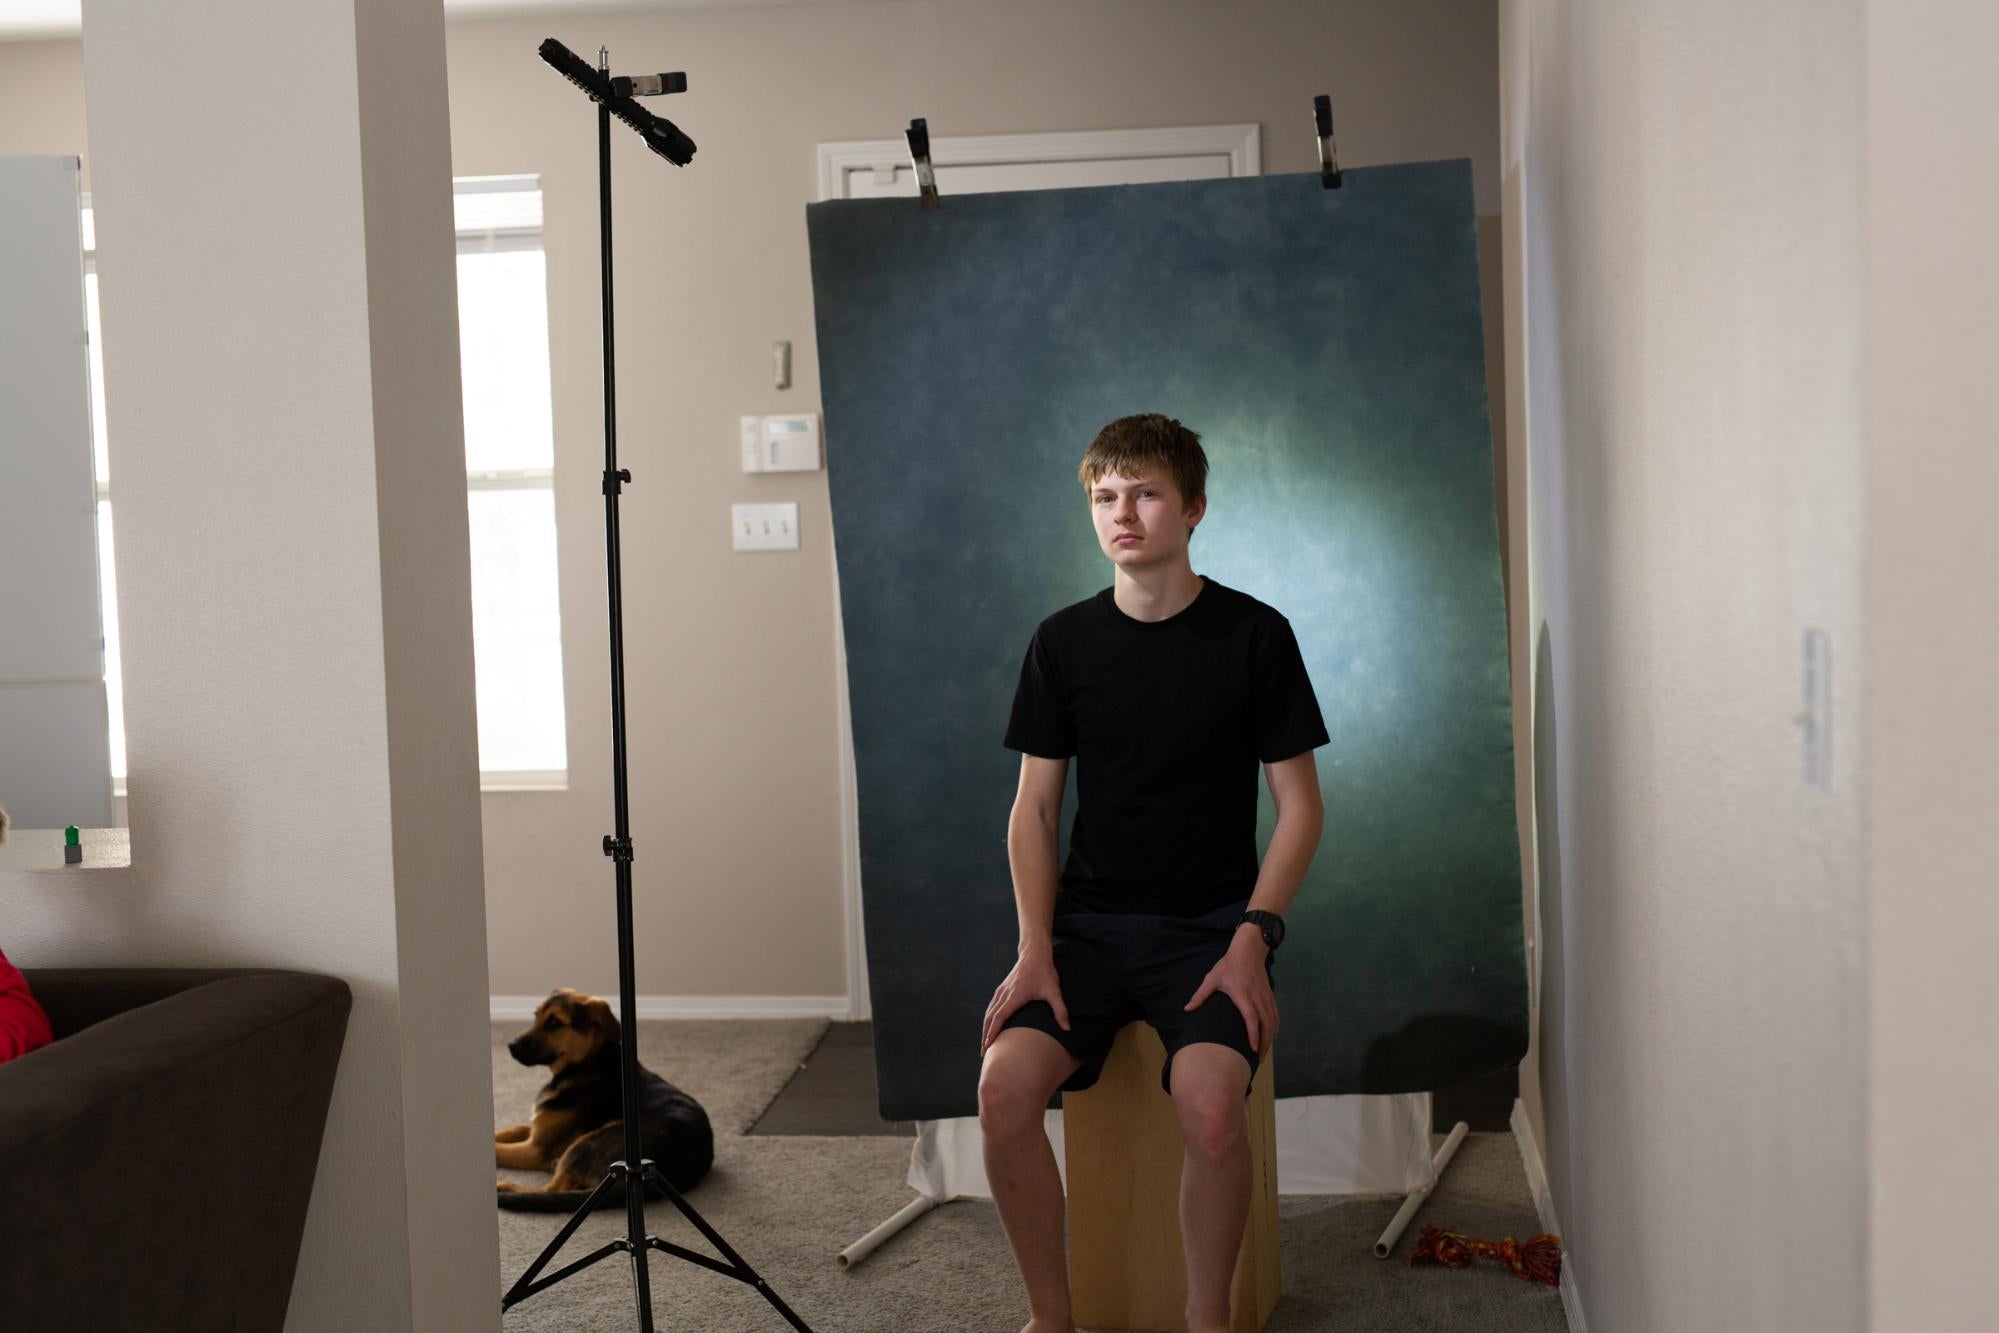
Setup One
Sunshine and a scrim are all it takes to make a nice, big, soft light source for easy, attractive lighting. The background is up to you, but darker backgrounds will give better separation. You can even use your vflat as a backdrop.
Position your subject in the shadow of the scrim and remember, the closer the scrim is to your subject, the brighter the key light will be because the scrim is transmitting light. I took this photo during a less than ideal time of day, so I had to place the scrim high to give my kiddo room to stand.

Setup Two
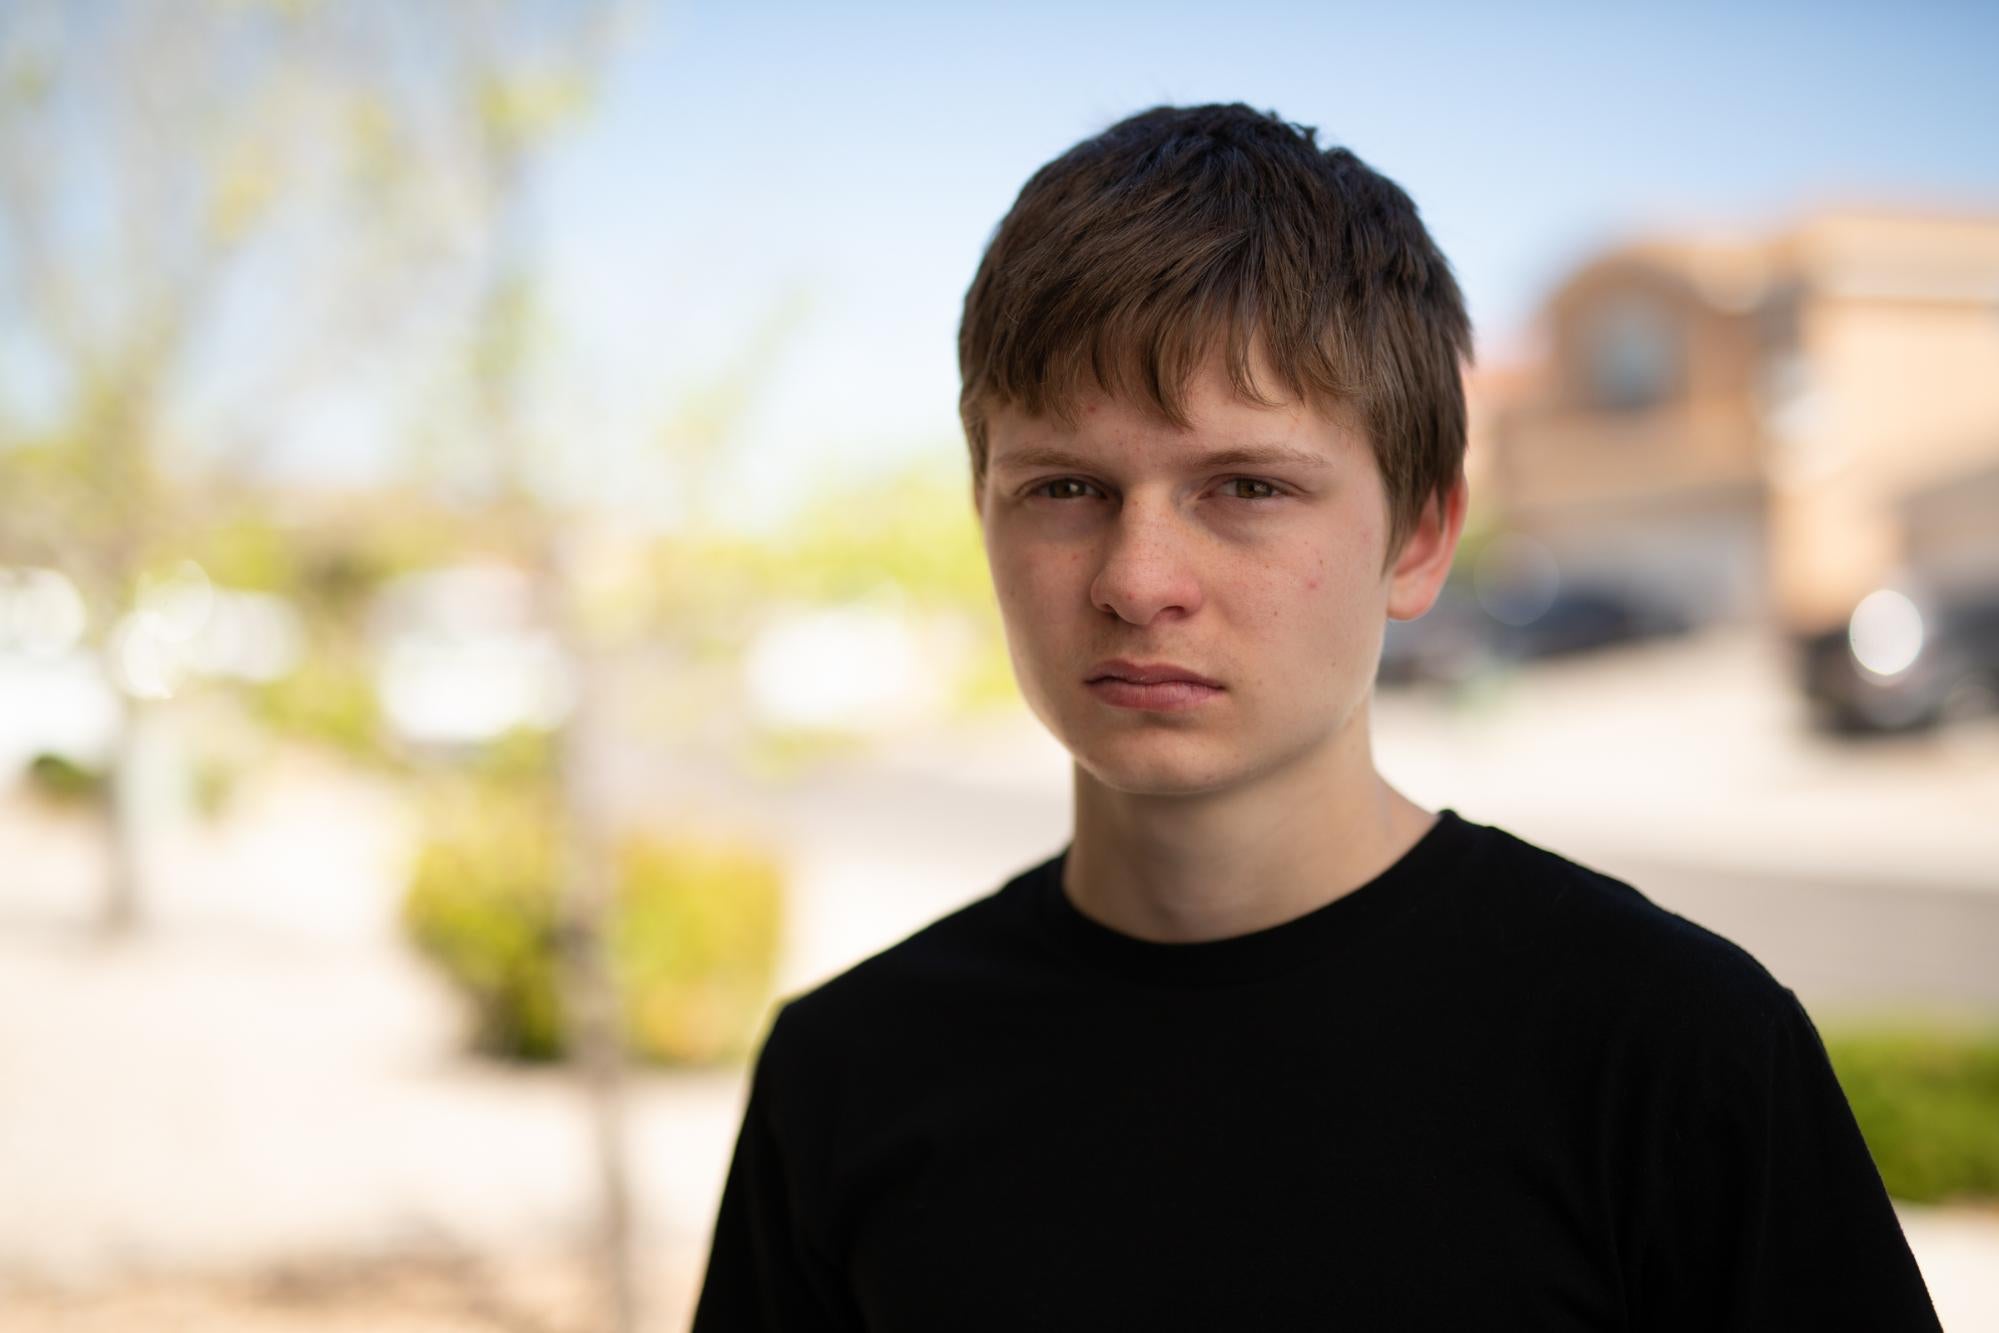
An open garage door creates a great big light source, and the standing DIY scrim will handle the backdrop with a couple of clamps. You can use the sun for key lighting and DIY vflats to finesse things by adding or flagging light. The trusty flashlight is always there if you want to add an accent light.
Since the key light source is fixed, you’ll have to adjust the angle of your setup, your subject, or yourself to create different looks. For this shot I used broad lighting, but you could just as easily use short lighting.
This DIY setup is flexible, and what you see is what you get.

Setup Three
Paired with the DIY scrim, the flashlight creates a surprisingly soft light. The backdrop is up to you, but vflats are easy and quick. I cut all ambient light sources for this shot, but you can add more lighting for fill, or even bring in another flashlight if you need accent light. In this case, my seven-year-old held another flashlight to create separation. I used the black v-flat so the second flashlight would be obvious, but you can use any suitable backdrop.


Setup Four
Simple window light is always a winner. Window light can create just about any light shape you want, from flat to split to Rembrandt, and it’s easy to alter the feel by adding a backdrop or fill. Window light is fantastic for teaching you how to position both yourself and your subject for light that suits your vision. You can add fill with your DIY vflats or a bit of accent light from your flashlight.


Setup Five
Finally, our flashlight comes to the rescue once more, this time as a DIY hard light source. Clamping or even using Gaffers Tape to attach a flashlight to a light stand creates a constant light that is surprisingly handy.
I’ve got my subject lit by the edges of the light while the center of the light hits the backdrop and picks up those gorgeous colors, creating lots of separation and highlighting the shape of the subject. I’ve placed him close to the wall so the bounce light fills in the shadows. A simple one light setup with lots of punch that can be created almost anywhere. DIY win!

As you can see, it’s not at all difficult to create using the light sources you already have access to, or ones you’ve created for yourself. Just to illustrate the point with some images that have been finessed (and not taken with a recalcitrant teenager as the subject,) here are a few photos that are lit with some of the DIY techniques I’ve discussed.
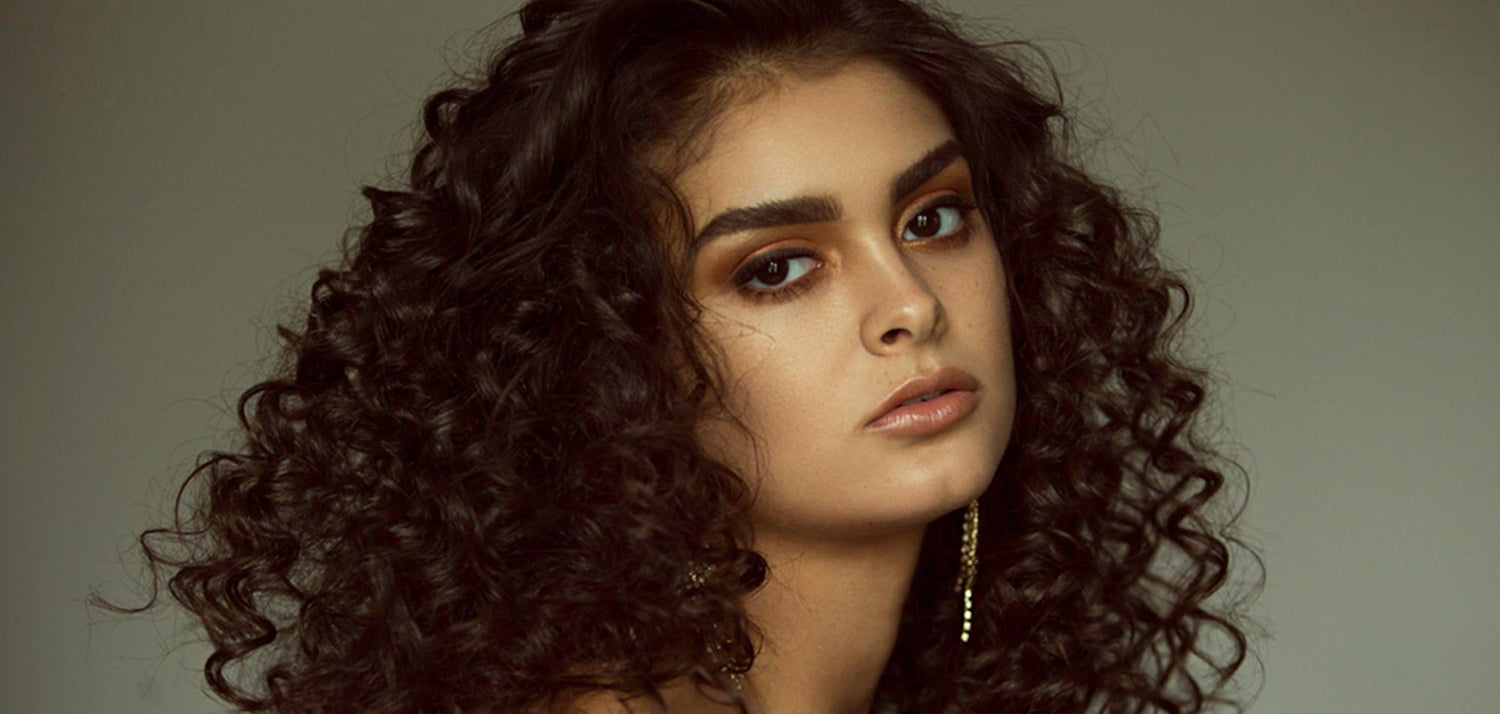
Window Light

Model Zuri Leigh in a dress by designer Marie Margot, with hair and makeup by Jazmine Gibson and Kim Clay Artistry.
Diffuse Light

Model Sophia Ibarra in designs by Marie Margot, with hair and makeup by Jazmine Gibson and Kim Clay Artistry.
Flashlight

Model Madison Flowers
Final Thoughts
It’s easy to think that great images can only be created with expensive lighting, but that’s untrue. While having a dedicated lighting system gives you flexibility and control and I highly recommend investing in a system if you can, working with what you’ve got on hand has its own advantages. Available light and DIY tools are accessible, cheap, and help you understand how light behaves while encouraging you to find creative solutions and think on your feet.
Practical light sources can often be the best light to use because they are available and suitable for the environment you’re working in.
Don’t let a lack of studio lighting stop you from mastering light or creating work you’re proud of. Give a few of these DIY hacks a try and start making photographs.

90 Days Of Content
Over the next 90 days we are going to be working with some top artists to explore recommendations giving you solutions to problems we have all gone through. We are paying the writers a really fair wage for every original article, and we are writing about things that aren’t sponsored by any brand. There is no one but our opinion behind it. We would love it if you do use our affiliate links here so we can continue to keep writing awesome articles that you can trust.


