
HOW DO YOU GET CLEAN WHITE BACKGROUNDS FOR YOUR PRODUCT PHOTOGRAPHY?
THE CINEMA 4D LEARNING CURVE
Infinite white studio backgrounds are great for eCommerce renders and showcasing products in an elegant yet simple way. Let's talk about a method to set up your CGI photo studio in Cinema 4D and Octane Render with this look!
The key to creating an infinite white background is to have two HDRI environments and a disk for a shadow catcher underneath the product. As a side note, I will be using HDRI Link from Greyscalegorrilla. HDRI Link is not required, but I love the ease with which you can swap in and out HDRI images for various lighting effects.
REFLECTIONS AND AMBIENT LIGHT
The first Octane Sky is created and renamed "Reflections/Ambient," as this will be casting the ambient light and reflections onto the product. Add an HDRI Link tag to the Octane Sky that we just created. With the Octane Sky selected, click and drag on the word "File" in the shader tab up to the HDRI Link tag and drop it there to link it to the Octane Sky. If you’re not working with HDRI Link, simply use an HDRI image from your library.
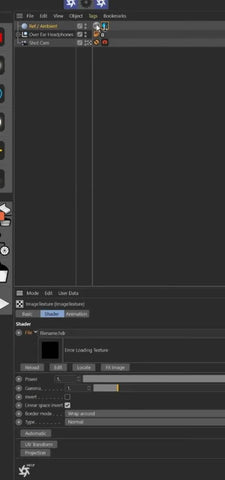
Next, we can go ahead and select our preferred HDRI image through the HDRI Link. The key to setting up the first Octane Sky is to ensure that the "Type" under the Main tab assigns it to the Primary Environment. The primary environment is the setting used to add lights and reflections to your scene. Once that is established, we will start the Octane Live Viewer to double-check that the environment is working correctly.

CREATING THE WHITE STUDIO BACKDROP
The second Octane Sky is created and renamed to "Background." Just like the previous environment, go into the Main tab for the newly created Octane Sky and set the Type to "Visible Environment." Selecting this will produce a black background in the render. The visible environment is one that’s seen by your camera. It’s great for back plates, but also works well with solid color backgrounds. This is an easy way to get lighting information from one HDRI, while providing a background from another: HDRI stacking if you will.
Using the arrow dropdown in the Texture area, move up and select "Color" from the list. By default, the color is plain white; we can now change this to the desired color for the CGI photo studio background.

CATCHING SHADOWS
Most CGI product renderings have some shadows to ground the 3d model. I like to use the disk, in the primitive shape's area, at the top of Cinema 4D.

The disk needs to have a material assigned to it, so it works properly. Head up to the Live Viewer to the Materials tab, create, and Octane Diffuse Material. In the Material Manager at the bottom of the window, we can double-click to open up the properties. Head down to the Common area on the left-hand side and select it. From there, we can see the options, and the one we need to enable is "Shadow Catcher." Once enabled, rename the material in the upper left corner to "Shadow." Lastly, assign the newly created material to the disk.
CONCLUSION
Once you’ve followed these steps, it’s a great time to add new lights to support your product best. Oftentimes I use an HDRI as a good base, and light on top of it. Creating 3d product renderings, with the look and feel of an eCommerce photo studio, on a plain white background is a relatively easy 3 step process. With the benefits of CGI, you can change the background to anything you like, whether it's a simple infinite sweep to a sprawling landscape. CGI affords you the flexibility to change all the variables on the fly. Happy creating!


