
At its heart, editorial photography is the art of visual storytelling. You’ll often see editorial work in magazines such as Vogue, W, Elle, and Vanity Fair. These publications typically have large budgets and access to amazing locations, models, wardrobe, and gear, but what if you’re on a small budget?
No problem. Don’t let a budget stop you from creating, simply learn to get creative.
What is Editorial Photography?
At its heart, editorial photography is visual storytelling. Perhaps the best way to understand editorial work is to contrast it with other genres of photography.
- Commercial: In commercial photography, a product (such as toothpaste) is being sold to the viewer. Most photographers typically use clean lighting to showcase the product and you’ll often see uncluttered or plain backgrounds to keep distractions away.
- Fashion: In fashion photography, a lifestyle is being sold. Typically, the images are moodier than commercial photography with more attention given to creative lighting. What is being sold is the garment/shoe/accessory in a social context. Example: If you buy product A (purse, shoes, car, perfume), you’ll become more like Model B (sexy, beautiful, successful, desired).
- Editorial: While editorial photography still showcases products, it does so by weaving them into a storyline. Think about how Annie Leibovitz photographed an “Alice in Wonderland” editorial for Vogue in 2003. Alice (Natalia Vodianova) drops down a rabbit hole and we follow her whimsical adventures through 11 pages of incredible, avant-garde fashion.
You’ll often see editorial work in magazines such as Vogue, W, Elle, and Vanity Fair. Of course, the photographers for those publications typically have large budgets. They can rent out locations, fly-in models, source couture gowns, and work with the best equipment.
What if you’re on a small budget? No problem. Don’t let a budget stop you, simply learn to get creative. I want to show you the steps I take when planning my editorials and give you ideas on how to shoot editorial photography on a budget.
Step 1: Mood Boards
A mood board is a single document displaying a collection of creative information. You can use them to give each member of your team a visual snapshot of what you’re creating. A mood board is free to make and begins to shape your vision for the story.
When I’m shooting for magazines, I not only create a mood board, I print it out and bring it on set so it can be referred to throughout the day. On that mood board, I’ll include hair and makeup inspiration, posing examples, color swatches (if I have a specific palette in mind), styling concepts, and lighting ideas.
This collage of ideas gets everyone on the same creative page which helps greatly in building a cohesive story.
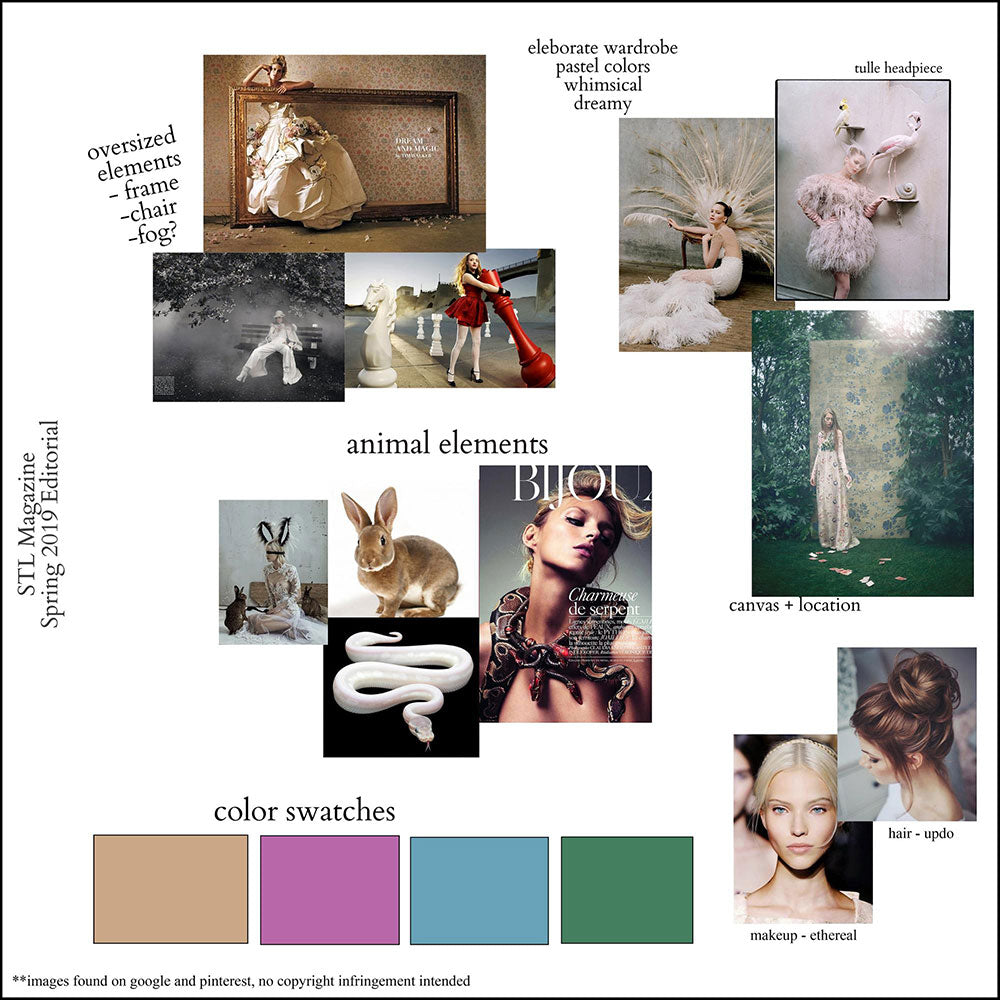
Here’s the mood board I created for “Wild at Heart”, the 2019 Spring Fashion editorial I shot for St. Louis Magazine. Below are some of our images from the shoot. You can see how the mood board helps to give direction to the entire team, but in the end, you should add your own flavor and perspective to the concept.


{ St. Louis Magazine (April 2019), Design & Creative Direction: Tom White & Emily Cramsey / Wardrobe Styling: Kristi Pinkham / Hair & Makeup: Brady Nance / Model: Caroline @ West Model Management / Photography Assist: Izaiah Johnson / Styling Assists: Hannah Chancellor & Leah Sostman }
Step 2: Models
Casting the subject of your story is an important step. Here are a few budget-friendly ways you can cast your leading character.
Modeling Agencies
If you haven’t worked with an agency, this is your chance to establish a testing relationship. ‘Testing’ means that the agency provides you with models and, in return, you provide them with photos from the shoot. A mutually beneficial relationship. Depending on the agency there may be other criteria, but that’s the gist of it.
Email agencies in your area, introduce yourself, include a link to your website, and then tell them about your project. I highly recommend sending them your mood board as well. This makes you look more professional and it gives the agency an idea of which model might be the right fit for your project.
Social Media
If you’re not ready to reach out to agencies, use one of the best resources at your disposal: your social media, and recruit there! Reach out to your friends and your followers and ask for model suggestions in your area.
Post those castings on Instagram, Facebook, etc. Offer a TFP shoot (meaning “trade for pictures”) and instead of paying your models in cash, you supply them with images from the shoot.
Step 3: Location
Your location sets the mood for your shoot. Planning to shoot on a backdrop? Isolating your subject from the world creates its own story, yet it often requires thoughtful styling to compensate for the lack of environment. While many studios are available to rent by the hour, if you’re simply planning to hang a backdrop, the cheapest option is to use a home.

Looking for locations on a budget? You’re in luck. Local areas of interest like botanical gardens, churches, theaters, colleges, historic properties, and train stations usually post their photoshoot guidelines online and often are free (or require only a nominal fee).
Note: if you’re in a large city or if you’re shooting with a production team, you may need to look into shooting permits.
Step 4: Styling
If I have nothing but a paper background and a model, styling is the fastest way I know to start building a story. My style is romantic and timeless. I like to shoot ethereal gowns and unique over-the-top pieces that you won’t find in stores.

Because of this, I often reach out to designers and ask if they’d be willing to loan pieces if I supply images afterward.
If you can’t find a designer to work with, get creative. You can rent (Renttherunway.com being a great place to find couture pieces on a budget) or even create. Remember, the outfit only has to look pretty where the camera can see it. The back can be held together with fishing line, duct tape, and a prayer. Totally fine.
Keep items like millinery netting, tulle, various fabrics, random ribbons, and crepe paper in your studio. Visit craft stores and look for oversized flowers or stick-on pearls or feathers or whatever accessories could bring your story to life.
The styling doesn’t have to be Alexander McQueen (dare to dream) to be unique. I’ve seen simple prom dresses ripped apart and restyled to look timeless or edgy.
If styling really isn’t your strong point, look for a talented stylist to bring into your team. Stylists looking to build their books may be open to a trade, while others may provide you with a day rate. The stylist can source pieces for the shoot, style them on set, and return them afterward. It will make all the difference!
Step 5: Hair and Makeup
Hair and makeup can make or break your vision. While you can fix makeup (to a point) in the post, hair needs to be right in camera. Your options here are to do the styling yourself (which I often did, starting out), allow your model to do it herself, or find a stylist interested in growing their portfolio.

Behind the scenes of a luxe portrait session. Hair & makeup by Dominique Ruiz.
I highly recommend reaching out to cosmetology school grads and bridal stylists (who may want to build an editorial book) and posting castings on your social media. There are lots of stylists who would love a chance to experience an editorial photoshoot!
Step 6: Gear
Let’s talk about lights, camera... budget. It’s no secret photography equipment gets expensive fast. Yet there are ways around it, such as:
Buy Used Equipment
There are so many amazing used cameras on the market today. Companies such as Canon will resell used and refurbished pieces on their website, but you can also find great finds on sites such as Adorama.
Rent
If you’re not planning to use a lens or piece of equipment for a long period of time, rent it! Local rentals may be available (look around), but if not websites such as LensRentals, BorrowLenses, and LensProToGo all offer a variety of cameras, lenses, and filters for a fraction of the cost of purchasing.
Try Alternative Brands
If you can’t justify spending money on name-brand lenses, you’ll be glad to know there are a variety of other options available to you. Tamron and Yongnuo are two brands that come to mind, additionally, vintage lenses as well maybe discounted in price.
Keep in mind, you’ll need to make sure the lens is compatible with your camera and read up on what the pros and cons of each lens are. While you will most likely sacrifice some quality, with a steady hand and some good retouching, I’ve seen magic made with off-brand lenses.
Use What You Have
If you’re on a budget and you truly cannot afford to upgrade right now, then don’t. Use what you have and modify the light with cheap tools like cinefoil or shower curtains. Learn the properties of light and get creative with ways to shape it.
I think of new gear like a diet pill. It promises all kinds of magic results but it only works if you do.
Let me repeat: amazing gear is only amazing if you have the knowledge and skill to do amazing things with it. A cheap camera in the hands of a pro can still yield beautiful results, while a high-end camera in the hands of a novice will produce average results. To a point, it’s more about your skills than top of the line gear. So, put in the work.
Step 7: Retouch
Post-processing is a vital step in the storytelling process. For each photographer and each creative style, the retouching process will look different. Photographers who composite heavily will rely on different tools than photographers who primarily color grade.

Here’s a retouching example from “The Painted Lady,” a vintage editorial I shot for Beau Nu Magazine. I purposefully created very flat lighting because I knew what I had planned for the post-production. Having a plan for your retouching enables you to make lighting decisions that will support your end vision for the image. (Makeup - Kelsey James, Hair - Nancy Rankin, Model - Chelsea)
Whatever your process, don’t overlook the ability to use this time to unify your colors, add special effects or textures, etc… Whatever it takes to bring your vision to life.
Step 8: Vision
This is where we stitch together everything that you’ve brought to the shoot. Your mood board, the styling, any props, your gear, and now your vision.
If you’re working by yourself with your subject, then you are your own creative team (and you probably deserve a raise). If you have a team, make sure you’ll all referring back to the mood board and making creative decisions that will work harmoniously when layered together.
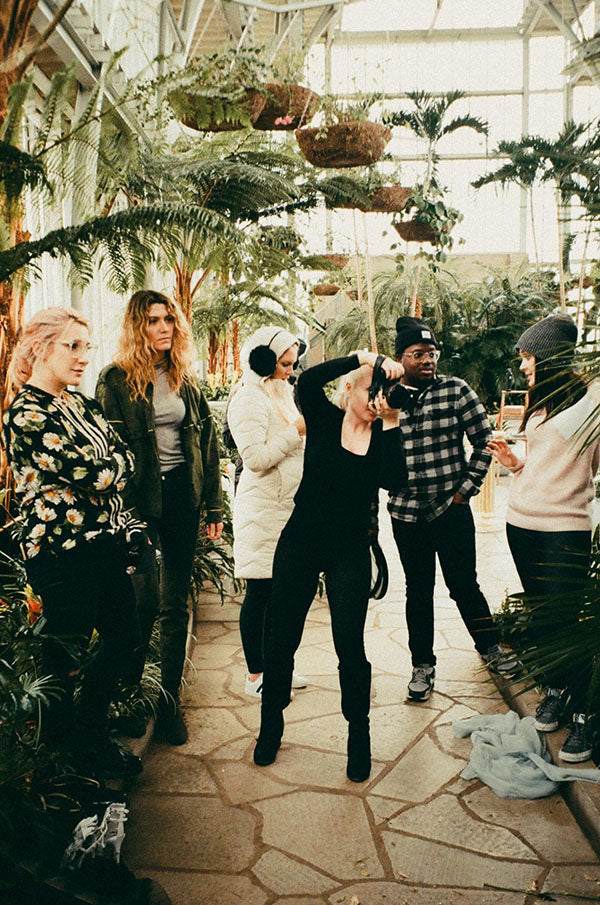
Behind the scenes with an amazing team shooting “Wild at Heart” for St. Louis Magazine. Photo credit: Chris Bauer
Learning how to shoot editorial photography is a beautiful adventure. You’re challenging yourself, your creativity, and your team to united together and elevate your ideas into something tangible. I can’t wait to see what stories you’ll tell!
If this inspires you I’d love to see how you make it yours! Tag me (@jaimayhew) when you post, happy creating!
90 Days Of Content
Over the next 90 days we are going to be working with some top artists to explore recommendations giving you solutions to problems we have all gone through. We are paying the writers a really fair wage for every original article, and we are writing about things that aren’t sponsored by any brand. There is no one but our opinion behind it. We would love it if you do use our affiliate links here so we can continue to keep writing awesome articles that you can trust.


