The dream of underwater photography is very real for many of us, and whilst some of us (me included) get to play with the expensive gear needed to create high-quality images underwater there are some very inexpensive ways to start you on your way to underwater photography on a budget.
Underwater Cameras
The one thing that separates regular dry-land cameras and those used for underwater photography is their ability to be waterproof. Water and electronics don’t mix very well, usually resulting in an inoperable piece of tech - something anyone who’s ever dropped their non-waterproof phone in the toilet knows - but luckily we have some great options for keeping our devices watertight whilst we create some awesome underwater photographs.
If you’re looking to take your expensive DSLR underwater for better image quality there are a couple of cheap underwater options, like the Ewa Marine range of soft underwater housings. These are great if you’re just wanting to shoot in the pool or in some calm open water, but I wouldn’t recommend them for shooting surf or going deep whilst scuba diving - they just aren’t that tough.

In the compact, point and shoot underwater camera arena you can go for a Nikon CoolPix or an Olympus TG-6 as an easy choice since they are waterproof without using a housing. They are great if you want something small and lightweight to shoot with but still have some control over the focal length and image quality. The Olympus TG-6 even shoots RAW so it means you don’t need to worry about White Balance in the moment - it can be adjusted later when you edit.
Underwater sports cameras, like the GoPro Hero 8 are great too as they are small and take a beating, but they are pretty limited in manual controls and their lens is a fixed wide-angle limiting your composition choices.
Waterproof smartphones are also good underwater, they can take reasonable shots and most newer ones are high resolution for quality images and can shoot slow-motion video. The issue is the touch screen, as the water will play havoc with it and even stop you from pressing the on-screen shutter button, so investing in a waterproof case like the Ghostek Nautical Waterproof Case for the phone makes this a lot easier - also check their depth rating.
My tip is to use the volume buttons on the side, as most phones can use those to trigger the shutter!
Lens Choices
Where possible you want to have an underwater camera with a zoom lens, as it gives you the most flexibility when composing your shots, but you also want something that can go wide as moving closer to your subject in murky water will mean a clearer photo - although you get more distortion.
If you’re shooting underwater on a full frame DSLR, my go to lens is the Canon 16-35mm 2.8 as it gives me a nice wide angle option as well as the 35mm for getting in closer without distortion, but you could also go for a wide angle for a crop sensor - say 10-17mm.
The GoPro 8 has a focal length of 6-33mm which can look pretty fisheye-like, especially close up with people, whereas the Olymous TG-6 is 25-100mm giving you a decent wide angle as well as a good zoom for some headshots - but again, the closer you can get to your subject the clearer the water will be.
Underwater Lighting
In the budget end of the underwater photography market you’re really limited to video or constant lighting products, as strobes like the Sea & Sea YS-D2 or Ikelite Ds-51 are fairly expensive. They also need to have some connection to the camera to be able to trigger with the shutter - either by a sync cable or optic fibre, which complicates the set up.

Products from the Lume range of lighting are great, especially the Lume Cube 2.0 Led light as it’s totally waterproof to 30ft/10m and under $100. It also comes with a set of gels and diffusers to give some creative options. The Lume Cubes are a hard light source, and even though they come with a small diffuser panel the light can cast some sharp shadows. Lume has also released an LED Panel which gives a nice soft light, but it’s not waterproof meaning that it’s a great light for shining into the water from above.
Using natural lighting is obviously the cheapest option, but it’s not always ideal as I’ll cover below.
Lighting techniques
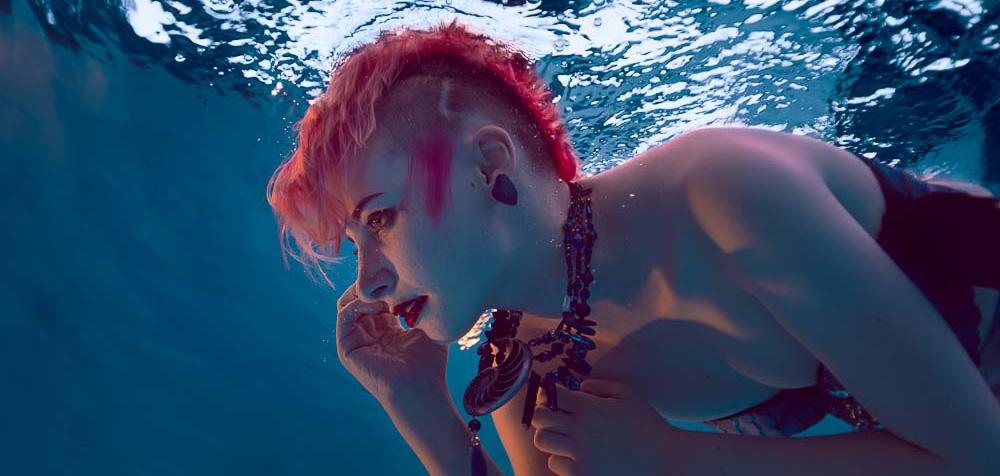
Natural light is a great place to start with your underwater photography as it’s readily available and free! The downside of it is that it’s unpredictable and sometimes hard to work with, especially if you’re using a camera that doesn’t have any exposure control, like the GoPro. If you do have a camera with exposure control then my advice is to shoot either side of noon, when the sun is lower in the sky and create a backlight for your subject.

Shooting at noon can give you way too much light and some very contrasty shadows, the earlier or later in the day the better, in my opinion. The hard light coming through the surface of the water can create ripples that show up on your subject and they’re also hard to control. I like to backlight my subject and then expose for their face, which is usually in shadow. If you’re in a lighter coloured pool or even open water with white sand it’s good to use that bounced light to fill in the shadows.
With artificial light you have a little more control over your final image, and using the backlighting technique above you can use the constant lighting to fill in the shadows. You’ll need to adjust the power and angle of the light to get the right balance, otherwise it can look a bit too “artificial.”
Diffusing or bouncing the light that comes from your source will certainly help soften any edges or shadows it creates, and you can do this with a video light by bouncing it off something white - like the wall/floor of the pool, a popup reflector, or even a white t-shirt. You can also diffuse the light by shining it through a plastic cup or a half a ping pong ball!

If you want to get more creative with your lighting, I’d suggest waiting until the sun has gone down and then using your constant lights to create some interesting effects. Like having one above the pool on a light stand aimed at the back of your subject’s hair and the other in the water off to the side to give a nice side light or a rim - just play with the power of each light to get a nice balance.

The possibilities are endless here, and the more lights you have the more options you’ll get. You can even try attaching some coloured gels to your lights, this will open up loads of options for your underwater photos - you can even get sample packs of gels so you don’t need to buy whole sheets.
Bonus tip: if you have a swimming pool with a light try using that as a key or back light for your subject. Get them to sink down, a couple of feet in front of the light and flick their hair up - the effect should be amazing!
Safety Underwater
Whilst underwater photography is great fun, it also has its dangers. Here are a few things to keep in mind while planning your underwater photoshoots:
- Always keep plugged in electrical devices away from water! Stick to using battery-powered, they are much safer.
- If you’re photographing other people, make sure they feel comfortable and safe the whole time. Having additional people with you as safety is a great idea, just to keep an eye on everyone whilst shooting.
- If your subject is wearing clothing or a large dress/fabric, make sure they can stand easily in the water or have a float for them to hold on to - pool noodles are great for this.
- Make sure everyone involved is 100% confident with their skills, the best times are when everyone is happy.
Final thoughts
Underwater photography can seem daunting and expensive, but it doesn't have to be. Using a little bit of ingenuity and some cheap gear you can really get some interesting and creative photos - all whilst having some fun in the water!

90 Days Of Content
Over the next 90 days we are going to be working with some top artists to explore recommendations giving you solutions to problems we have all gone through. We are paying the writers a really fair wage for every original article, and we are writing about things that aren’t sponsored by any brand. There is no one but our opinion behind it. We would love it if you do use our affiliate links here so we can continue to keep writing awesome articles that you can trust.


