
Welcome to part two of retouching for the iPad Pro! In the first part, we covered the best iPad Pro for your workflow, the editing apps for iPad Pro photo editing, the gear you’ll need, how to work with the Files app and pull your images from an SD Card, along with an overview of the Adobe suite of apps. We also dove into Adobe Photoshop and showed how you can develop a professional retouching workflow with it.
However, aside from Adobe Photoshop and Lightroom CC, there is another app that is not only as powerful on a desktop as it is on the iPad but also streamlines your on-the-go workflow: Affinity Photo.
If you’re someone who wants a streamlined iPad Pro photo editing workflow and wants to avoid downloading a million apps, you’ll want to look into retouching with Affinity Photo. Unlike Adobe, Affinity is a one-time purchase (currently on sale for 9.99 at the time of writing). It also combines every feature Adobe has for the Photoshop and Photoshop mix apps and jammed it full of even more features — making it a one-stop-shop for retouching. Let’s dive in!
Getting Started
Affinity photo was developed in 2015 as a Mac operating system editing alternative to Adobe Photoshop. It launched for Windows 2016 following wide success and praise for its software. In 2017 it took home Apple’s best iPad of the year award and its success has only continued.
An early adopter of using the iPad Pro as a retouching platform, Affinity has benefited from several years of rollout functionalities and is now the most robust photo editing app for the iPad Pro on the market. If you’re frustrated waiting for Adobe to play catch up, Affinity has got you covered.
Working With External Files
Working with files in Affinity is just as easy as an Adobe workflow. Like Photoshop, Affinity will pull files both from an external drive, an SD Card, or the iPad Pro itself.
You’ll want to make sure you have a USB-C SD card reader or a USB-C external drive. From there, simply plug the device into your iPad Pro. Then, navigate to the Affinity app and select the ‘+’ sign to create a new Document.
Choose ‘New Document from Files’ and you’ll be able to use the Files app to navigate to your external drive!
Affinity’s Differences
There are really three key elements of an Affinity-only workflow that users unfamiliar with Affinity will need to know: Personas, Toolbars, and Context Controls.
Personas are workspaces for individual tasks (a separate interface for Liquify versus photo development, for example), Toolbars (which change, depending on the persona), Context Controls (located at the bottom edge of your image on the Context Bar. This has additional tool preferences and settings.

Opening Documents
Like Photoshop, you have a number of options for where to import your photos from. Affinity allows imports from both the Cloud, your iPad Pro, and from an external hard drive.
When you want to import a file, simply open the Affinity app and then click the ‘+’ sign in the upper right-hand corner. Doing soon will open up a new screen filled to the brim with options. If you’re importing from an external drive or SD card, just make sure that they are plugged into the iPad Pro before trying to import them into Affinity.
There are a dozen different ways to get started with your documents in Affinity: templates, cloud retrieval, importing from the Photos App, importing from the Files App, creating Focus or HDR stacks and merges, as well as working on Batch Images a la Lightroom Classic. You can even drag images from your internet browser straight into Affinity using the iPad Pro’s Split View.
Affinity is able to handle RAW files directly, no having to import into Lightroom CC and having to export as a TIFF! RAW Files opened in the Affinity app will open in a module called “Develop” which we explore more in the next section! JPGs and other file formats will open in Affinity’s default workspace or “persona” but retouchers can switch into the Develop persona if they wish.

The Interface Settings
Affinity’s initial interface is very similar to Photoshop and users familiar with Adobe will have no problem in using Affinity. However, unlike Photoshop Affinity for the iPad Pro provides far more settings to adjust and control.
The settings panel in Affinity opens a whole new world to those of us who like control over what our photo editing apps are doing. Here you can adjust the Undo Limit, change Autosave Intervals (which you can increase or decrease depending on how much battery life you want to save), change your default save location, and there’s even a ‘Left-Handed Mode’ for our left-handed retouchers out there.
One of my favorite setting functions is the ‘Background Grey Level’. Here you can choose how dark you want the grey tone surrounding your workspace to be, allowing you to see colors relative to the space they might be inhabiting!
You can also change and import your own favorite ICC profiles and adjust not only default profiles but also rendering intents, meaning that retouchers on the go who are photo editing on the iPad for a print client — for example — can now preview accurate more profiles on their iPad.

There are additional tools and settings for retouchers using the Apple Pencil. You can adjust pressure settings up or down using a tool similar to the Curve tool. You can also change the function of the pencil’s ‘Double Tap’ feature. By default the Pencil’s double tap is set to ‘Undo’ but can also change it to ‘Zoom to Fit’ or ‘Previous Tool’ depending on how you want to work.
Editing graphic based images in Affinity gets an added boost by being able to import your own Fonts under the settings as well. As long as you have the OTF or TTF file on your iPad or on the Cloud, you can add them here!
Workspaces and Personas
Workspaces in Affinity are called “Personas” and there are five Personas: Photo, Develop, Liquify, Selection, and Export. Each one comes with their own set of tools and settings you can adjust for your images.
As a result of having individual personas, finding tools are streamlined. It’s extremely helpful to not have to click through several tool panels in order to get to the tool you need. The toolsets on the left hand side will change as you move through the personas and while some tools on the right change, some standard functions (like layers) remain the same.

The Photo Persona
The default persona in Affinity is called the “Photo Persona” and is stocked with a retoucher’s core editing tools and resources. On the right-hand side, you’ll find familiar tools like Move, Color Picker, Crop, and Fill. In addition to regular brushes, you’ll also find clone and heal brushes. A long depress on their tools opens up a sub-menu containing the patch tool, blemish tool, and red-eye removal.
Retouchers who are new to Affinity might not be familiar with the ‘Inpainting Brush’. The Inpainting brush allows retouchers to paint over damaged or unwanted areas. This absolutely includes removing objects like powerlines, dust spots, or even people.
You can also import your own custom brushes into Affinity — from commonly used eyelash or freckle brushes to your own creations. Simply tap and hold to pull up brush settings to make adjustments. Furthermore, you can use the Pin icon at the top of the panel to keep the brush panel locked in “open” mode which saves you time switching between brushes.
When you open a tool in Affinity you’ll find your tool settings pop up in a bar at the bottom of the iPad screen. This bar, called the “Contextual Toolbar” changes depending on the tool you’ve selected. You’ll be able to adjust brush sizes, opacity, hardness, and other necessary brush properties.
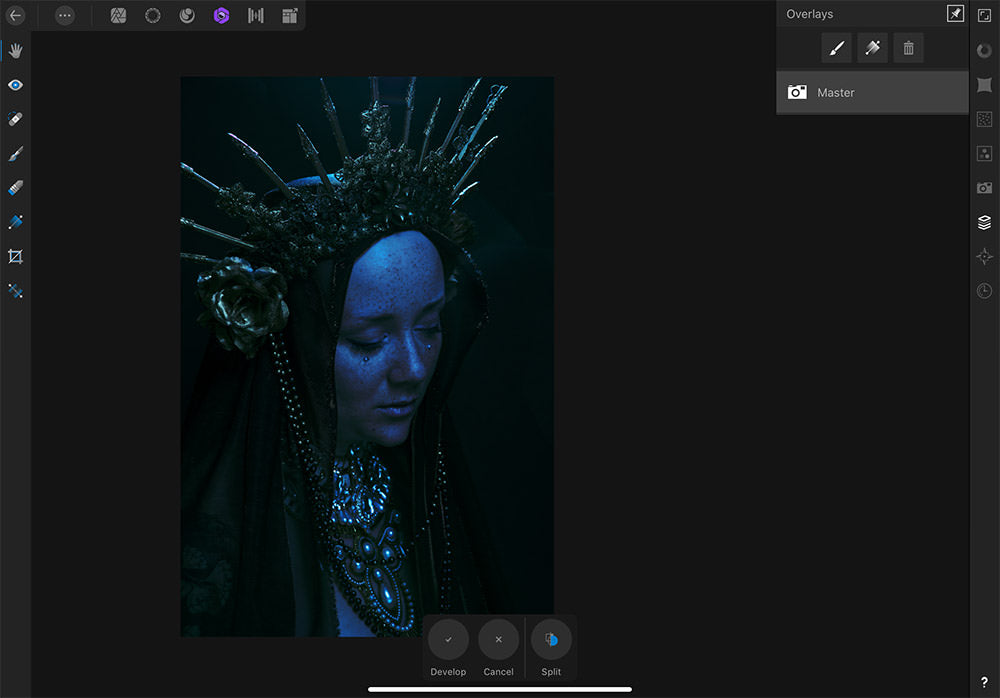
The Develop Persona
The Develop persona is Affinities Raw processor. Unfortunately, any work you do in the Develop persona is ‘baked’ into the image rather than kept in a separate EXIF file, so retouchers should be wary that anything done inside the Develop persona is destructive. Once you leave the Develop persona, you won’t be able to undo anything without starting over on the file.
However, you’ll find several useful tools in the Develop persona. On the right-hand toolbar you can pull up your Image Basics. If you are familiar with Lightroom CC you’ll be relatively familiar with how the basic’s panel is laid out. Here you can also adjust exposure, contrast, white balance, and your shadows and highlights.
Retouchers hunting for masking tools inside of the Develop persona will want to use the persona’s “Overlay” feature. Overlays are Affinity’s local adjustment tools. You’ll have the option to use a brush overlay or a gradient overlay. You’ll also be able to handle lens corrections, noise reduction, use Curves, and split toning.
The Liquify Persona
They didn’t leave anything out of the Liquify Persona! All of a retoucher’s standard liquify needs are built right into the program. It’s a very nice switch from having to completely export your image out of Photoshop and into a separate app.
When you open the Liquify Persona your image will automatically have a mesh overlay on it. Opening the panel on the left side will give users choices on how the mesh grid appears, along with your history and navigator panels.
The tools on the right-hand side will be familiar to most and have every feature retouchers have on a desktop, right there on the iPad Pro. The notable exception in familiarity with those coming from Adobe Photoshop will be the use of “Freeze” and “Thaw” which are Affinity’s version of masking tools.
The Selection Persona
Affinity’s selection person comes with a wide variety of selection tools. Retouchers have a choice of tools such as Smart Selection, Freehand Selection, Marquee tool, a Flood Tool, Color Selection, and Refine Selection Tools.
The Smart Selection tool can be a bit finicky, as the selection is tied to the pressure of your Apple Pencil or finger. However, the use of the Apple Pencil makes the selection process extremely easy as long as you remember to press hard when making your selection. The tool works relatively seamlessly and the refine edge tool is accurate even for tough jobs like hair and fur.
The freehand selection works just like a normal desktop app. Click and draw with ease. Should you want to make a different selection, a long depress inside of the selection will pop up a toolbar with a deselection option.
Your marquee tools have four options: Rectangular, Elliptical, Row, and Column. Next is the Flood tool. This tool allows you to make selections based on pixels of a similar color. This is perhaps the one tool that didn’t work as seamlessly on the iPad Pro as it does on the desktop. The pixel selection was clumsy and having to deselect pixels to get a proper selection was time-consuming and wasteful.
The color selection tool fares much better on the iPad, although the tool suffers much of the same problems as the Flood selection tool. Considering this, retouchers looking for efficiency should probably stay with the Smart, Marquee, and Freehand selection tools.
Tools and Toolbars
The best part about Affinity for the iPad are tool-specific gestures. Hold two fingers to the iPad screen to move and pan around your image. Pinch in or Pinch out to Zoom in or zoom out. If you have the Move Tool selected, you can tap on an object to select it.
You can also group and ungroup layers by opening the Layers Studio (or panel, as some people may be more familiar calling it), select more than one, and then pinch in to group or pinch out to ungroup your layers.
There are more gestures than are possible to list here but they are absolutely worth checking out. The advantage of being able to simply two-finger tap to undo or three-finger tap to redo means those little time savers add up in the long run.
Blemish, Clone, and Heal
The next set of tools we’ll go over are the blemish, clone, and heal tools. These tools are a must-have for any app trying to be among the best photoshop apps and Affinity does not disappoint.
All three are located inside of the Photo Persona and can be accessed by long-pressing the “Clone Tool” on the left toolbar. Selecting a tool pulls up the Control Bar and the tool-specific functions such as options for Size, Opacity, Flow, and Hardness.
You can even change the pressure applied. Clicking on the white arrow to the left of the Control Bar pulls up your brush alignment, Blend Mode, and source.
Having all of these options make retouching with these tools as if you never left the realm of desktop editing in the first place! Not only do you have all of these options but the tools themselves are clean, efficient, and using them hardly drained any battery life whatsoever.
Both the Healing Tool and Clone Tool allow you to choose your source point on an image, unlike Photoshop on the iPad. To choose a source, click and hold on the place you want to source texture from and a ‘+’ sign will appear in that place. After that, simply click what you want to replace and poof - it’s done.
We’ve found both the clone and heal tools fast, efficient, and simple even on larger source selections that might slow down the processor.
Adjustment Layers
Retouchers trying to use Photoshop on the iPad experienced a lot of frustration over available adjustment layers. Luckily, Affinity has no such problems. Moving from the desktop to the iPad — either coming from Affinity or Photoshop — lets retouchers lose none of the adjustment layers they love and use.
Under the adjustment panel, you’ll find the Channel Mixer, Color Balance, Gradient Maps, White Balance, and much more. In an added bonus, almost all of the tools available in the Develop Persona are available under the adjustment layers tool.
Even better, retouchers who love to use LUTs when working from a desktop or laptop computer have access to LUTs inside of Affinity. Affinity supports the use of .3DL, .CSP, .CUBE, and LOOK LUTs and will allow you to import them. Additionally, you can even export your own adjustments as LUTs for use on later images.
Filters
The loss of a wide variety of filters was also a huge sticking point for Photoshop on the iPad users. Fortunately, Affinity has packed nearly all of them inside of the program. Retoucher’s can access Blur, Color, Distortion, Noise, Sharpen, Shadow, Highlight, Haze Filters, and more!
In addition to filters with manual control, users can also use “Auto” filters for fast corrections. You can have Affinity’s AI to correct White Balance, Levels, Contrast, and Color.
Having access to all of these options — both familiar and unfamiliar — means you might need to do some digging into just what an “Erase White Paper” filter does but allows retouchers the breadth and depth of tools they need to work. It allows retouchers to finally do the last piece of the retouching puzzle: Frequency Separation.
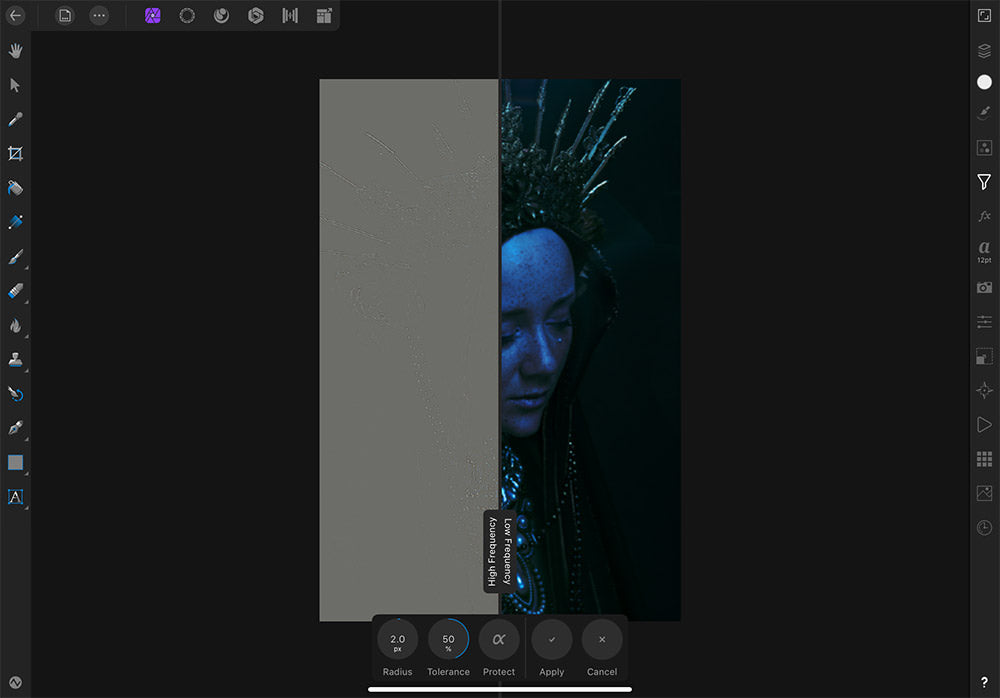
Frequency Separation
The Frequency Separation filter in Affinity is the last missing piece of a professional retouchers workflow. While both Photoshop and Affinity have Dodge and Burn capabilities, only Affinity has the ability to create Frequency Separation.
Not only does having it help retouchers but having it automated is even better. When you’re on the go, you probably don’t have a whole lot of time. Making it a controllable Filter ensures that retouchers can use the feature quickly and efficiently.
Selecting the tool pulls up the additional controls found on the Context Bar. Moving the Apple Pencil (or your finger!) on the screen moves the Radius or Tolerance controls up or down to get the perfect numbers for Frequency Separation. Additionally, you can also use Affinity’s ‘Protect’ Feature, which will use AI to protect ‘facial features’ in the image.
The Protect feature did seem to protect the face in the test images we worked with, but we preferred to do Frequency Separation the old school way. However, it’s worth playing around with and seeing if it’s applicable to your images!
Image Stacking
Another feature in Affinity is Image Stacking. Image Stacking has lots of benefits — object removal, noise reduction, exposure merging, long exposure simulations, blending, and now we finally have it in Affinity Photo for the iPad.
Affinity even has a separate way to make a document to make it easier to do it. You’ll simply select ‘Image Stacking’ under the ‘+’ Icon. Drag the Files or Photos app up into the corner of the iPad Pro so that it activates the split view. Once you have your app pulled up, simply navigate to your images, then click and drag them into the Affinity App.
When the Affinity app opens the document, the photos will automatically be stacked in a layer group. You may need to adjust the strength of it, so simply tap the ‘Layer Options’ Icon in the left-hand corner of the Layer app and you can change the “Stack Mode”.
If you want to use the stacks to create an image with Object Removal, you’ll follow the same instructions, but when you drag the images into Affinity, you’ll want to select ‘Align Source Images’ and ‘Perspective alignment’, then tap OK. BOOM! It’s that easy.
Retouching On the iPad: Wrapping Up
Retouching on the iPad Pro has come a long way and has never been easier. Whether you choose the Adobe suite of apps or Affinity retouchers can now truly retouch on an iPad as if they were on a desktop — and perhaps even better.
With the advent of a truly powerful suite of apps, the power of the new iPad Pro processors, and the accuracy of the new Apple Pencil, editing on the iPad is not only a really interesting way of working, but also can be far more streamlined and easier to work with than a mouse — or a tablet.
Editing on the iPad Pro allows for direct contact and tactile responses to what is occurring on screen without the learning curve of the eye-hand coordination of a Wacom tablet. With the addition of gestures and the portability of having an iPad Pro, the experience of retouching on the iPad rivals — and might soon eclipse — spending the cash on a Cintiq. I for one, can’t wait to see what’s next.

This article was guest authored by our good friend, Ayden Grace.
Ayden is a fantasy fine-art photographer based in Dallas, Texas.
90 Days Of Content
Over the next 90 days we are going to be working with some top artists to explore recommendations giving you solutions to problems we have all gone through. We are paying the writers a really fair wage for every original article, and we are writing about things that aren’t sponsored by any brand. There is no one but our opinion behind it. We would love it if you do use our affiliate links here so we can continue to keep writing awesome articles that you can trust.


