When Apple launched the iPad Pro in 2018 they hailed it as the laptop replacement we had all been waiting for. Unfortunately, that didn’t quite do the trick for most of us photographers that were looking to make the upgrade from old MacBook Pro models, we were all left more than a little nonplussed.
Now that Apple has released an even more powerful iPad Pro in March 2020. We finally have a suite of apps for a serious retouching workflow. It's time to find out if photo editing on the iPad Pro is truly an option for the professional photographer.
We’ve split this topic into two parts in order to better reflect the possibilities of retouching on the iPad Pro. The first part will focus on an editing workflow with the Adobe Suite of apps and the second part with the little known, but powerful underdog Affinity. The two parts together will give you a comprehensive overview of photo editing on the iPad Pro.
Getting Started
Developing a retouching workflow on the iPad is, unfortunately, not straightforward or streamlined. There are a huge number of free photo apps available and there are many ways to get your retouching done on the new iPad Pro.
In order to keep focused and choose the best apps for your photo editing, it will be helpful to write down your current workflow from your MacBook Pro or desktop - and then take stock of what you hope to accomplish on the new iPad Pro.
The Necessary Hardware
There are a few pieces of necessary hardware to do photo editing on the iPad Pro. You’ll need an iPad Pro. I suggest the new 2020 iPad Pro for the new eight-core A12 chip, and screen quality when you retouch. You’ll also need the Apple Pencil. If you get the new iPad Pro, you’ll want the Apple Pencil 2 for a better grip and ergonomics.
Color management is a key part of any serious professional’s toolset. Despite Apple’s TrueTone technology, any serious professional will want to ensure their device is color-managed. Thankfully, this is now possible with the ColorTrue app from X-Rite!
Apps! All the Apps!
The next thing to consider when editing is your app choices. There is a whole slew of free photo apps to choose from, but what you choose will depend on your own retouching workflow. Adobe Photoshop, Adobe Lightroom CC, Photoshop Fix, Affinity, SnapSeed, VSCO, Meitu, etc. are all options, but not all are suited for a professional’s workflow.
Adobe Photoshop, Lightroom CC, Affinity Photo (which is basically a subscription-free photoshop app), and ColorTrue (a color calibration app), will be your best apps for editing photos on the iPad Pro, as well as to create an iPad-only photo editing workflow. These apps combine the largest variety of tools, most familiar interfaces, and the easiest compatibility with formats you are already working with.
Getting Those Images on your iPad Pro
In order to retouch on the iPad Pro, you’ll need to consider how you want to get your files onto the iPad. There are three options for importing files regardless of where you do your photo editing: One, Move images from the Cloud, Two, import images from an external drive, and three, import images directly from your camera!
With the first method, you can import your images from the Cloud to your iPad and you’ll need to download either Google Drive, Dropbox, or any other cloud file service. The second method is if you want to move files from your desktop, MacBook Pro, or laptop, to your iPad. You can use the iPad’s USB-C port and an external harddrive like SanDisk’s USB-C SSD Extreme Portable Drive.
The last method is a direct import of images from your camera. Using the iPad Pro’s USB-C dock, you can hook your camera directly to the iPad and import the images using Lightroom CC’s interface.

Once you’ve decided how you want to move your files, you’ll need to load them onto the iPad Pro itself. Apple has recently launched the Files App for the iPad, allowing you to save and locate files similar to the way Finder works on Mac or Explorer on Windows. The Files app also allows for viewing files on an external drive - including RAW files.
I found downloading my files from Google Drive complicated and confusing. There is no “download” button in the app, so you have to click on the individual file and select “Open In” before being able to “Save to Files”. Not necessarily the most intuitive order of operations.
Moving files from an external drive is far easier. Simply plug the drive into the iPad’s USB-C port and then navigate to it under “Locations” using the Files App. Once you’ve located your file, click “Select” and then “Move” to duplicate the file onto your iPad. You can even create a new folder on the iPad specific to your project!
The Battle of Two Workflows
There are two workflows available to professionals who want to do their photo editing on the iPad. The first workflow is done strictly with Adobe apps only. This is especially convenient if you’re dedicated to getting the maximum benefit of your monthly subscription and you want to take advantage of Adobe’s Cloud.
The second workflow circumvents Adobe and entirely relies on the third-party program called Affinity. If you’re not familiar with Affinity, it was a low-cost Photoshop alternative developed in 2014. Where Photoshop CC has struggled to put out all of the bells and whistles of the full Photoshop version - Affinity has not. We’ll talk more about a retouching workflow with Affinity in Part 2.

Starting the Retouch with an Adobe Workflow
Working on an iPad workflow is unfortunately, anything but streamlined - especially if you’re looking to follow your desktop workflow. For the purposes of this example workflow, we’ll assume that the files you imported to your iPad are RAW files and you’ll need to either open them in Lightroom CC or take them into the Affinity Photo app. Let’s take on the Adobe workflow first.
Adobe’s Biggest Miss
Once you’ve got your file management under control, the next step in most photographer’s workflows is to head into Adobe Photoshop. If you’ve been hoping to work on RAW files inside of the project, you’ll hit a crucial snag - Photoshop for the iPad does not support RAW files.
In order to work on uncompressed files on a pure Adobe app set, you’ll need to either convert the files before you transfer them to the iPad (completely disregarding our iPad pro-only workflow) or you’ll need to convert them after you transfer.
Luckily, Adobe’s Lightroom CC iPad app does support RAW files. This means once you load your files onto your iPad, you can simply import them into Lightroom CC and then export them to TIFFs, DNG’s, or PSD’s. Some of you may choose to work on development basics in Lightroom CC since some basic functions (like White Balance) are still missing from Adobe’s Photoshop apps and its road map.

Starting In Lightroom CC
After importing your photo into Lightroom CC (using whatever method suits you best), you’ll want to make any basic adjustments here first. White Balance, Sharpening, Lens Corrections, and Noise Reduction are best done in Lightroom before you export as a TIFF to Photoshop CC.
Those of you coming from Lightroom Classic might find the interface a little more challenging to work with but rest assured, working in Lightroom CC is a breeze once you get familiar with it. The buttons are clear and intuitive to use, the icons familiar, and the use of gestures makes things like culling images a breeze to use. Thanks to the iPad’s excellent screen even the 11” model allows you to zoom in for tiny details.

If you’re hoping to work in big batches, you might be slightly disappointed in Lightroom CC. Selecting hundreds of photos is tedious and there is no shortcut for mass selecting.
Once you’ve wrapped up your adjustments you’ll need to either export the file back to your ‘Files’ or select ‘Open In’ and choose the Photoshop App. If you use Lightroom’s ‘Edit In’ ‘feature only gives you options to take your photo to Adobe’s ‘Photoshop Fix’ app.

Photoshop Fix
The Photoshop Fix app is a free photoshop app developed by Adobe specifically for “creative mobile editing”. Professional photographers will find a large set of familiar tools in the app - clone, spot healing, liquify, patch healing, as well as paint, and color. Additionally, Photoshop Fix allows for layers - meaning any edits you make are non-destructive. This is key for any professionals working on original files.

If your workflow has you running Liquify or you need to paint or colorize the image, exporting to Photoshop Fix will be the next step. Luckily, the app is easy to use but powerful. Running a 40mpx test file through the app resulted in nothing less than an incredible performance.
Each adjustment you make creates a new “invisible” layer. Clicking on an adjustment you’ve already done loads that “layer” allowing you to undo any adjustments you’ve made. Once you’re done, you can either “flatten” the layers and export your image to a social media network, or you can keep your layers and simply export and click “Send to Photoshop CC”.
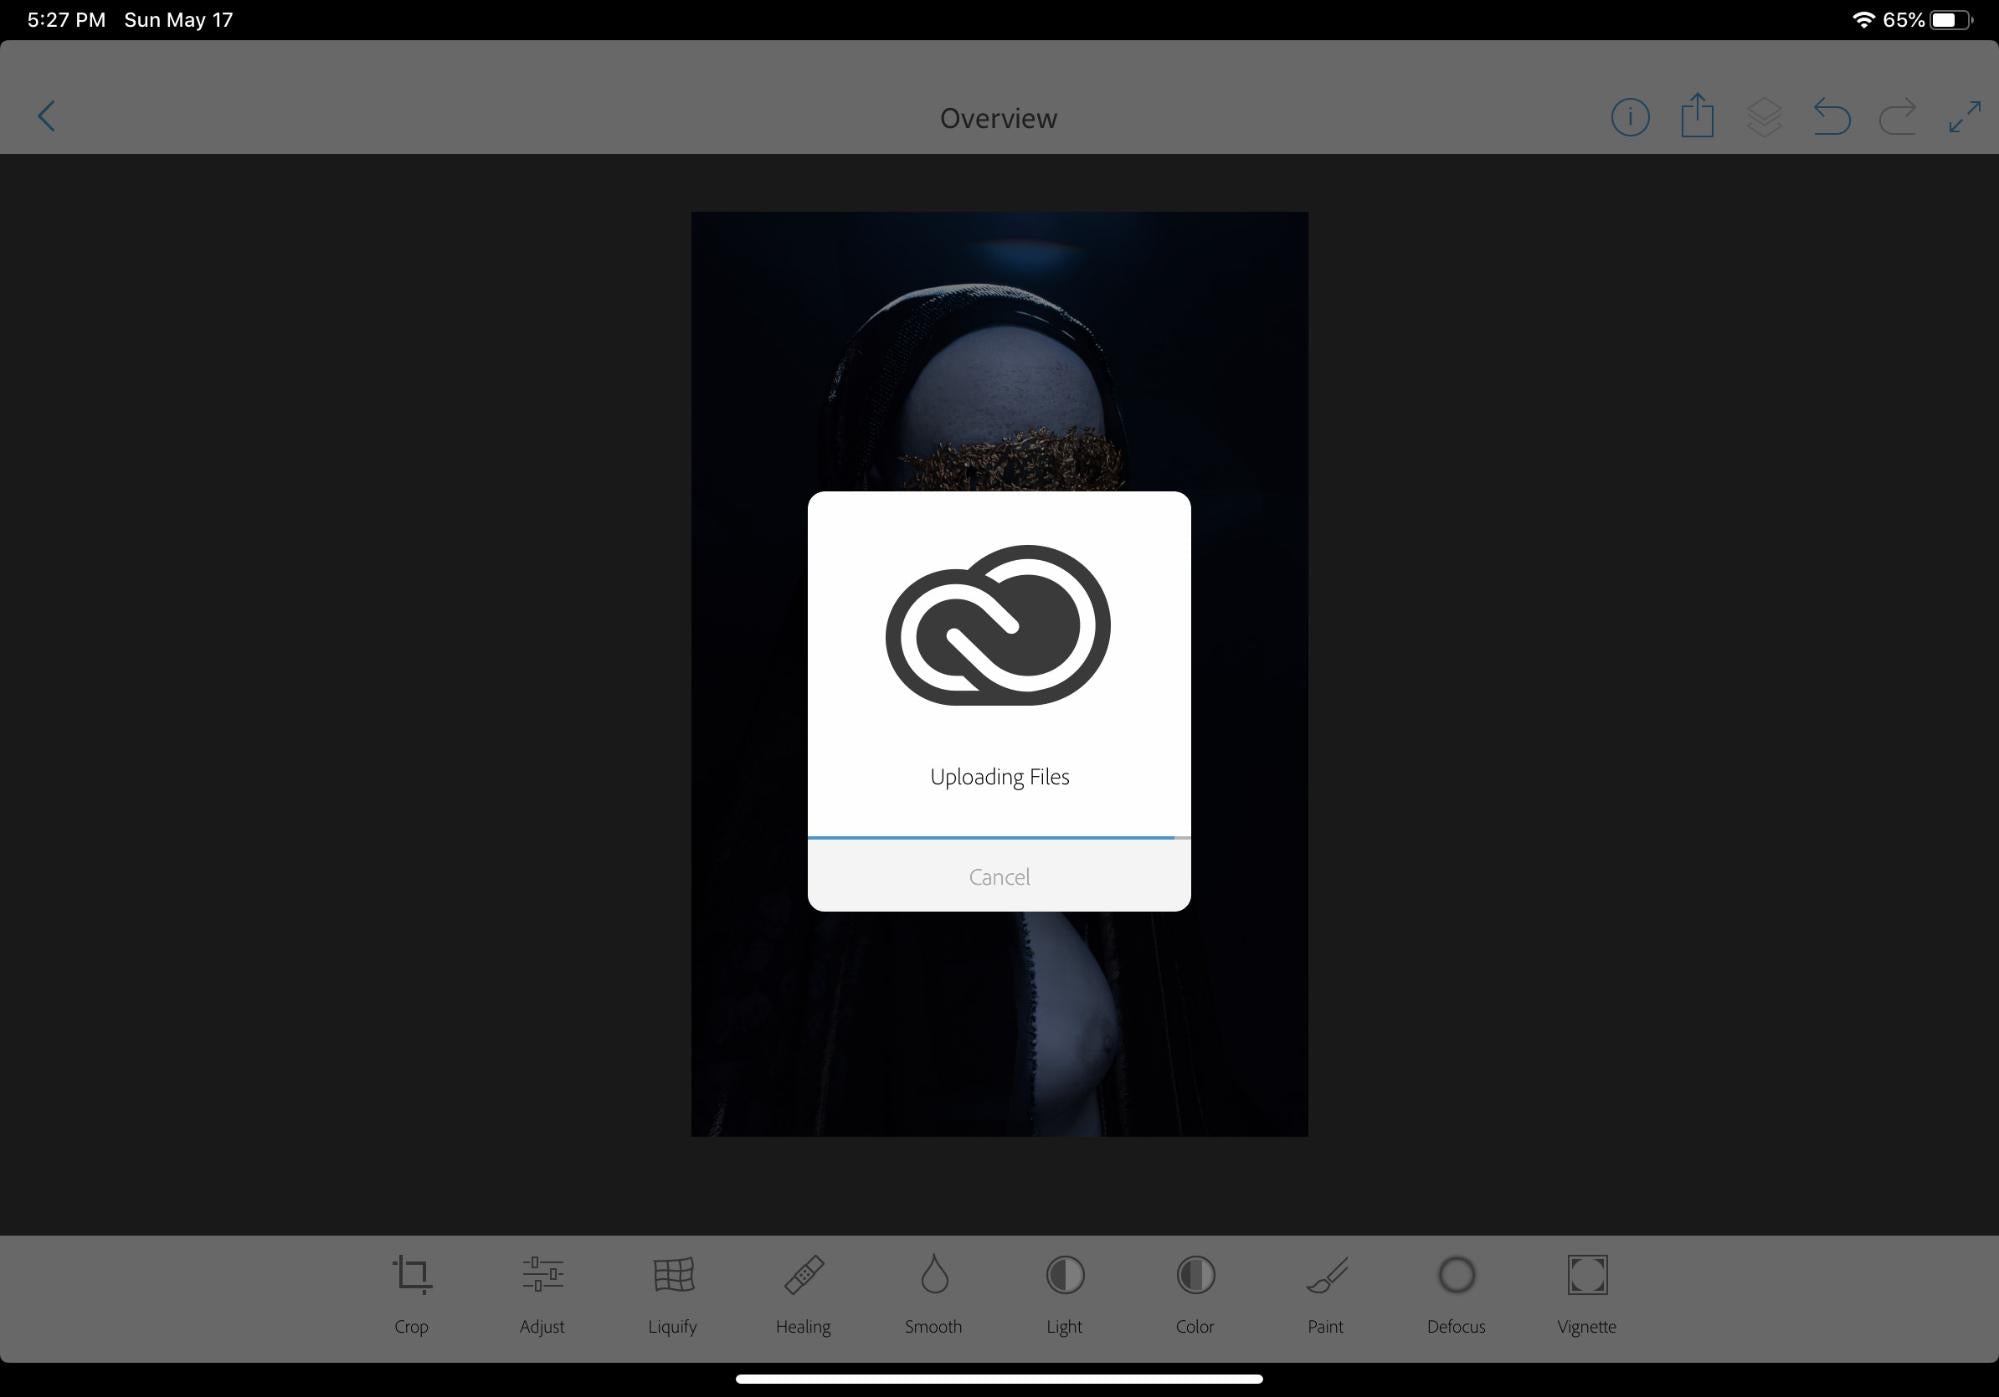
Unfortunately, any time I tried clicking on “Send to Photoshop CC,” a CC loading screen would pop up that always resulted in a “Network Error.” If I selected that option a second time I often resulted in success, but I could never find the cloud file on my iPad.
What DID happen - as soon as I logged into my desktop computer - was that my Photoshop desktop application launched! Appearing on my screen came to the image I’d been working on moments before, complete with separate layers for each adjustment I made.
It was an unexpected bonus but not the result I was after. If I wanted to export it to Photoshop CC for the iPad, I either needed to flatten it and export it to the iPad’s camera roll or select the “Open In” feature (which also flattened the image). For now, Photoshop Fix remains a destructible tool on an iPad Pro-only workflow and therefore, my last stop in my workflow.
Photoshop for the iPad, finally!
Now that you’ve imported your photos onto your iPad Pro, done basic adjustments, and then exported the image to your ‘Files’ app as a TIFF, DNG, or PSD you are finally ready to work in Adobe Photoshop! Phew.
The Initial Interface
The home screen of Photoshop looks refreshingly similar to the desktop version. You have your recently opened documents front and center, with a brief menu of options on the right. Creating and Importing an image is in the lower left-hand corner.

Creating a new image prompts another familiar interface. You can select your size and resolution, but unfortunately, you’re limited to 8bit RGB color mode settings with no way to change it.
Opening the import dialog allows you to select your chosen image from your Photos, Files, or directly from the Camera itself. Once your image is imported you’ll be sent to a new Photoshop workspace.

Tools and Toolbars
This workspace is Adobe’s dedication to minimalism while keeping the interface familiar enough to get around. On the left-hand side, you have a standard toolbar where you’ll find your favorite tools like the Paintbrush, Eraser, paint bucket, and healing tools.
A long press on any of these tools reveals their counterparts. For Example, if you want to find your clone brush, you’ll simply need to long-press the healing tool.
When you select a tool that has additional options a bar will appear alongside the toolbar with the relevant settings. When opening the clone tool, you’ll find a box with numbers (your brush size), a circle with a soft outer shape (Your brush hardness), a transparent box (the opacity control), and then a target (this is your target source). There are also three ellipses for additional settings and controls.
There are a lot of settings and controls that Adobe has had to pack down into a bite-sized package. Fortunately for us, they have (mostly) done it rather intuitively with tool functions.
On the right-hand side of the workspace, you’ll find an additional taskbar. Here you’ll find your layers, layer options, as well as the ability to add layer and layer adjustments.
You’ll also find the ability to create new layers (with a long press for adjustment layers), turning layer visibility off and on, masks and mask creation, along with a clipping adjustment button, and a ‘Filter’ section that really only holds Gaussian Blur and Invert.
Clicking the ellipses functions like a right-click on Photoshop for the desktop with a small army of adjustments and selections.
Along the top of the workspace, you’ll find your typical undo and redo buttons, the cloud connectivity indicator, Export, and your help button. Photoshop for the iPad files are saved to the Adobe Cloud, which means they automatically save every minute or so.
Images being saved to the cloud also affects the Undo/Redo States. According to the history steps, images are able to revert all the way back to the beginning so long as you do not close out of your image.
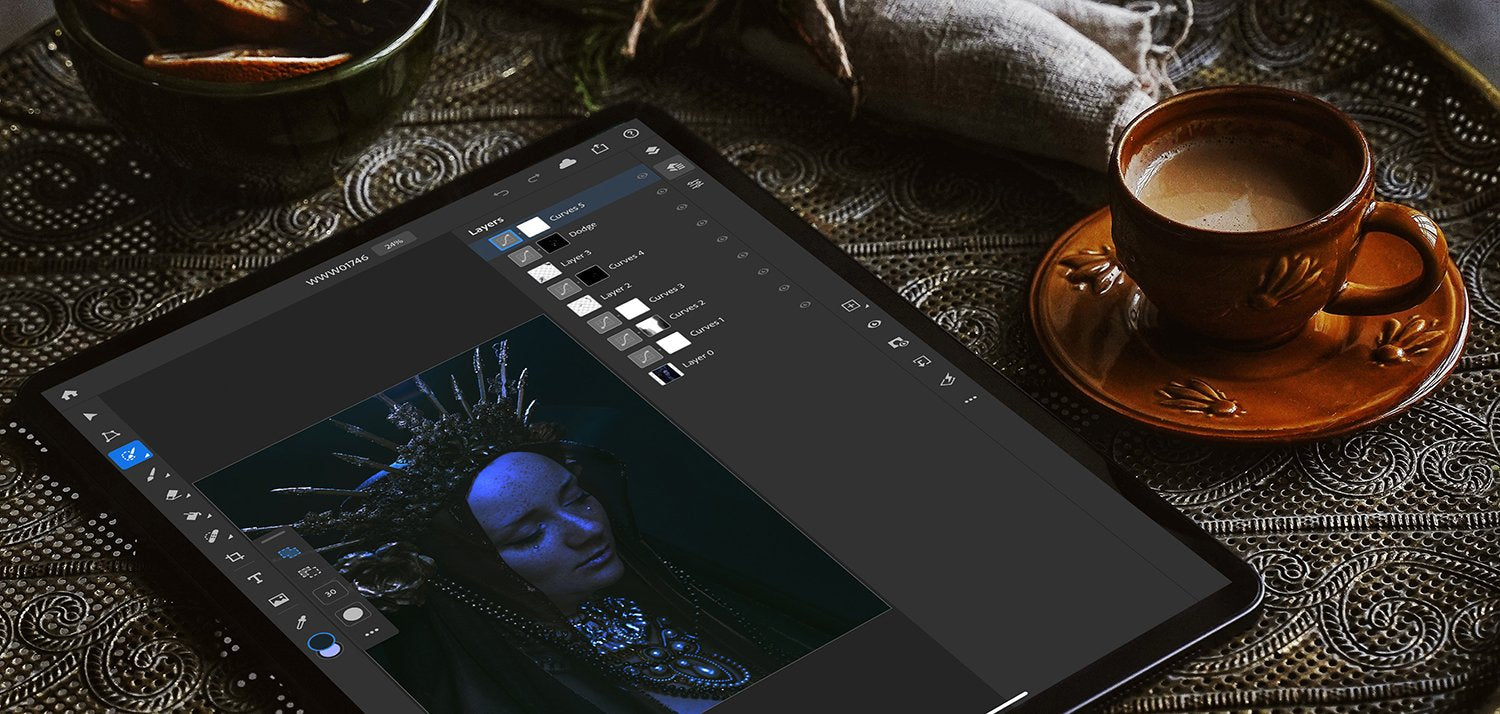
Layers, Layers, so Many Layers
Let’s get the biggest question out of the way: Yes, there are layers in Photoshop for the iPad and yes, there is a limit to the number of layers you can have. How many layers can you have? Up to 500!

Now that we’ve cleared that out, let’s get down to it. All of your layer and layer options are all situated on the right-hand side of the workspace. There are two ways to view your layer stacks. The first is a snapshot style layer view that floats halfway down the right-hand toolbar.
If you want a more traditional view, you can select the second layer view option. This displays the layers in a way that users will be most familiar with from Photoshop CC.
By long pressing the ‘new layer’ button you can pull up the adjustment layers options. Here you can create some of the basic adjustments such as:
- Brightness/Contrast
- Black And White
- Color Balance
- Curves
- Exposure
- Hue / Saturation
- Levels
- Vibrance
More advanced tools such as Gradient Maps, Chanel Mixers, and Color Lookups are missing from this version.
Even though these tools are available their full feature set is not. For instance, with a Hue/ Saturation adjustment layer you are only able to select from what desktop or MacBook users would be familiar with as a “Master” channel. It lacks the ability to target individual color channels.
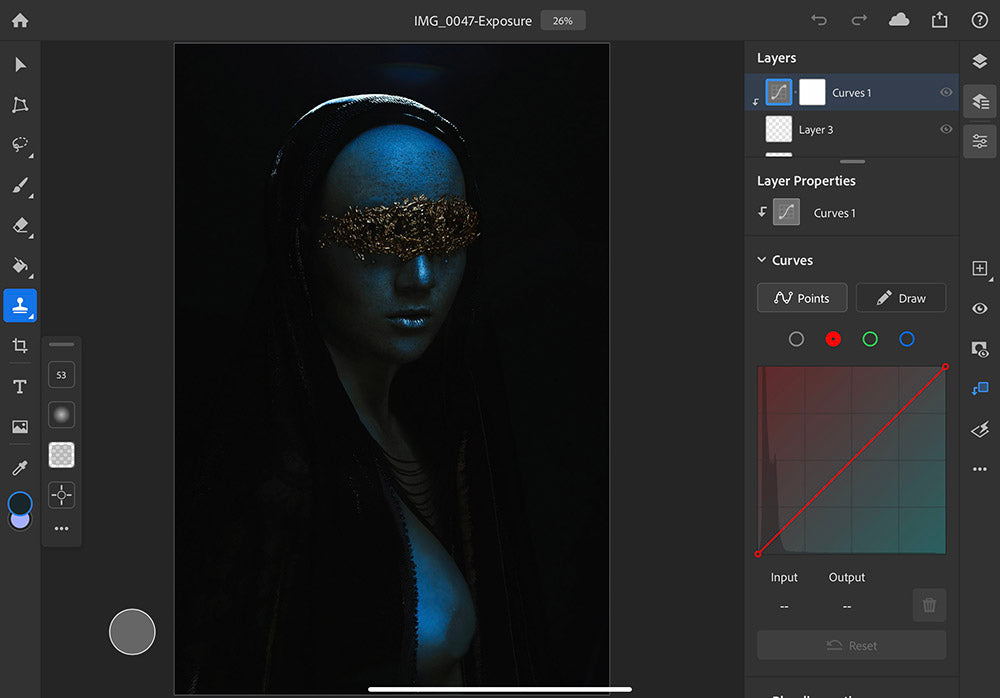
The Curves adjustment tool is particularly wonderful on the iPad. Creating a curves adjustment tool pulls up the Layer Properties. When you select the ‘Red’ Curves channel, you’ll see the curves dialog box changes to red on top and blue on the bottom to reflect how pushing or pulling the Red Curve adds to the image. You’ll see similar changes in both the green and blue channels.
There are also layer blending modes, nested under layer properties, but the blending options are limited to Opacity controls only. Both ‘Effects’ and ‘Smart Filters’ are listed as ‘unsupported’ for the mobile devices - a hint perhaps, of what’s to come.
If you want to invert your layer or mask, you’ll find that tucked away under the “Filters” section on the right-hand toolbar.
Dodge and Burn and Frequency Separation
With the addition of layer masks, and the introduction of the Curves tool in the latest version of Photoshop for the iPad, photographers and retouchers alike can now take retouching on the iPad seriously. These updates mean that Dodge and Burn are now completely possible exactly like the desktop version of Photoshop.

To do Dodge and Burn on the iPad, all you need to do is create a Curves adjustment layer (just as you normally) then invert the mask using ‘Filter and adjustments -> Invert’.
Double-clicking on the layer name will pull up the dialog box to rename the layer (Either ‘Dodge’ or ‘Burn’ depending on your preference) and then repeat the process for your second layer.
Photoshop Actions are not supported on the iPad version as of the writing of this article, which means you’ll need to create your Dodge and Burn layers manually each time.
The lack of a full-fledged Photoshop also means Image Filters (such as the ones needed for Frequency Separation) are missing, rendering any Frequency Separation method unusable for the time being.
Healing and Cloning
Non-destructive healing and cloning on the new iPad Pro are some of the most rewarding aspects of Photoshop on the iPad. Not only are the tools responsive but they are also extremely intuitive and accurate. However, users might be disappointed to find that the only healing tool available is the Spot Healing tool.
While not having manual healing control is mildly frustrating, you’ll be hard-pressed to find fault with it. Adobe has seemingly improved the AI behind it, giving you a better overall experience with the tool.
Even on the more complicated issues, the Spot Healing tool proved fairly accurate and useful in almost all situations. You can also click the Ellipses to ensure it’s sampling “all Layers’ and you can decide whether or not you want pressure sensitivity to determine the size of your brush.
Cloning is similarly well attuned. By using your left hand to select the source point tool and using your right hand to draw the area of your clone you’ll see your speed improve dramatically. Especially when paired with the Apple Pencil, the clone tool becomes a fast, accurate speed demon of a tool.

Masks, Composites, and Selections
Composites, one of the most technical aspects of Photoshop even on your home MacBook, are absolutely possible on Photoshop for the iPad, with some caveats. In some ways, Adobe has automatically intuited what and when you need certain tools.
When you want to add a composite to your image, you can use the ‘Image’ import function in the lower left-hand toolbar, navigate to wherever you have stored your composite element, and click ‘Import’. By using this function, you’re automatically loaded into Photoshop for the iPad's “Transform” function.
The transform function allows you to resize and rotate your imported image wherever you like on your background plate. Once you’re done, you can simply click “Done” and be returned to the main workspace. If your imported image has a dark background, you can choose to go to your Layer Properties -> Blending Options -> Screen rather than cutting out the image using the selection tools.
If your image does not have a dark background or you need to cut your image from the background; Photoshop for the iPad has a wide and powerful selection of tools to make that easy. Simply go up to the Masking tool (a lasso) and long press to pull up the masking toolset.
Here you’ll find your standard lasso tool, magnetic square selection, magnetic lasso tool, and two variations of your standard selection. Perhaps the most exciting tool in this set is actually the option to “Select Subject”. Simply click, wait a moment (on our large file it took approximately one second) and Photoshop’s AI will automatically select the subject for you.
This worked on several of our images and lighting conditions including images that were extremely dark, busy, or on a clean background. It will also pull up an additional dialog box at the bottom of your screen for mask creation, erasing, or inverting.
Wrapping Up in Photoshop
Now that you’ve gotten your image completed, you can use Photoshop’s export function to send your image to a wide variety of apps (Hello, instant Instagram post). You can also select a decent variety of formats including JPG, PNG, PSD, and TIFF.
Photoshop for the iPad has proven to be a formidable tool for professionals retouching images and with every update, Adobe gets closer and closer to matching Photoshop CC on the desktop.
It’s not quite there yet for more advanced users, as it's missing key features and compatibilities and often sends users who want certain features out to other apps - an annoyance for those of us that like streamlined workflows.
However, for users already part of the Adobe family, for fundamental retouching needs, and to capitalize on the On-the-Go aspect, Photoshop on the iPad has more than a decent starting point. With Adobe’s interest in listening to its iPad customers and the roadmap the company has already laid out, I have no doubt we’ll see a truly full-fledged Photoshop on the iPad soon.
Stay Tuned for the next article in this two-part series where we’ll tackle the second iPad retouching workflow!

This article was guest authored by our good friend, Ayden Grace.
90 Days Of Content
Over the next 90 days we are going to be working with some top artists to explore recommendations giving you solutions to problems we have all gone through. We are paying the writers a really fair wage for every original article, and we are writing about things that aren’t sponsored by any brand. There is no one but our opinion behind it. We would love it if you do use our affiliate links here so we can continue to keep writing awesome articles that you can trust.


