I’m obsessed with the magic you can create with one light photography! I’m going to show you how to create lighting with maximum impact and minimal equipment and by the time we’re done, I hope you’ll love these setups too.
My Introduction to One Light Photography
Let me start by telling you why I love this lighting. When I started in photography it was as a hobbyist with a small budget and zero technical knowledge. I was gifted two cheap constant lights and started out by photographing reluctant friends in my studio apartment (glamorous it was not).
When I was finally able to purchase my first strobe, a single Alien Bees 800, I was surprised at the learning curve required to advance to this new system. The quality of light was inarguably superior - more consistent and more powerful with countless modifiers available - but with a strong light came a greater need for control. This meant that my go-to lighting setups for the constant lights had to change.
To start learning my new light, I purchased two modifiers, a softbox and a beauty dish, and I began experimenting with what portrait lighting looked like with only one strobe. Fortunately, with a little practice and the right setups, I found that you can create beautiful lighting with a single light source. (you can, I promise! Let me show you how.)
For the purposes of this article, I will be referencing a strobe in my set-ups, but there are, of course, many other ways you could create the light. Whether you have a Stella, speedlights, constant lights, even a window if that’s what’s available to you - the principles of light stay the same, so use what you have, and let’s build from there.
THE SCRIM

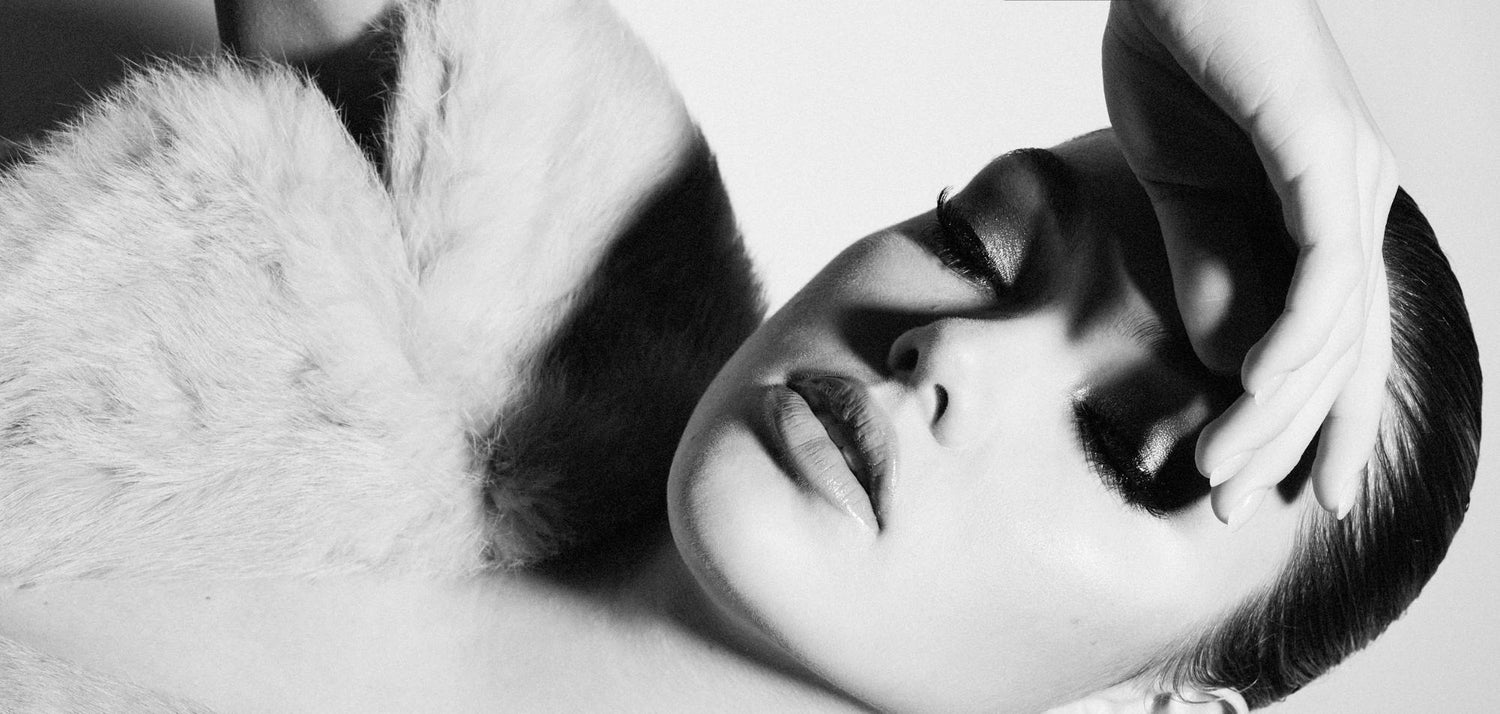
Subject Credit: Reagan
Desired result
To create very soft light, almost mimicking daylight (soft and directional) with one light.

The Setup
One strobe attached to a large umbrella was placed behind a 6x6 scrim (similar to this one). The strobe is approximately 6 feet away from the subject and one foot behind the umbrella. Both the scrim and the flash are 20 degrees to the side of the subject. The scrim is supported by two C-stands and is angled slightly down to further mimic sunlight streaming in through a window.
Tools
The strobe is shooting through a large umbrella. My goal was to replicate daylight and to do that with only one light source, I needed to significantly soften the quality of the light. For that a scrim is perfect! If you’re not familiar with a scrim, it’s simply a piece of translucent fabric that is placed between a light source and the subject to reduce the intensity and harshness of the light.
For this setup, I used a Lastolite scrim (I love this scrim because it’s large but easily breaks down for transport), but if you don’t own a scrim, no problem, you can easily clamp a translucent fabric (like a shower curtain or diffusing fabric) to a background stand or PVC pipe and make your own.
Outcome
I loved the quality of this light! But keep in mind that there are two angles to be aware of when you’re shooting through a scrim. The angle of your strobe and the angle of the scrim. If your light is angled down, but the scrim is flat vertical, the light won’t filter over your subject the same way. Experiment with the scrim at different positions to see all the ways you can bend the light.
Variation
Changing the location of the strobe + scrim will greatly change the direction of the light. Move the lights around your subject to create a completely different mood. Ex: place it directly overhead like sunlight, at 45 degrees for stronger shadows, etc…
REFLECTOR DISH

Desired result
Use one light photography to create sharp contrast on the subject, hard shadows against smooth white skin.
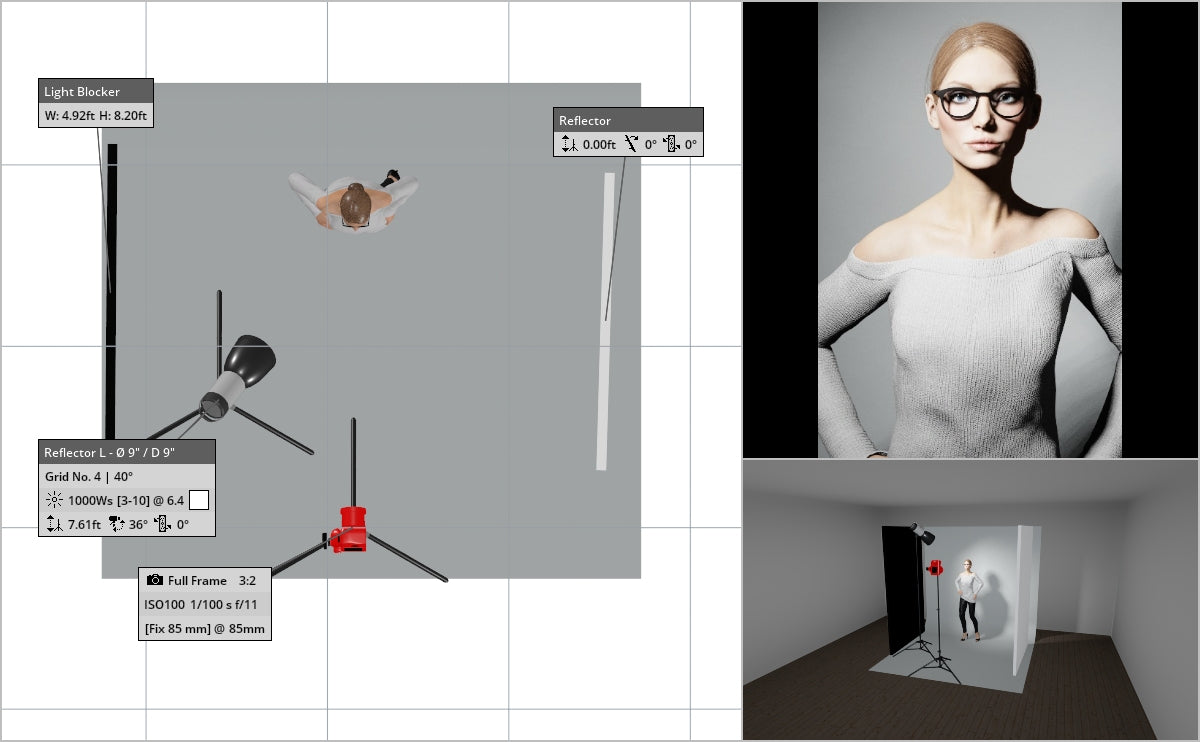
The Setup
On camera left, the strobe was placed up high and angled sharply down to create those hard shadows. The strobe was placed approximately 15 feet back from the model to make those shadow lines crisp. Remember, the closer your light source is, the softer the light (and resulting shadows) will be. Keep moving that light further back until you get those extra sharp shadows. Then, to keep the shadows on the opposite side from going black, a white V-flat was placed on the far side of the model. This ensured that the shadows still retained detail.
Tools
The only modifier on the strobe was an 8” standard reflector dish. A reflector dish shapes the direction the light takes once leaving the flash tube. Without this guidance, the light would spill in all directions and the shadows wouldn’t have this beautiful directionality. A good rule to follow is that the wider your reflector dish is, the softer the light.
Depending on the brand of your strobe, you can purchase dishes in a variety of sizes, finishes, and outputs. To heighten the effect, you can also use a long throw reflector which gives an even greater intensity of light and can be used over much longer distances.
Outcome
I don’t often work with such hard light sources and I was very happy with how this series turned out. I experimented through the shoot by changing the position of the strobe. The downward angle it’s tilted to, the distance to the model, and the direction the strobe head is turned all greatly changed the outcome.
If you’re planning to show your model’s eyes in your shot, make sure you capture those catchlights! Have the subject look up or lower the strobe enough to get that spark of light in her eyes. Makes all the difference.
Variation
Anytime you have hard light you have the beautiful opportunity for a GOBO! (industry speak for a Go-Between – something that goes between the subject and the light to create shadows or some other kind of visual interest). I’ve used this setup but progressed it – holding up plants or curtains or other items to create interesting shadows. This is a fun set up to play with!
A quick tip: You’ll want to hold the GOBO closer to your subject than to the light if you want hard shadows.
LARGE OCTABOX

Desired result
To create soft and creamy light that would wrap around my subjects while still allowing movement during posing.

The Setup
My single strobe was secured to an octabox and positioned one foot away from my subjects at 90 degrees. This allowed the light to completely wrap around my subjects (in this case my daughter and myself). I wanted a large light source because my daughter likes to move (between every shot she’s singing and wiggling and asking if we’re done yet) so I wanted a lighting scenario that wouldn’t need to be adjusted every time she shifted position.
A white V-flat was used for fill, but since we were turned 90 degrees away from the camera, the V-flat was placed 45 degrees to the opposite so to soften the shadows on our faces.
Tools
A 60” octabox was used to replicate a large, sun-like light source. I placed the light very close to my subjects to create a creamy, soft light and also close to the backdrop to light it up and keep it from going gray. Remember, the closer the light is to your subject, the softer it will be.
Soft light is still bright (soft doesn’t mean dim), it’s soft quality comes from the fact that the transitions from highlights to shadows will be smooth (unlike with the reflector dish). In this case, I wanted a soft transition to emphasize the love between mother and daughter (or in this case, myself and my daughter).
Outcome
As you’ll see in the lighting diagram, my initial plan was to have both of us facing the light. This would’ve put more light on my daughter’s face and made for a more technically correct image. However, this was the image with genuine emotion and love and although I wish there was more light on her face, I truly adore this portrait. If I had planned for her to be facing away from me, I would’ve placed a reflector directly across from her face to bounce light back.
Variation
You can create a drastically different result (with the same lighting setup), if you pull the strobe (and your subjects) away from the backdrop. If the strobe had been 6 feet from the backdrop, but still feathered 90 degrees forward, the backdrop would go light gray. Move your subjects back to the edge of the light and instead of being wrapped in the light, they’ll be feathered for a more editorial look.
Conclusion
Whether you’re experienced or just starting to play with strobes, I hope this gives you some new ideas of ways to work with one light photography. If this inspires you, I’d love to see how you make it yours! Tag me (@jaimayhew) when you post, happy creating!


