MAKE MASKING IN PHOTOSHOP EASIER
"Success is walking from failure to failure with no loss of enthusiasm.".” – Winston Churchill
As a composite photographer, one of the most tedious parts of post-production can be dealing with selecting and masking both the subject(s) and elements of a scene. One of my favorite parts about post-processing 3D renders is that you can export render passes that save loads of time in making selections and masking.
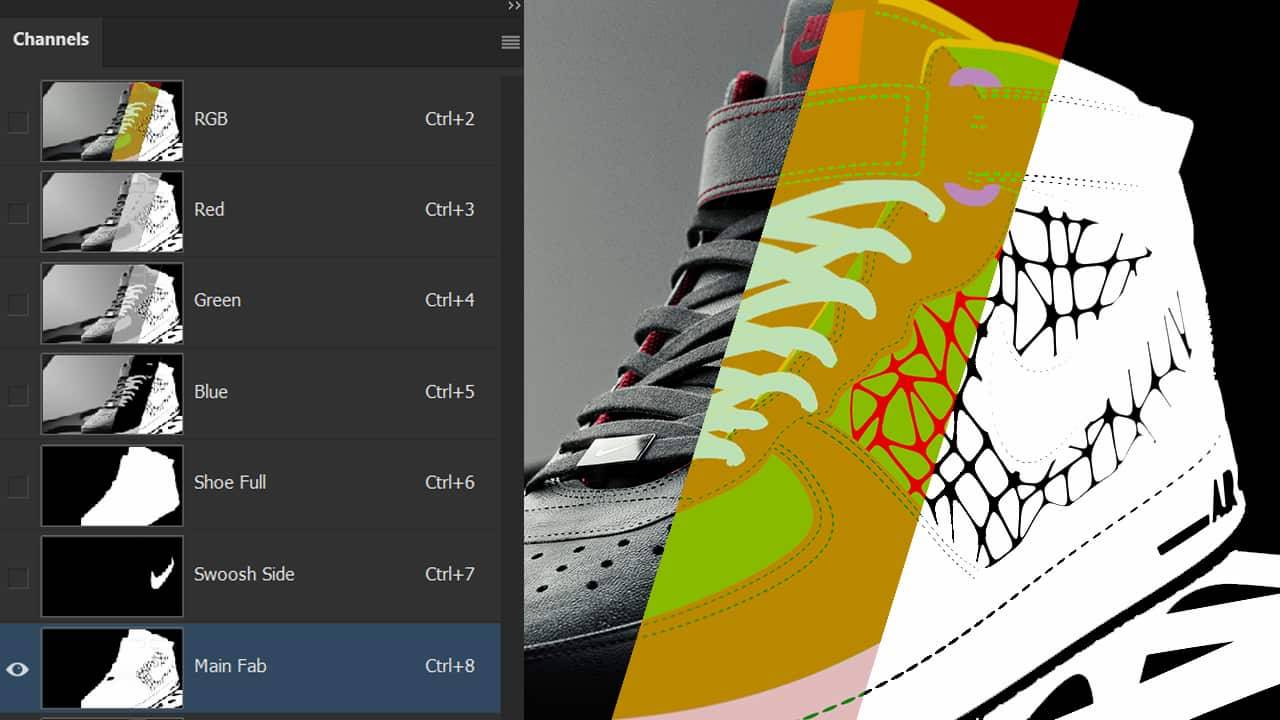
In this video, I discuss using 3D render passes to create selection libraries in Photoshop using channels. Channels make this process easy because, with minimal prep work, you are only a CTRL or CMD+Click away from making quick selections. Alternatively, you can hide and unhide your mask render layers by clicking the eye icon, and wand select everything needed... every time.
WHAT IS YOUR PHOTOSHOP LAYOUT
Let's talk about the Photoshop layout setup I like to use for compositing. My preference is to have my channels panel pulled away from my layers panel. This makes selecting alphas easier, with fewer clicks than having to pop back and forth between layers and channels tabs.
The basis of setup for the selection library is using the various 3D render layers to make selections (using general masking techniques), and “Save Selection As Alpha” in the channels panel. This is the small rectangle icon button with a circular cutout at the bottom of the channels panel. Take note of the fact that you need to have an active selection to perform this function. From here you would continue making multiple selections, repeating the process of storing and renaming various alphas.

In the video I briefly discuss the render layers I often use, though not are necessary for every project. We’ll have future posts that deep dive into how and why I use each layer noted here. The most important part is that as a productive artist, you’re setting yourself up for success in every way possible. Taking 10-15 minutes at the beginning of a composite to set up your alphas is well worth it, given the latter is a very tedious process.
Once your base selection library has been made, it’s time to put it to use. This is where layer masks come into play. Simply CTRL or CMD+Click the channel (alpha) thumbnail you want to create a selection, then create a layer mask, or adjustment layer. Remember when creating layer masks, you can ALT or OPTION+Click the layer mask icon to invert your selection for the mask. Of course if you’re wanting to make adjustments you can use a black or white brush, OR, use other alphas from your library to modify masks further.
CONCLUSION
Hopefully this process sparks a bit of interest if you’re not familiar with it, as it’s an extremely useful practice to get into. This has been a great part of my work flow for quite some time and I only wish I had known about it earlier on in my journey; after realizing I was working far harder than needed for too long. Take time to experiment with various selection methods and combining channels to achieve great results, it’s worth it!
Happy creating!


